Introduction
In this guide we're going to build a simple Bitcoin machine that accepts physical coins in exchange for Sats!
Items Required:
- Computer or Laptop
- Raspberry Pi
- Coin Acceptor
- Micro-SD Card
- SD Card Reader
- Standard Micro USB Cable
- 5V Step-Up Transformer
- Rechargeable Power Pack
Step 1
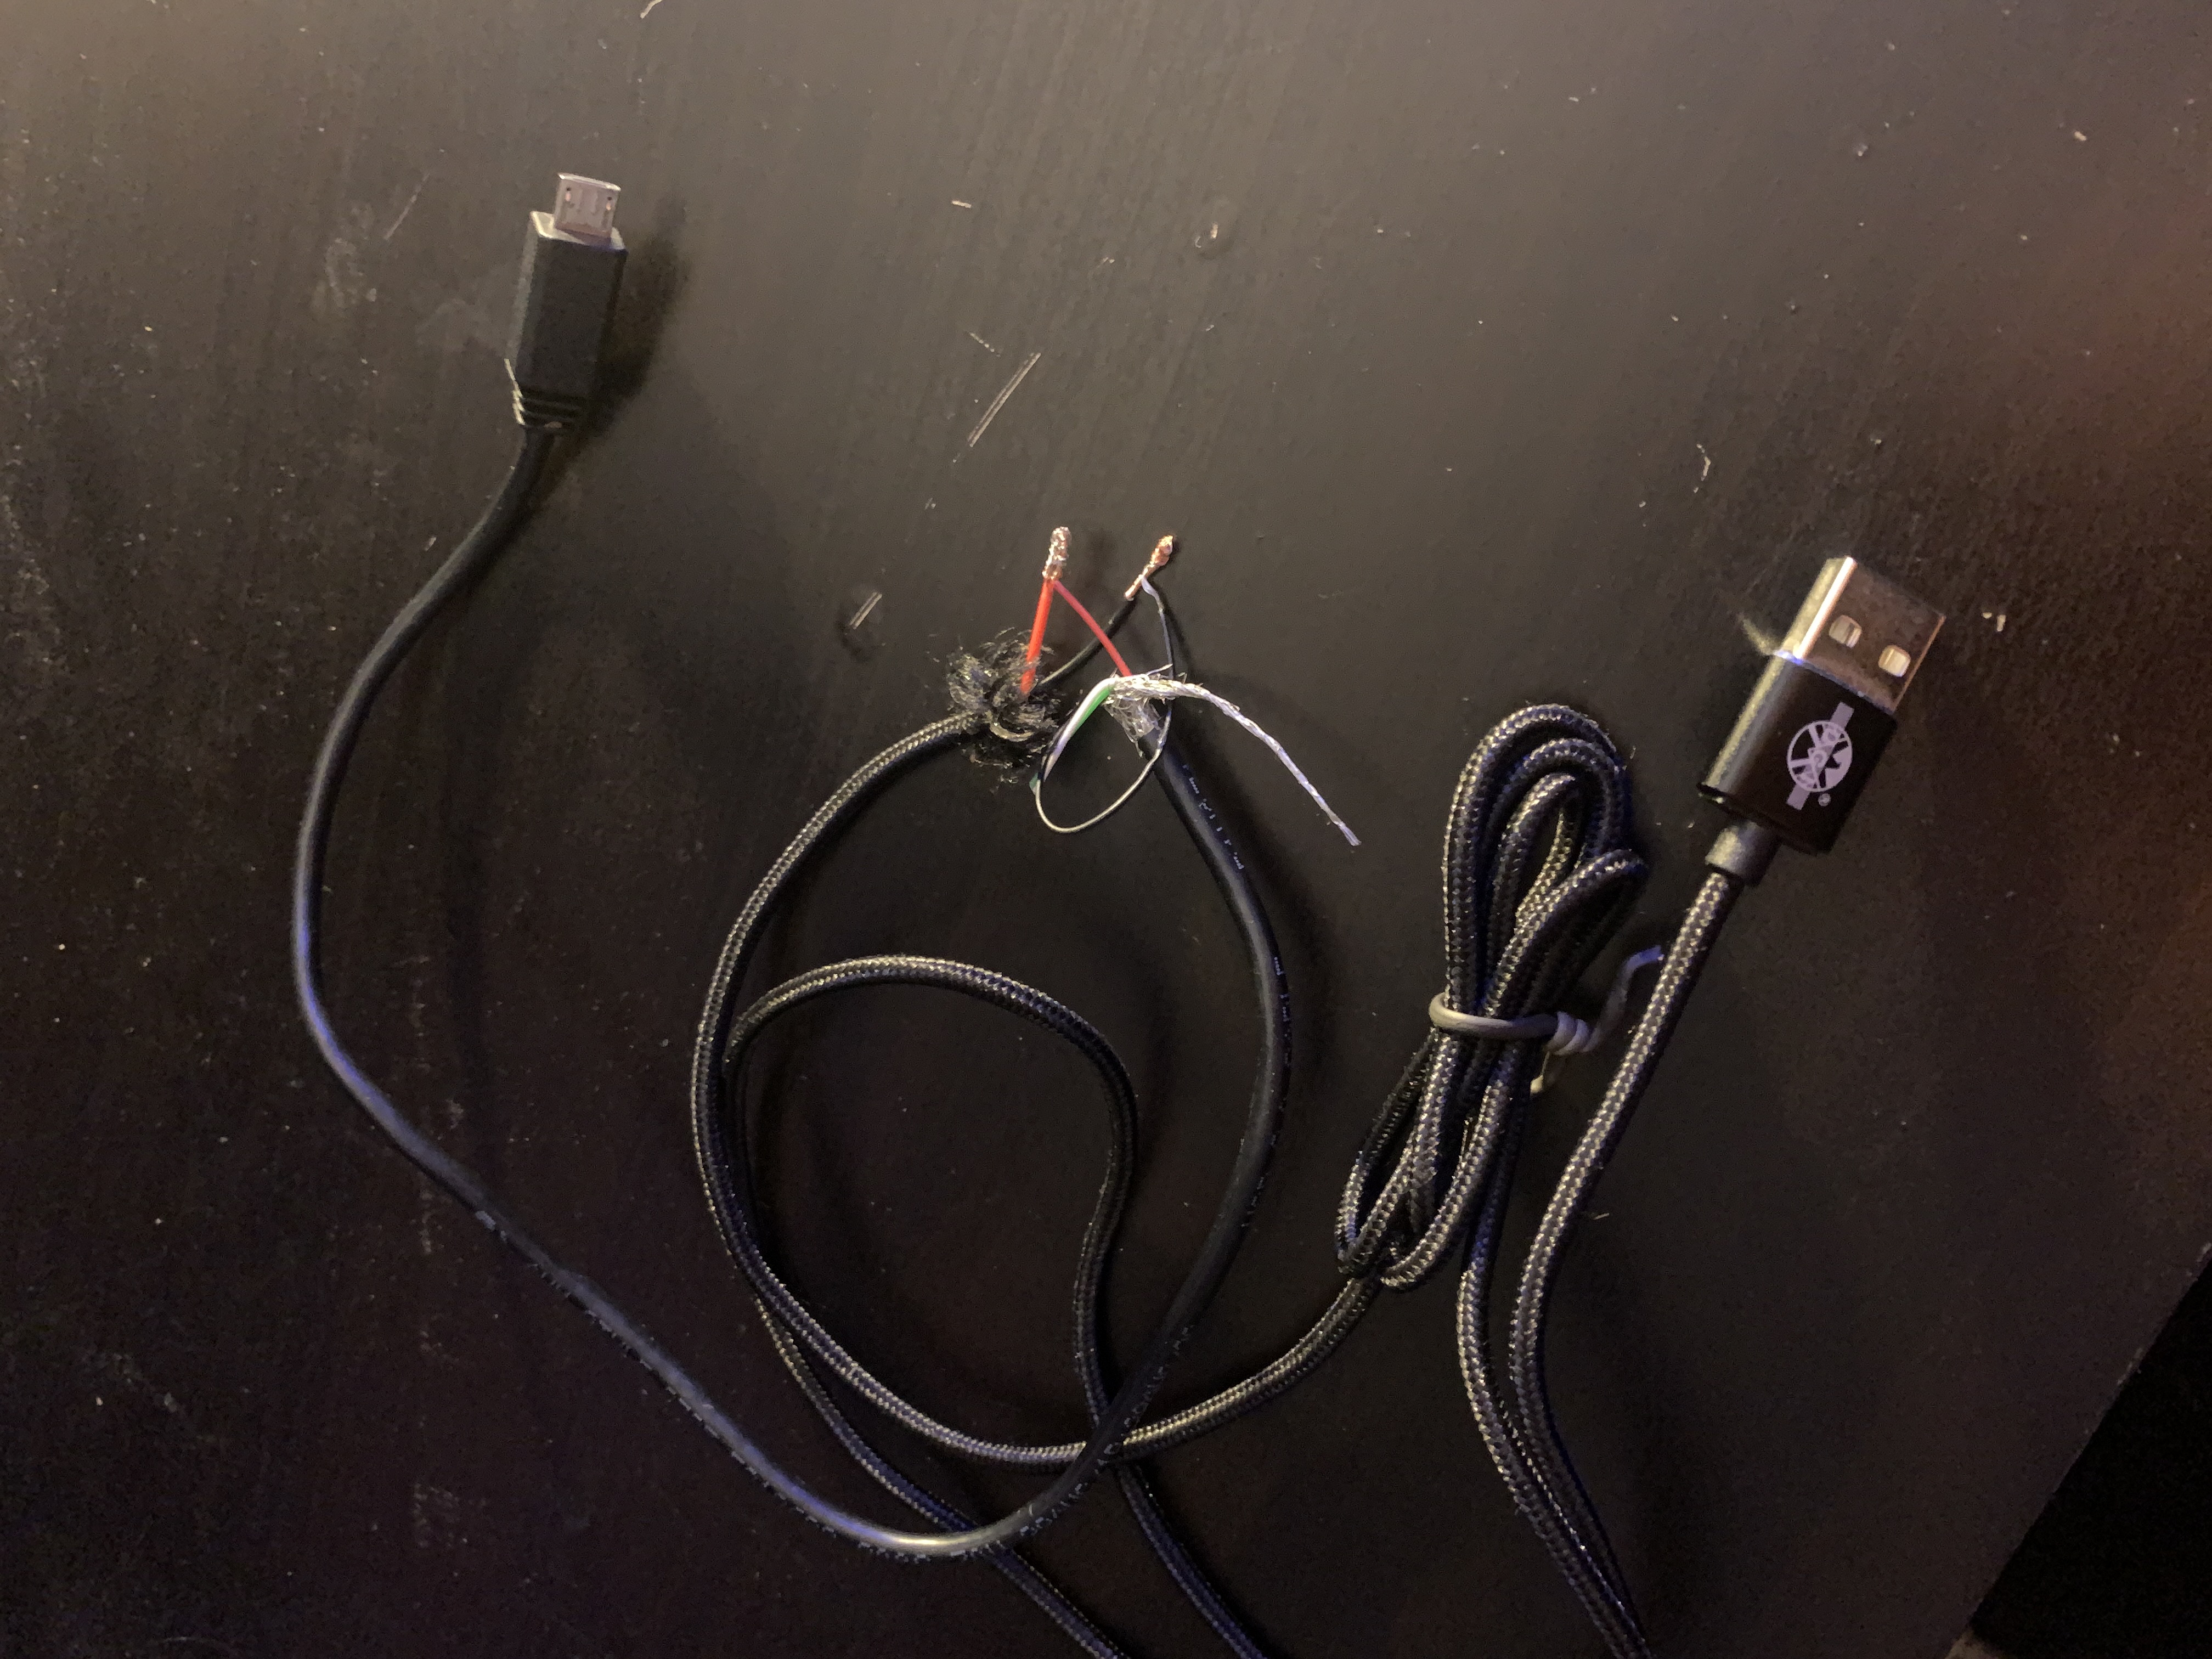
First we're going to need our micro USB cable. Make sure this is a spare one, and not one you would normally use to charge a device as we're going to be cutting this cable in half.
Once you have cut the cable in half, you need to reattach the red and black wires as seen in the image below.
Step 2
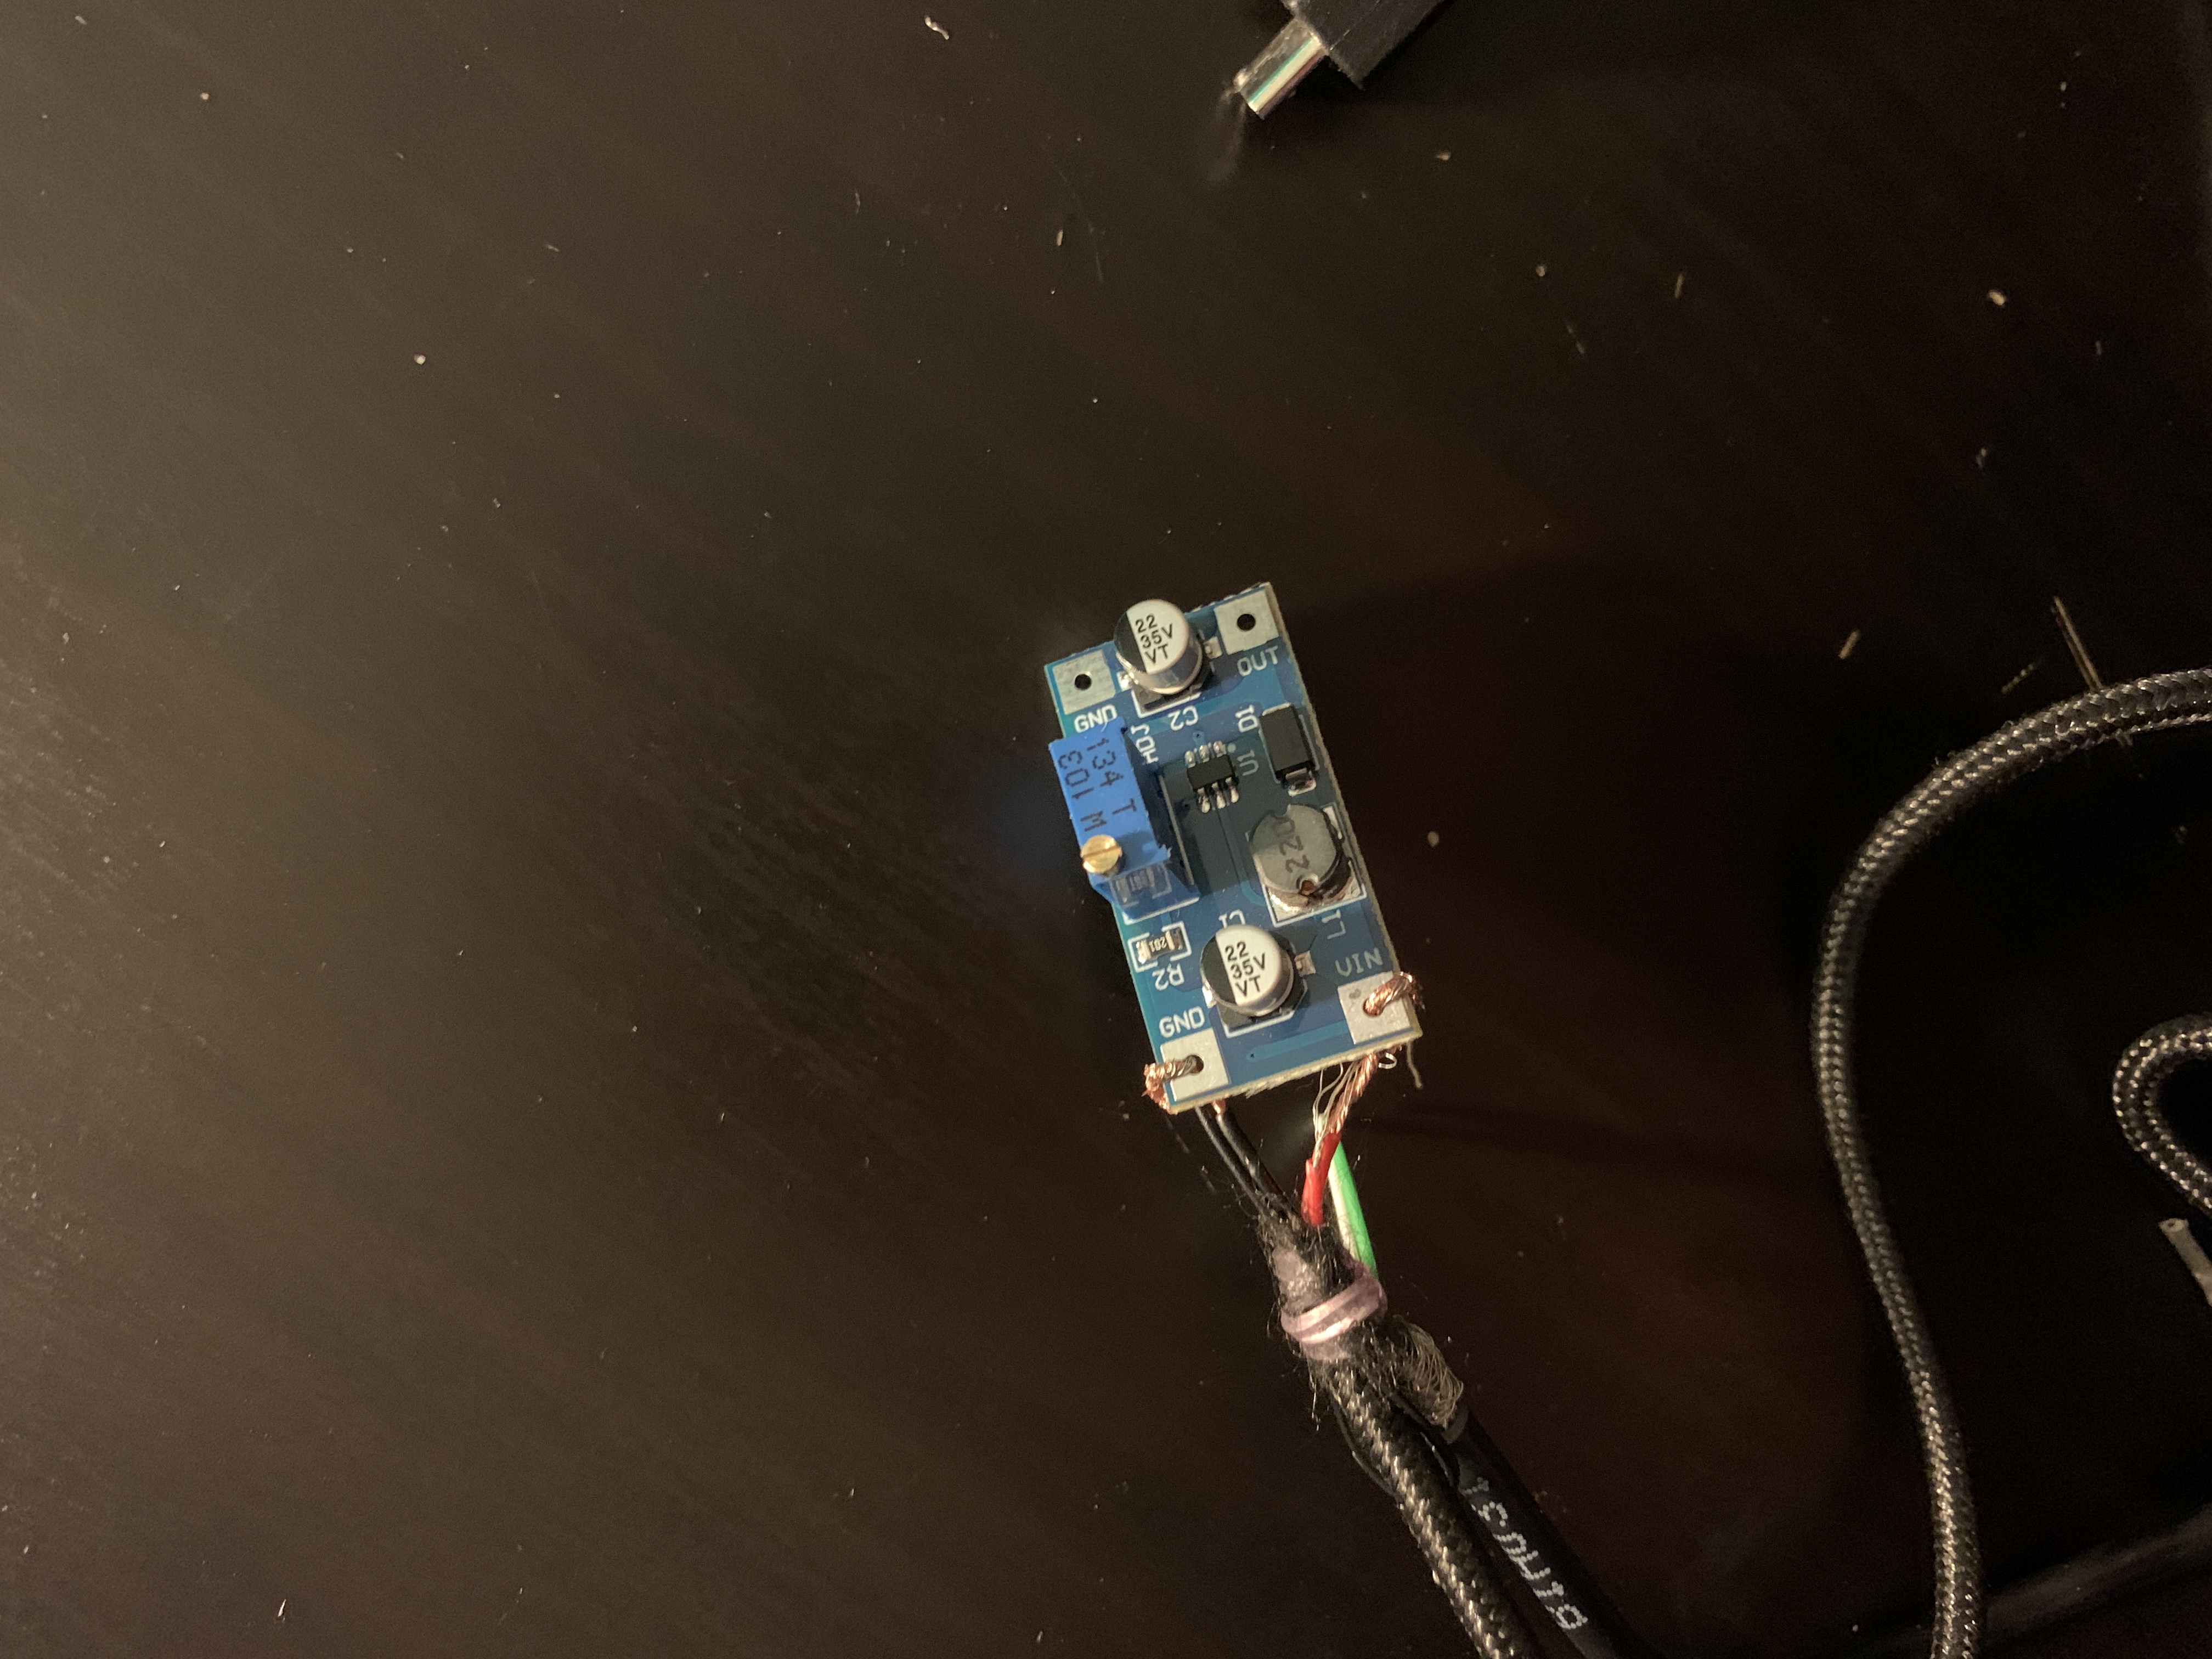
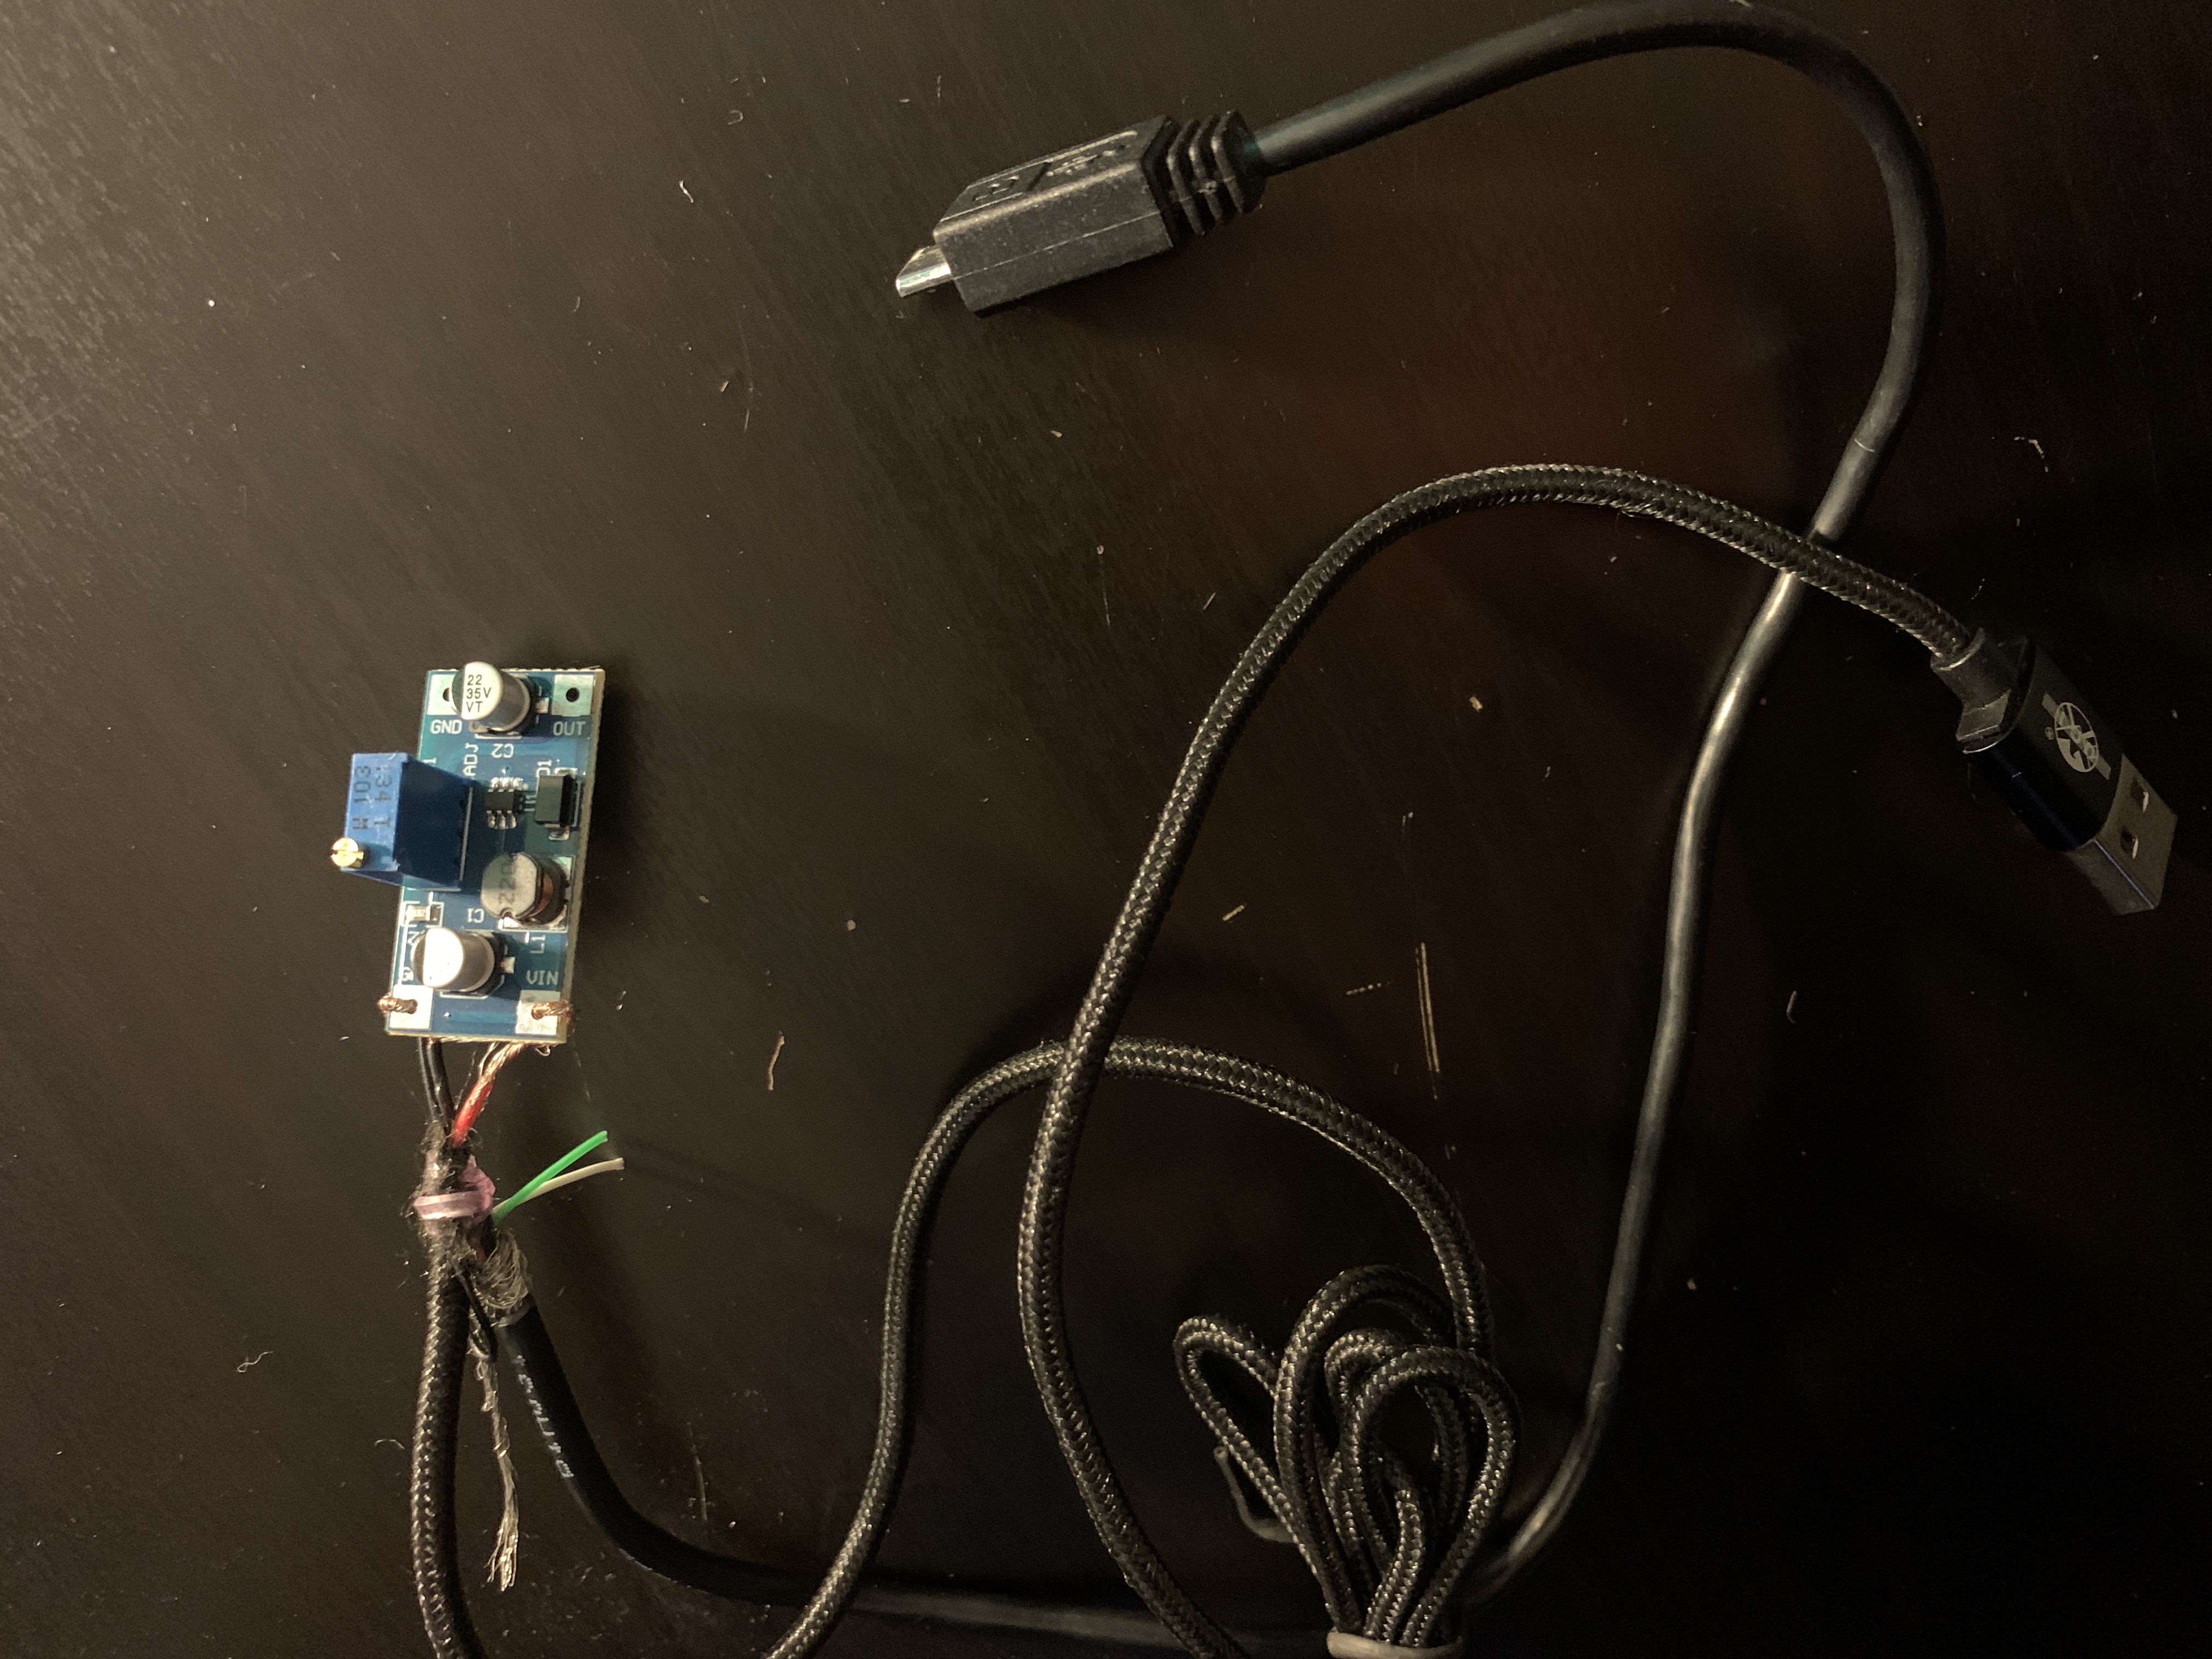
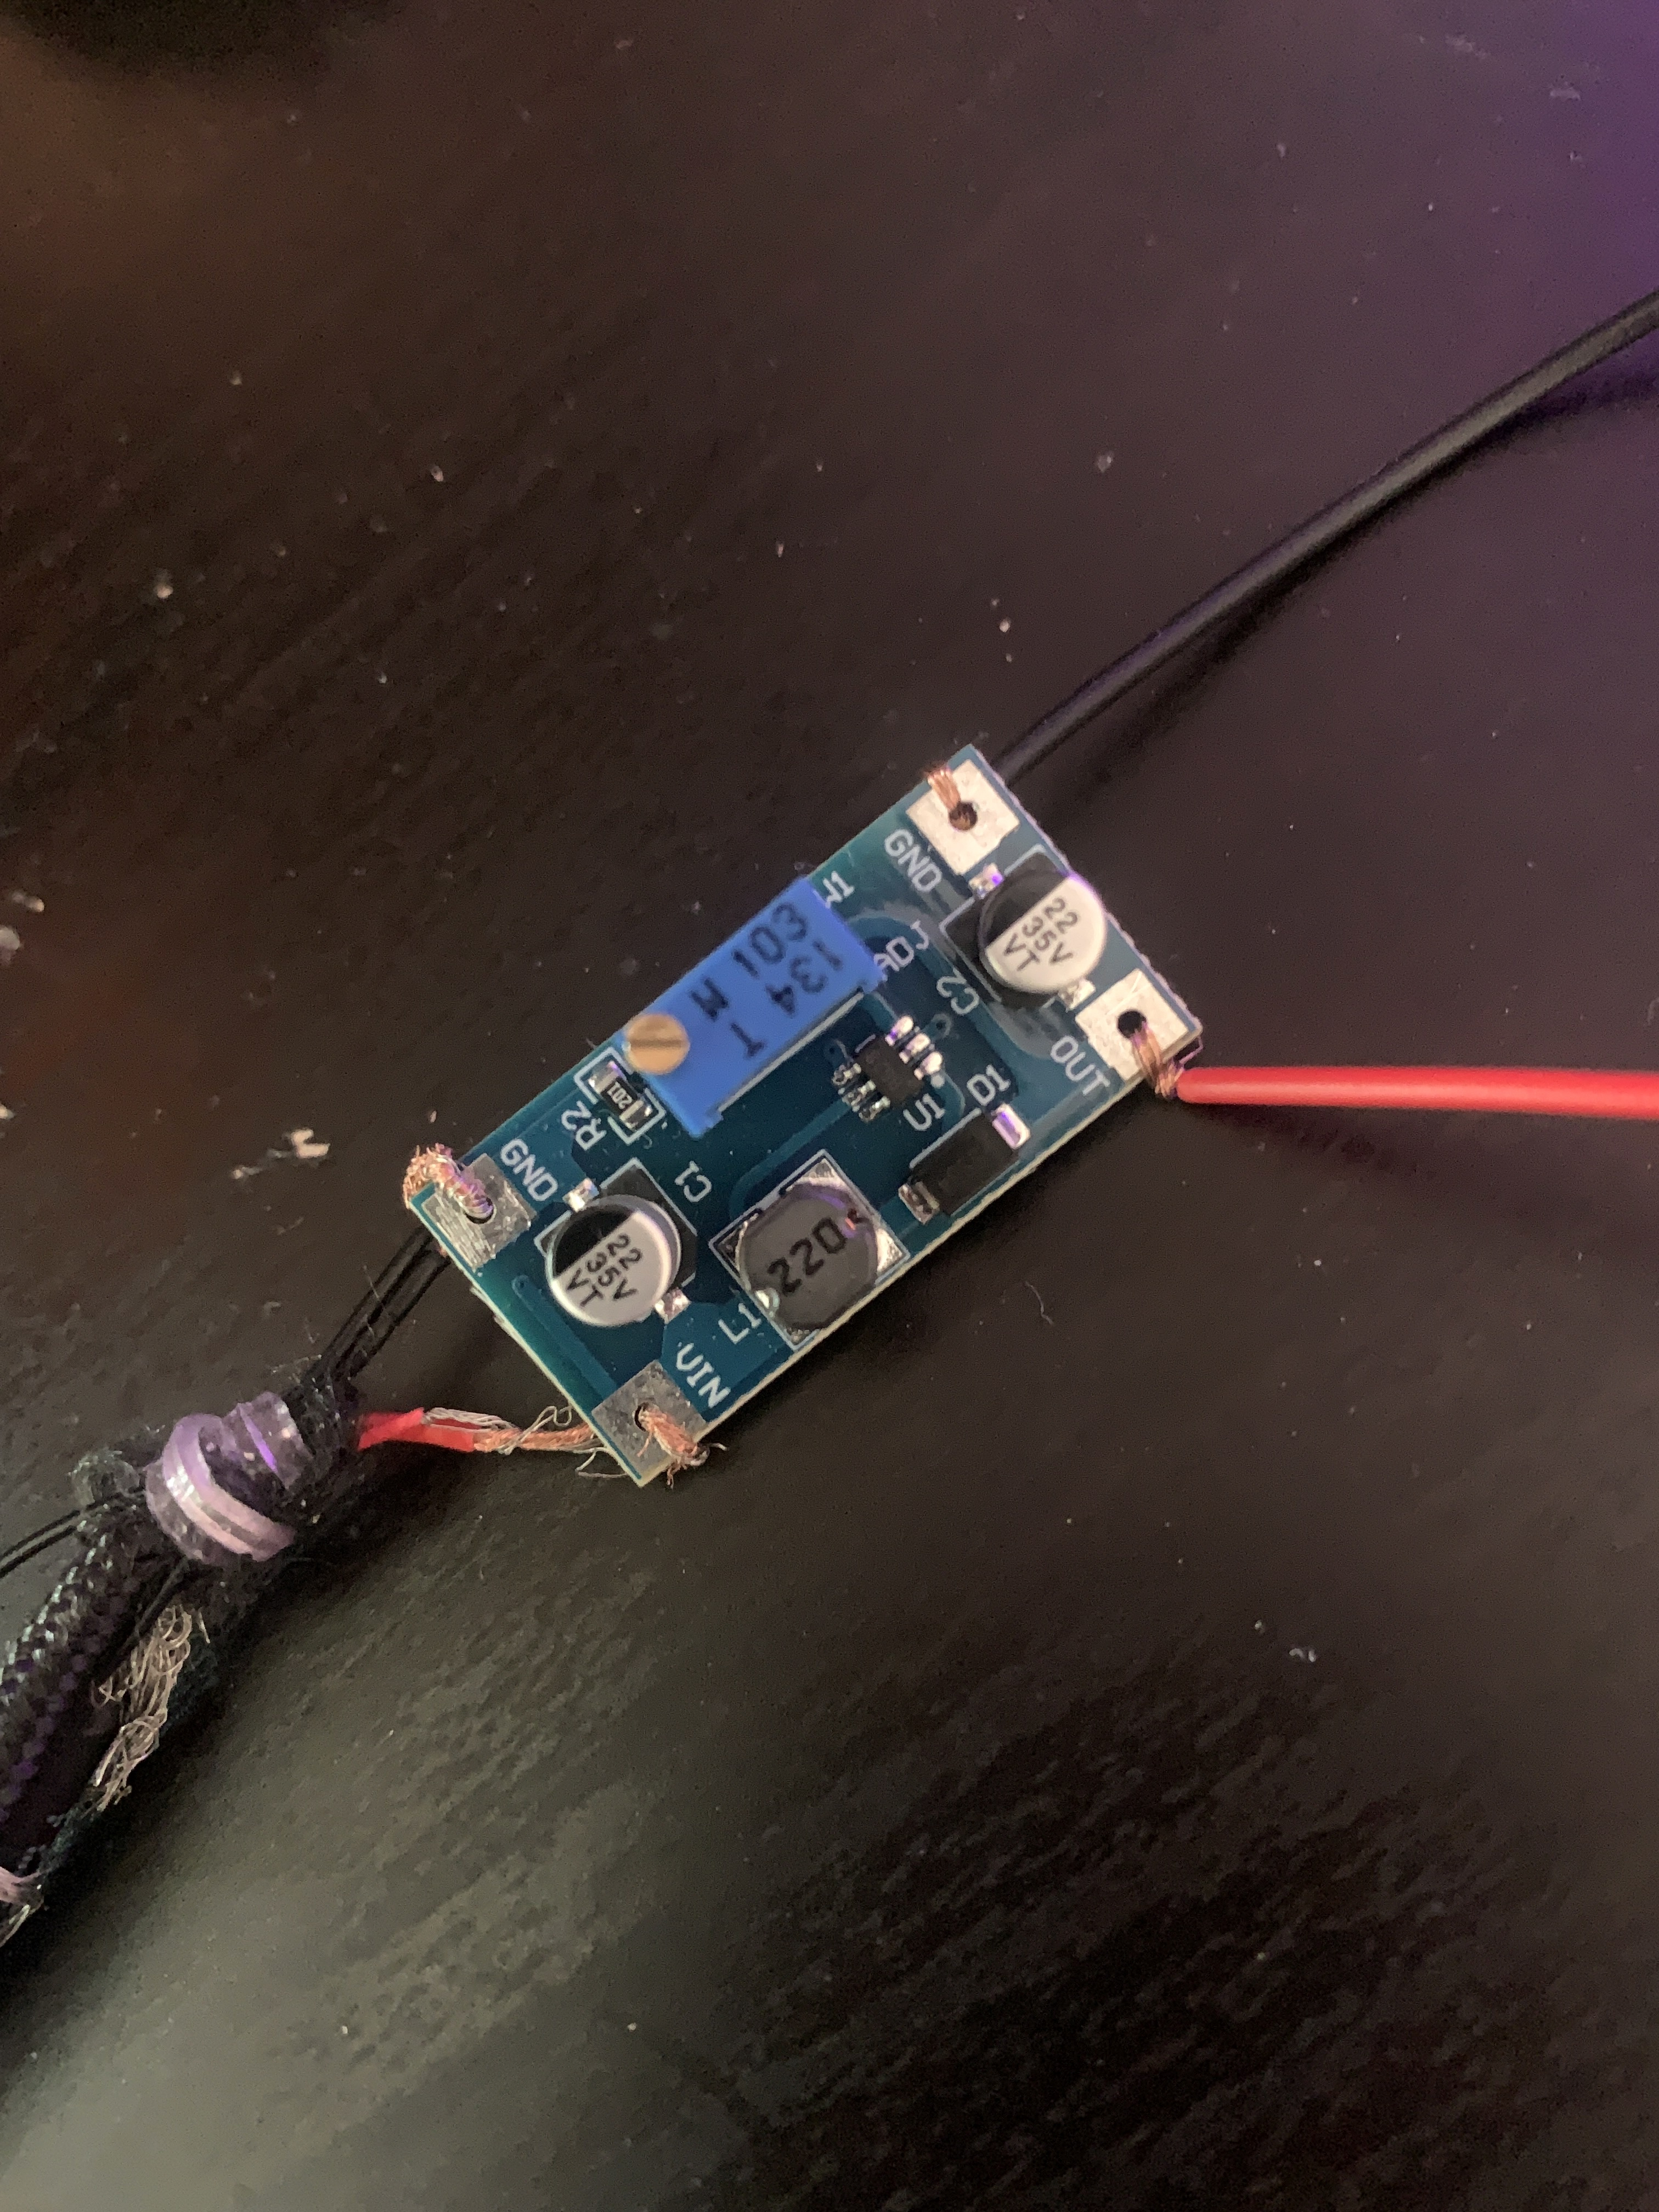
Now we need to connect the joined ends to our 5V Step-Up Transformer as seen in the images below.
Step 3
Now let's setup our Raspberry Pi.
This step requires a micro SD card & SD card reader.
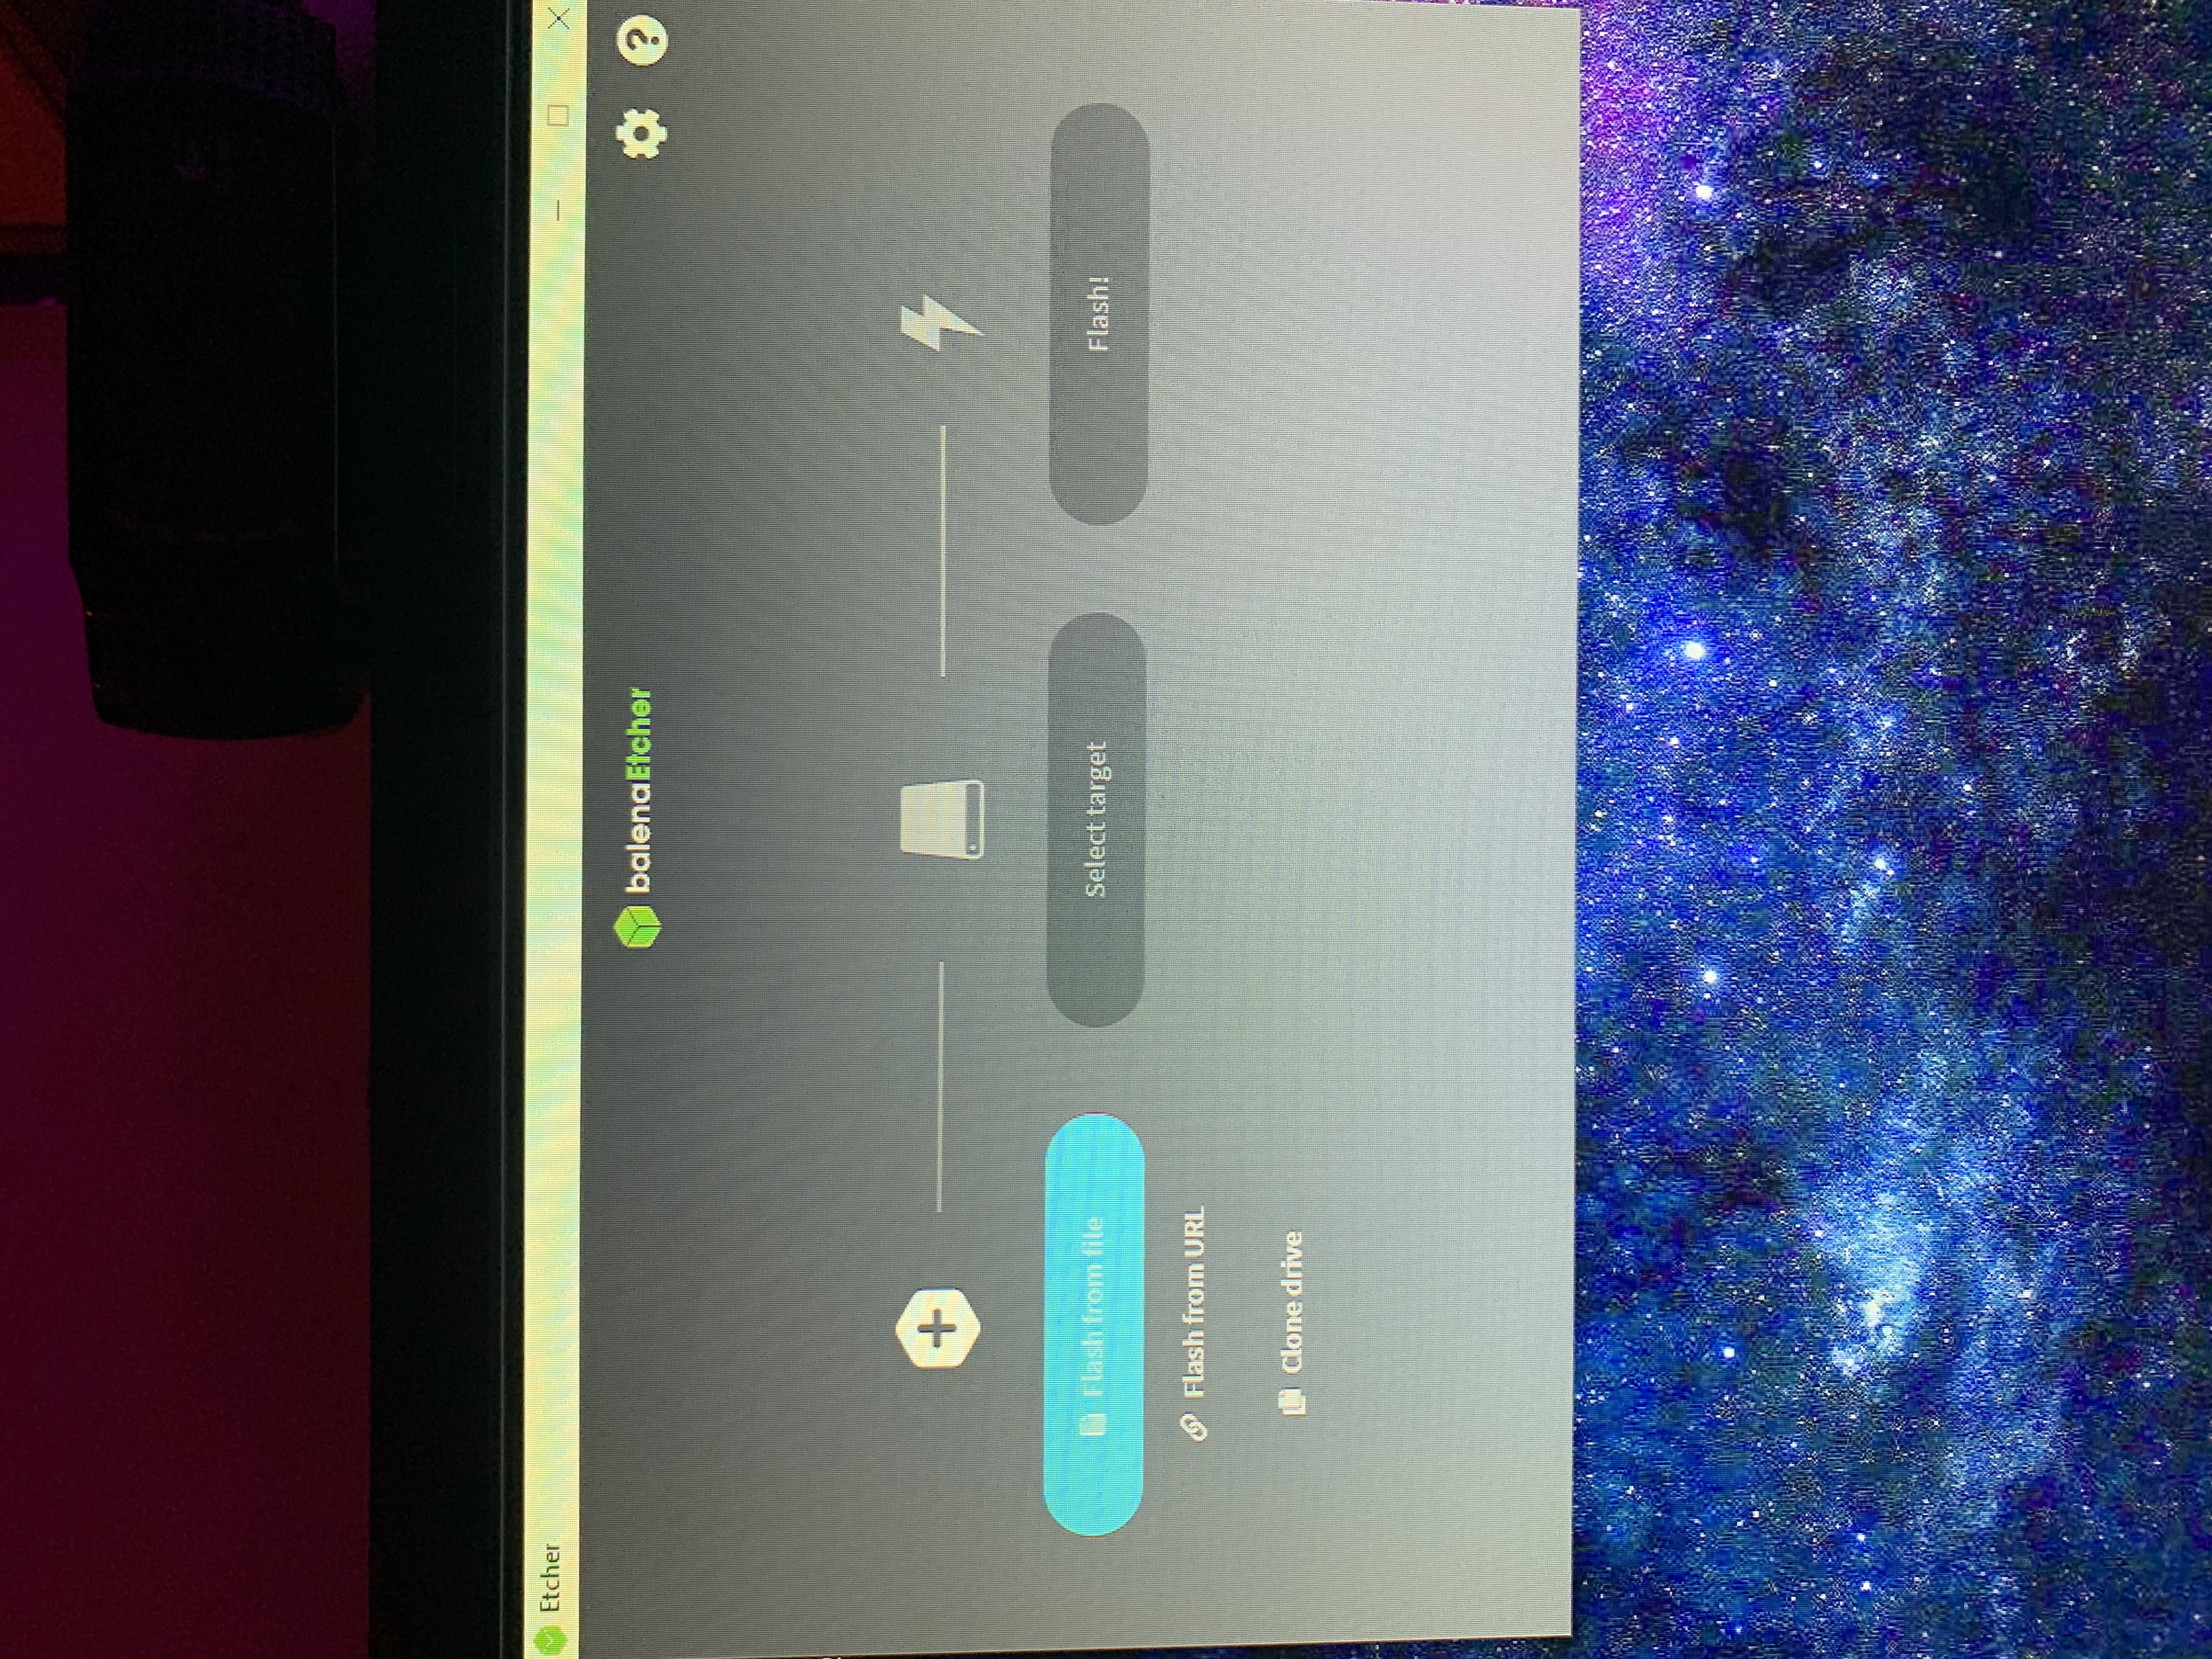
First, we will need to download & install balenaEtcher on our PC, so that we can flash the ATM software to our micro SD card.
Official download link here: balena Etcher Download
Follow the steps in balenaEtcher to flash the software to your micro SD card, select your SD card as the target location.
Step 5
Now we have the software flashed to the SD card we should be able to access the "boot" folder on the SD card.
Inside this "boot" directory we will need to 'Right click' > Create 'new text document' file and rename it to "ssh", making sure to also remove the file extension(.txt) from the file name.
Now we will also create another file called "wpa_supplicant.conf", Open it and type the following:
country=GB
ctrl_interface=DIR=/var/run/wpa_supplicant GROUP=netdev update_config=1
network={
ssid="my-wifi-router"
psk="my-wifi-password"
}
Make sure to replace my-wifi-router & my-wifi-password with your actual router name & password!
Double check those files are saved and are inside the "boot" directory.
So hopefully now we can safely eject the SD card from our Computer, plug it into our Raspberry Pi and connect our power cable(USB) to a power source.
After a minute or two we should see the Raspberry Pi IP address screen show up on our display, Great!
You can now use PuTTY to once again login to the Pi and then use the command line "sudo shutdown -h now", This will begin to shutdown the Pi, You will probably notice the Green LED flicker a few times before it turns off.
Once the LED turns off, it's a good idea to wait 10-15 seconds before unplugging it from the power source.
Step 6
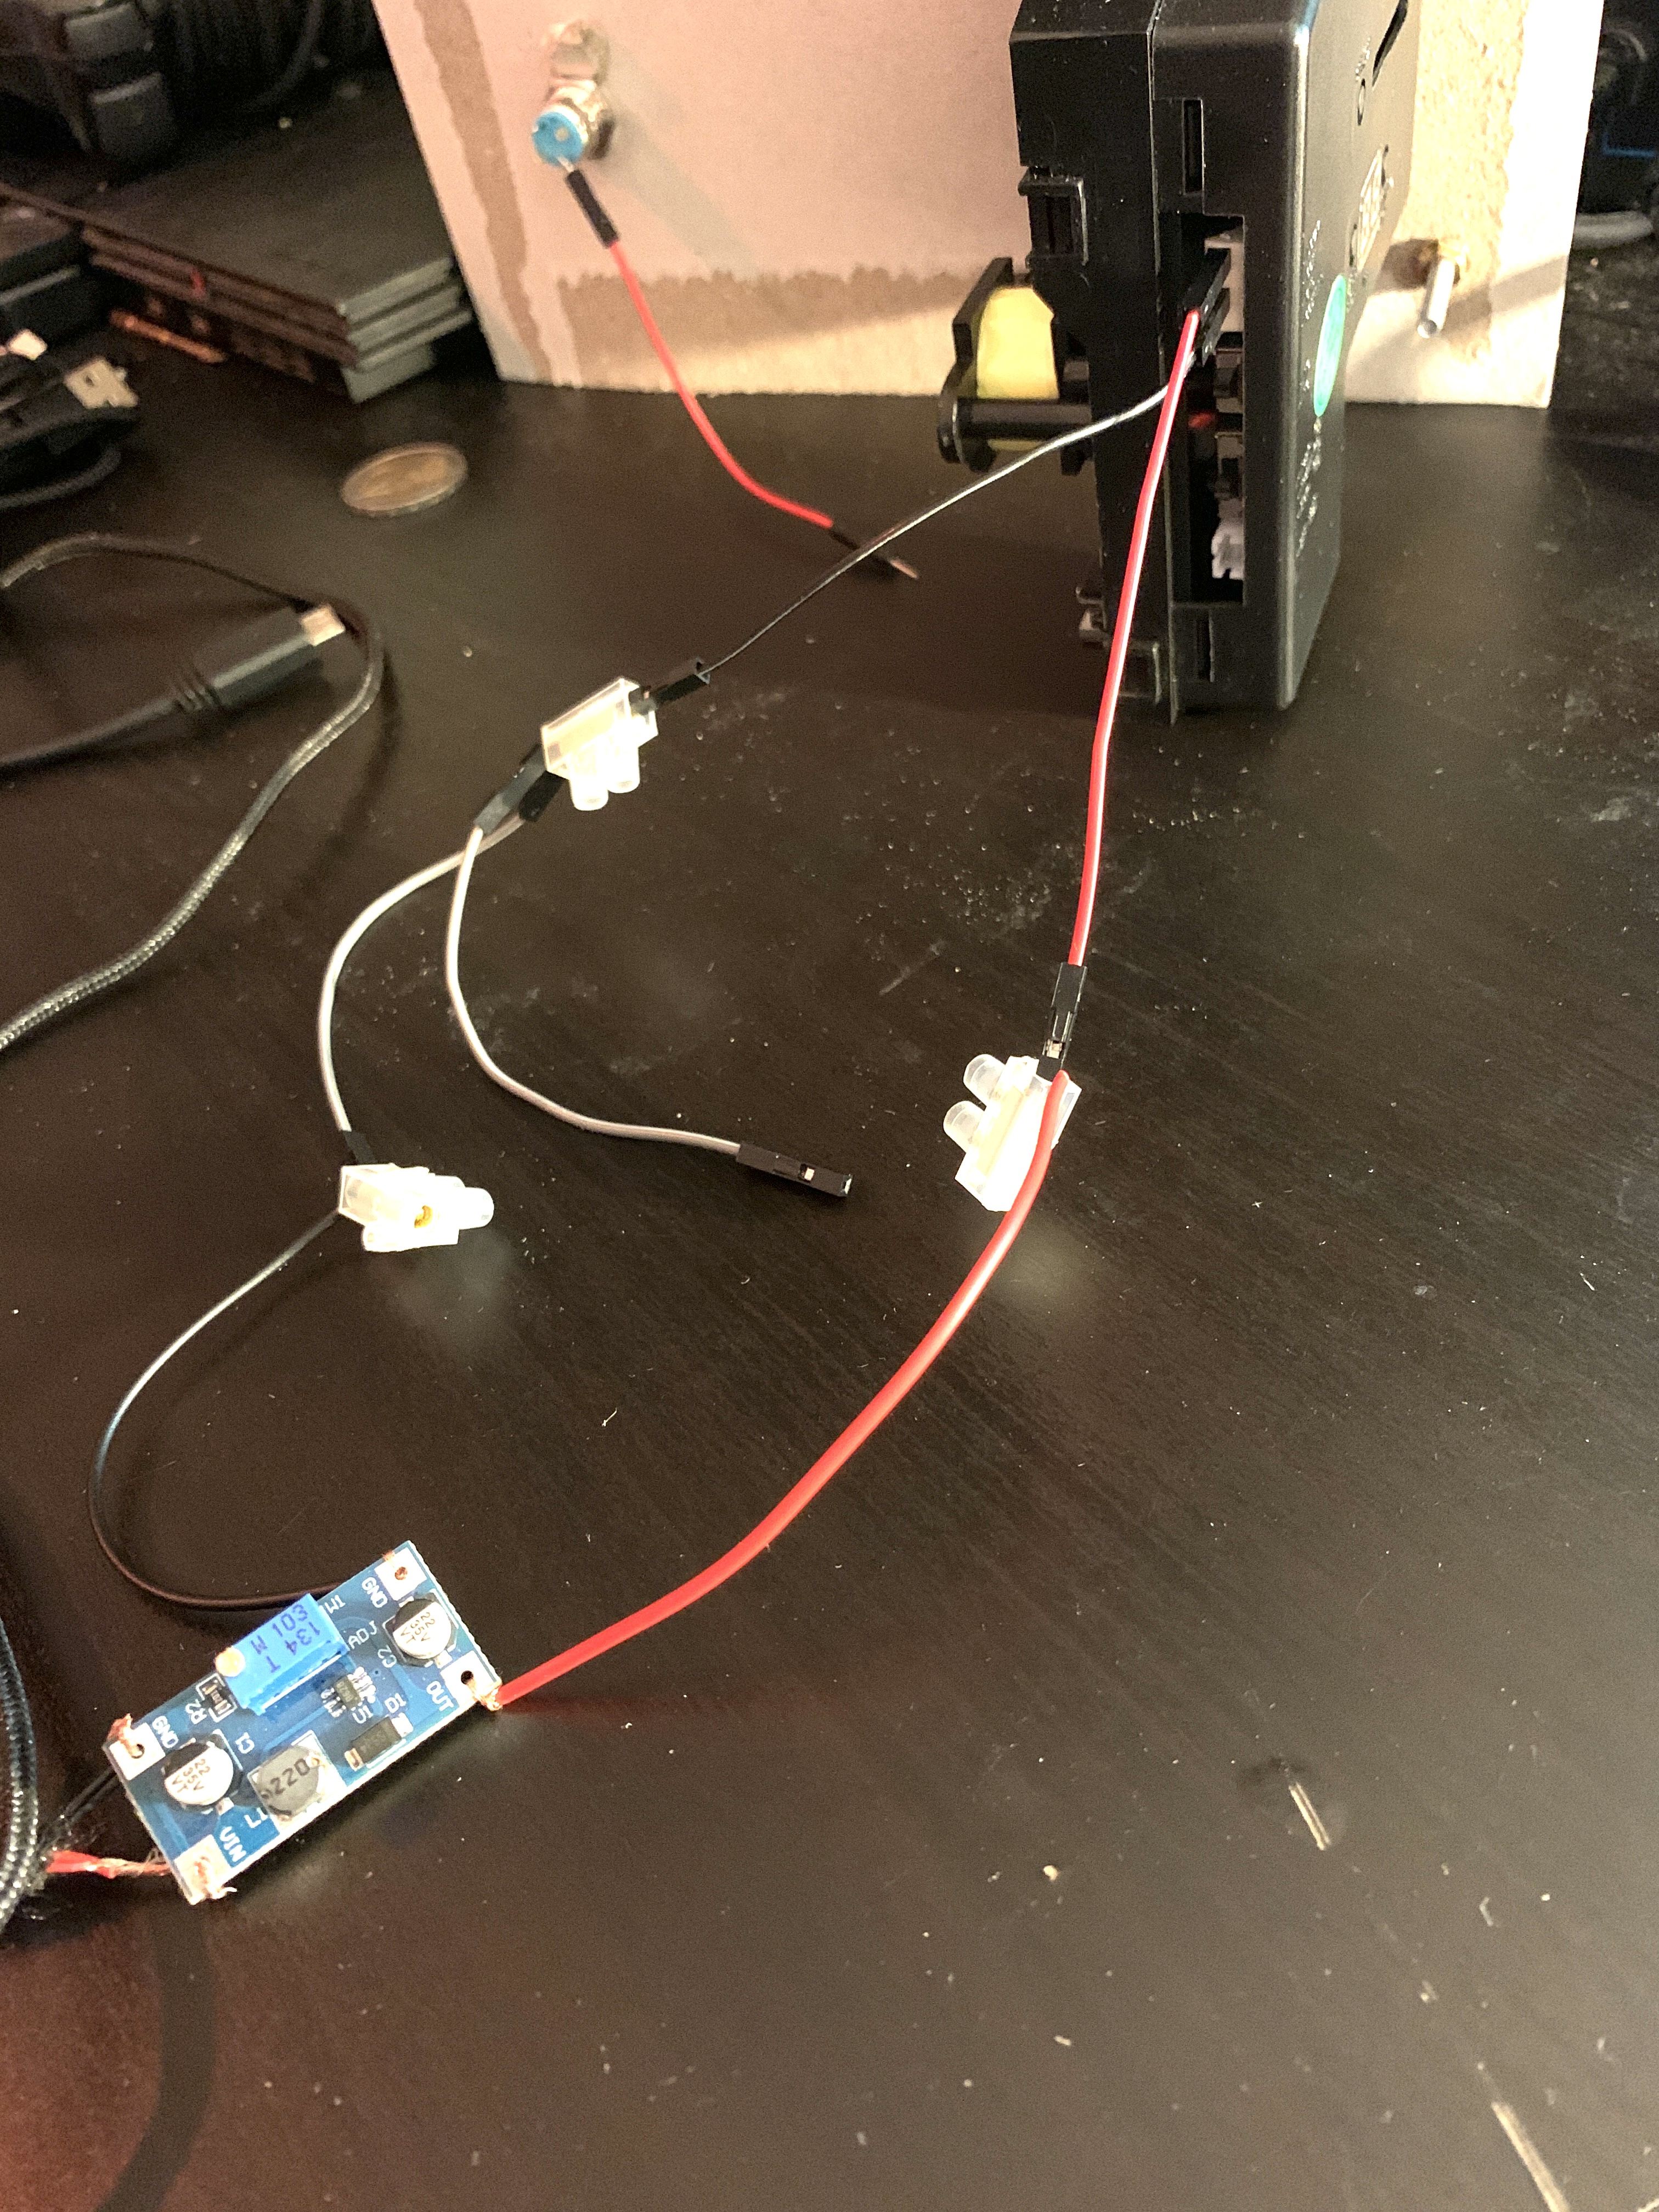
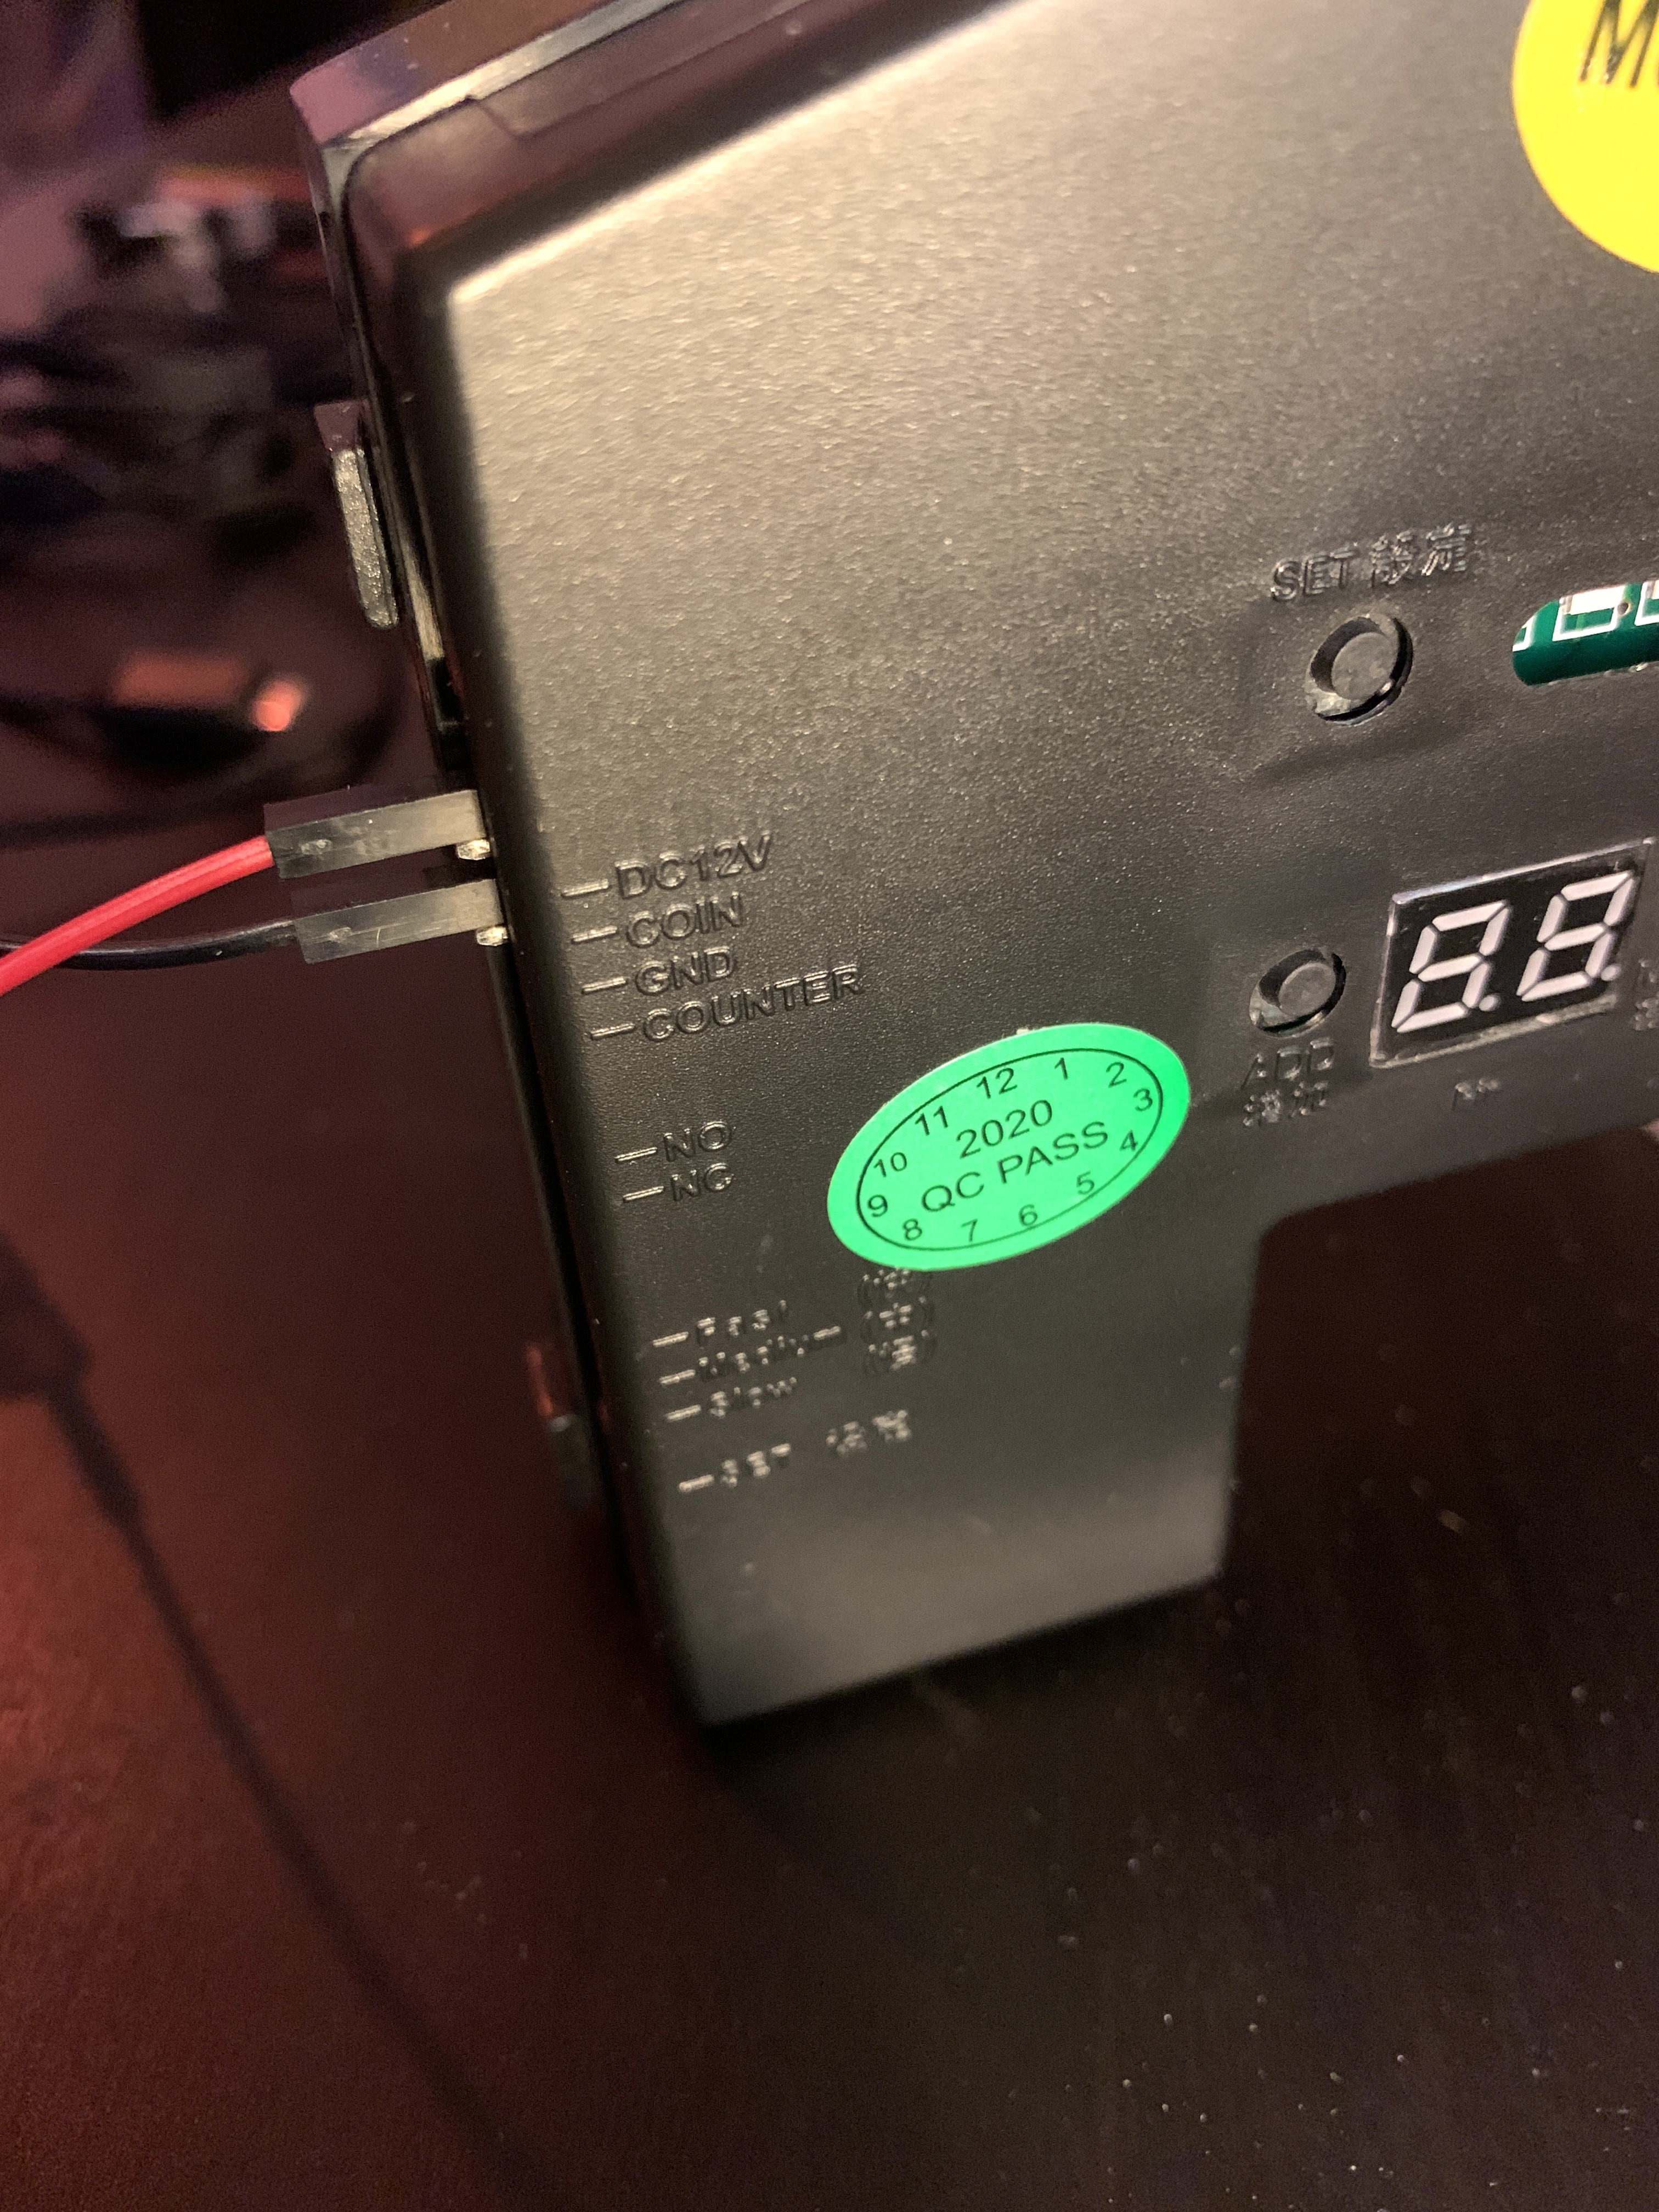
So now we have the SD card flashed and we know the Pi is working, Let's take a step back and look at our wiring for our Coin Acceptor. Below you can see examples of how the Positive & Negative wires connect from the Transformer to the Acceptor, you will notice theres a GND wire coming off the Negative wire that connects the Transformer to the Coin Acceptor this GND wire will connect to the Raspberry Pi, This allows the Pi to notice the Pulses coming from the Acceptor when a coin is entered.
You can either use those "wire blocks" to attach the wires together as shown below, or you can solder them, it is up to you, I am just using blocks at the moment until I have a chassis for the machine, incase I need to make changes to wire lengths etc.
In the images below you can see how the OUT+(on the transformer) goes directly to the "DC12V" pin(on Coin Acceptor) and the GND-(on Transformer) goes directly to the GND pin(Coin Acceptor).
Step 7
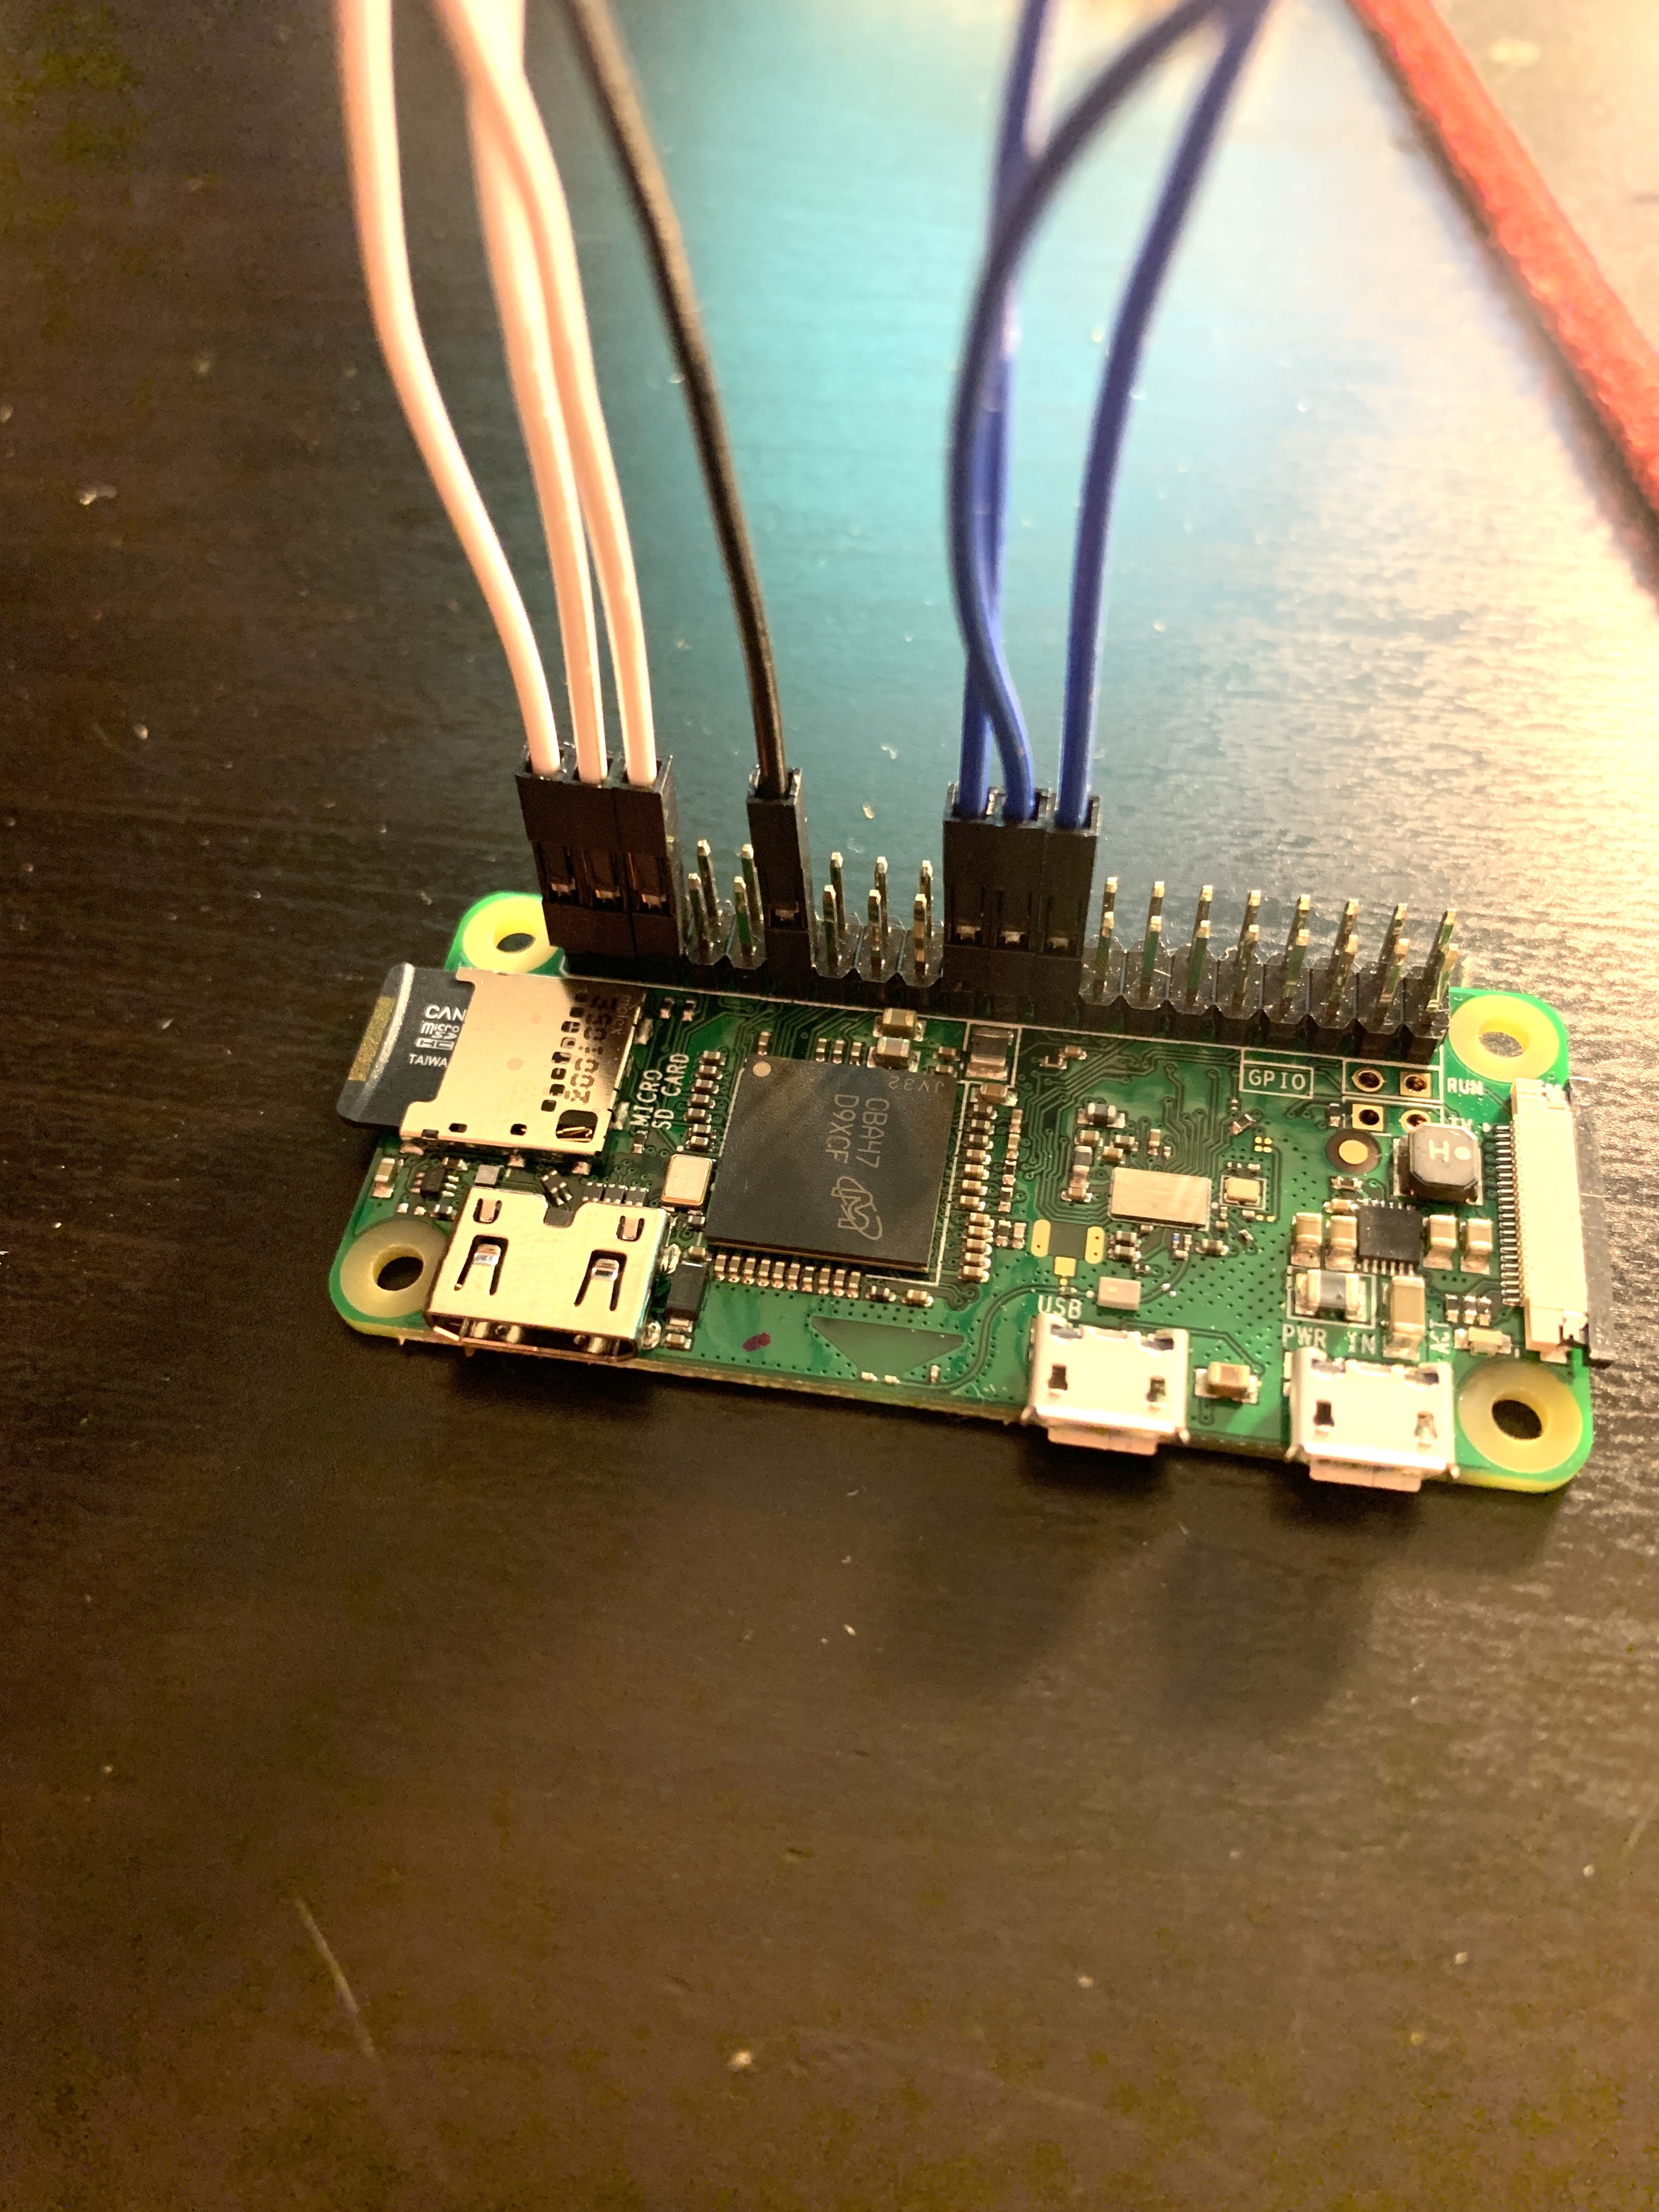
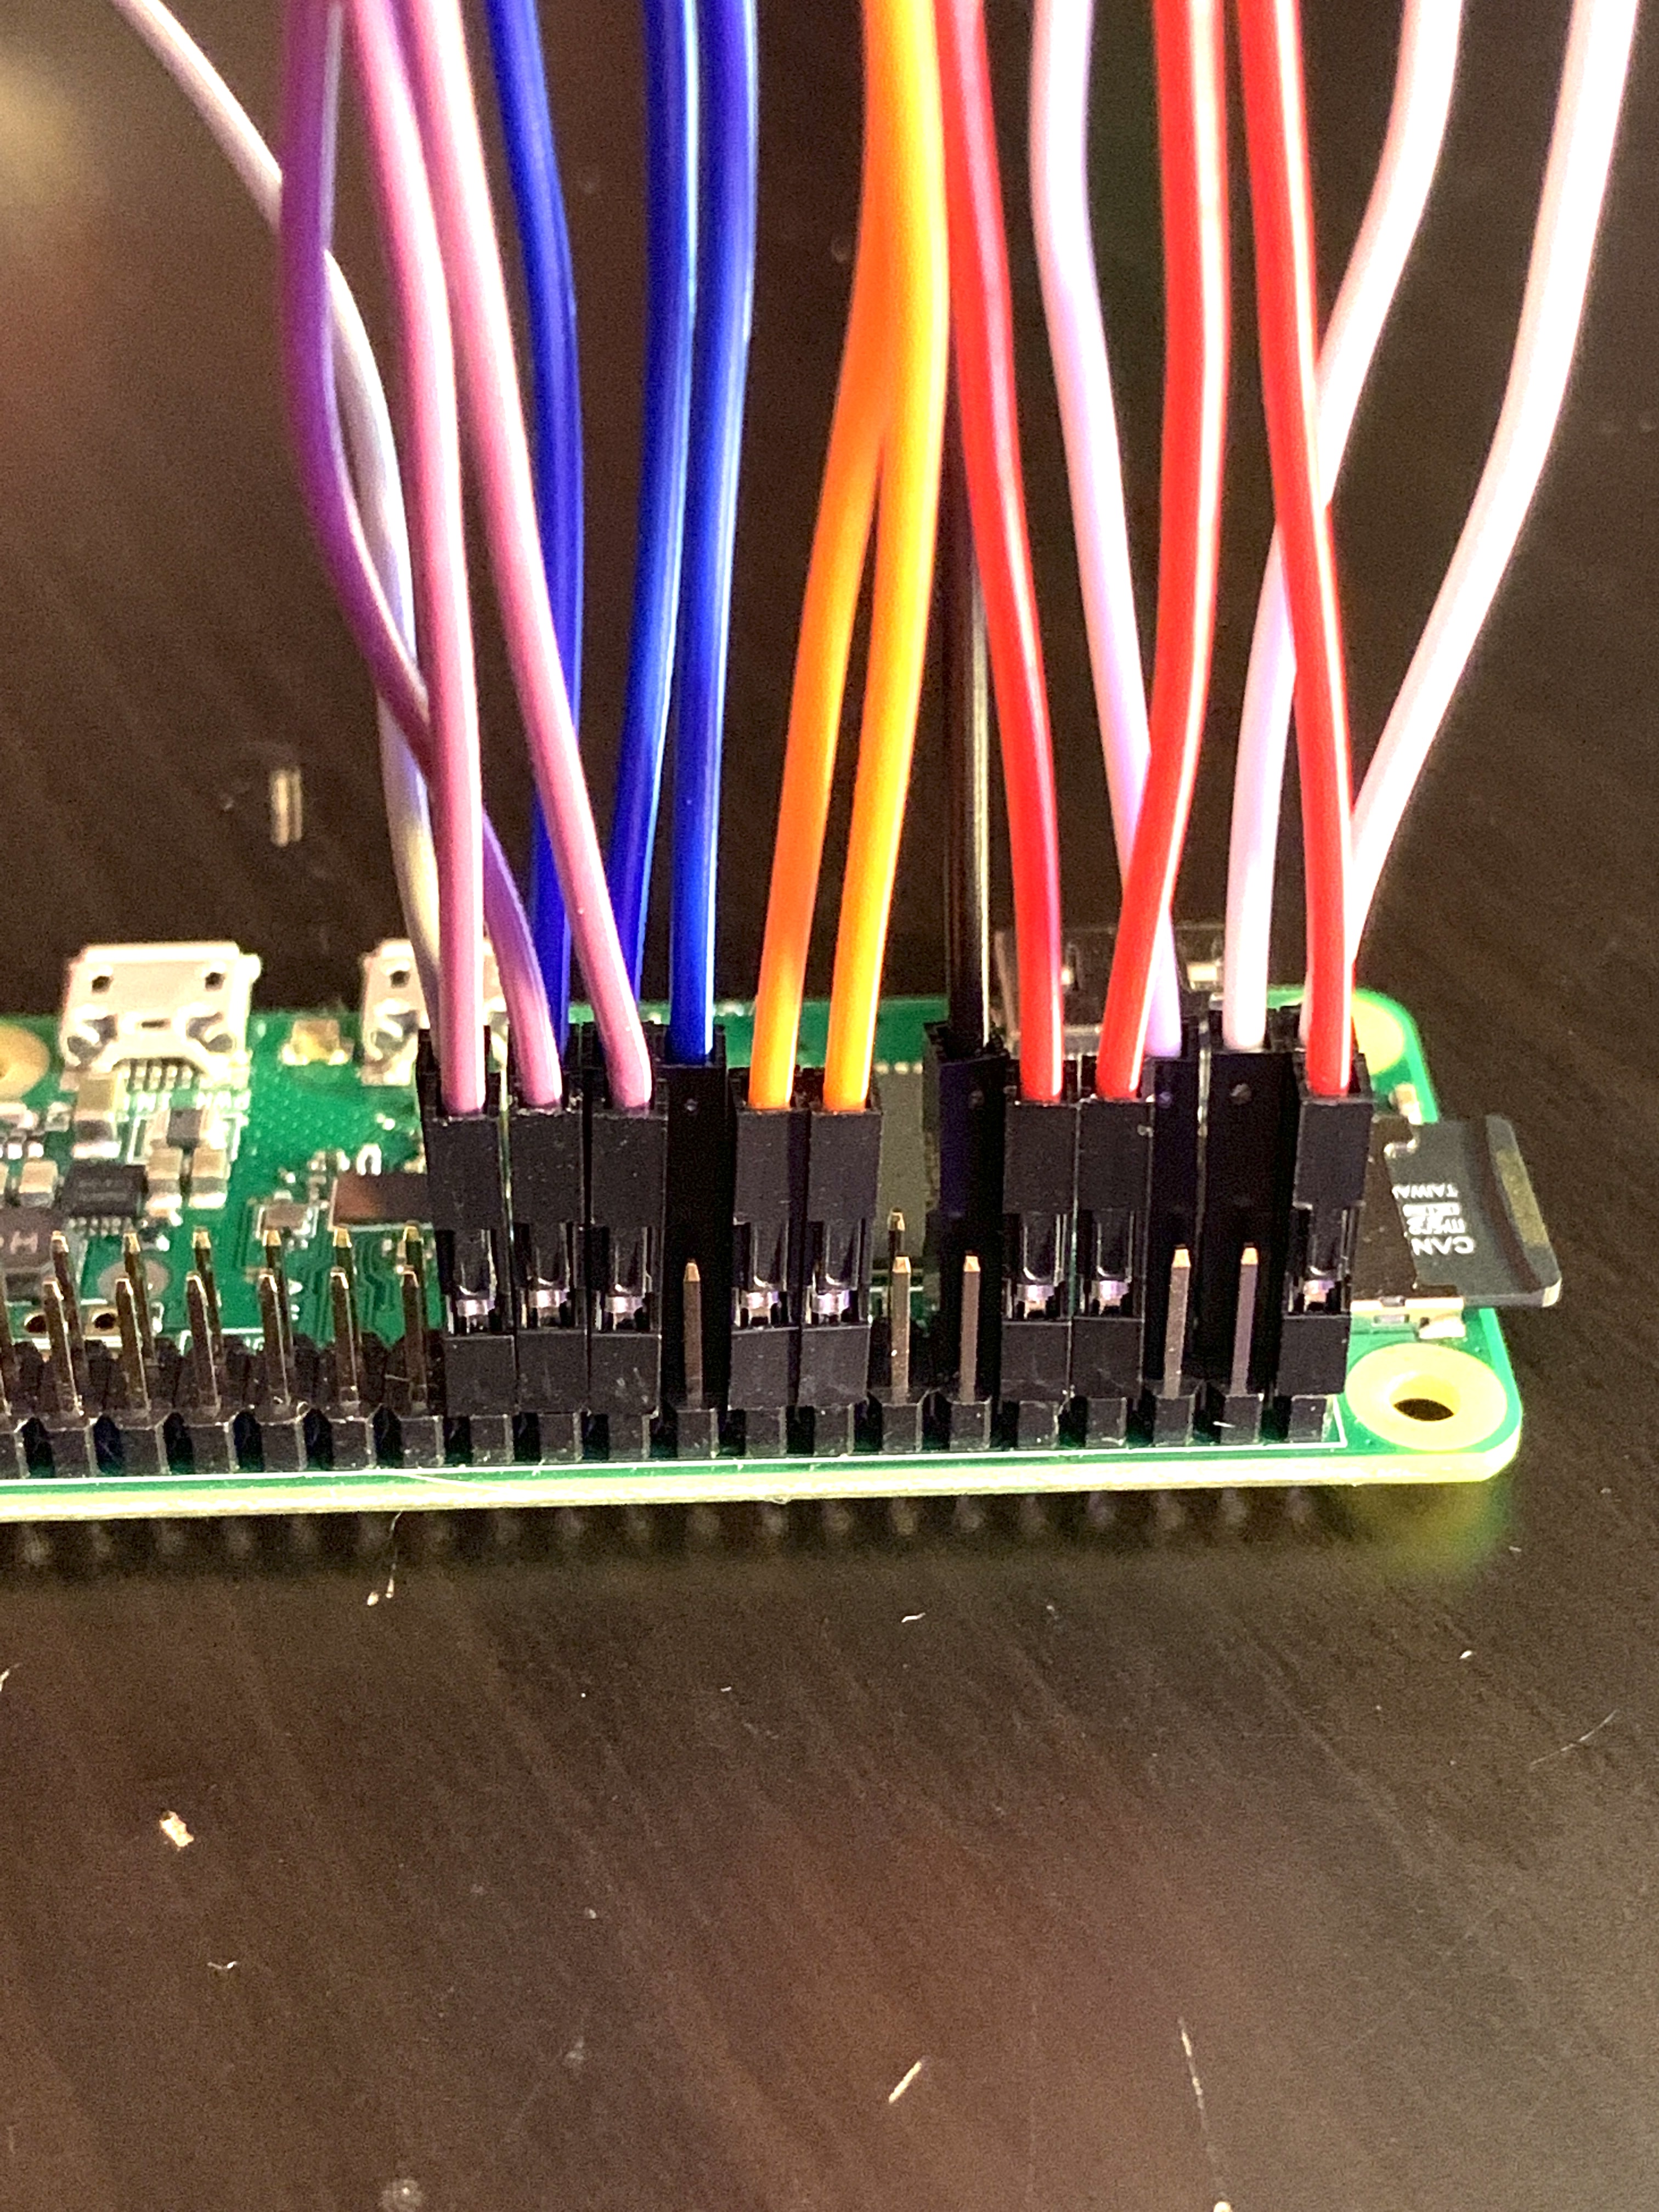
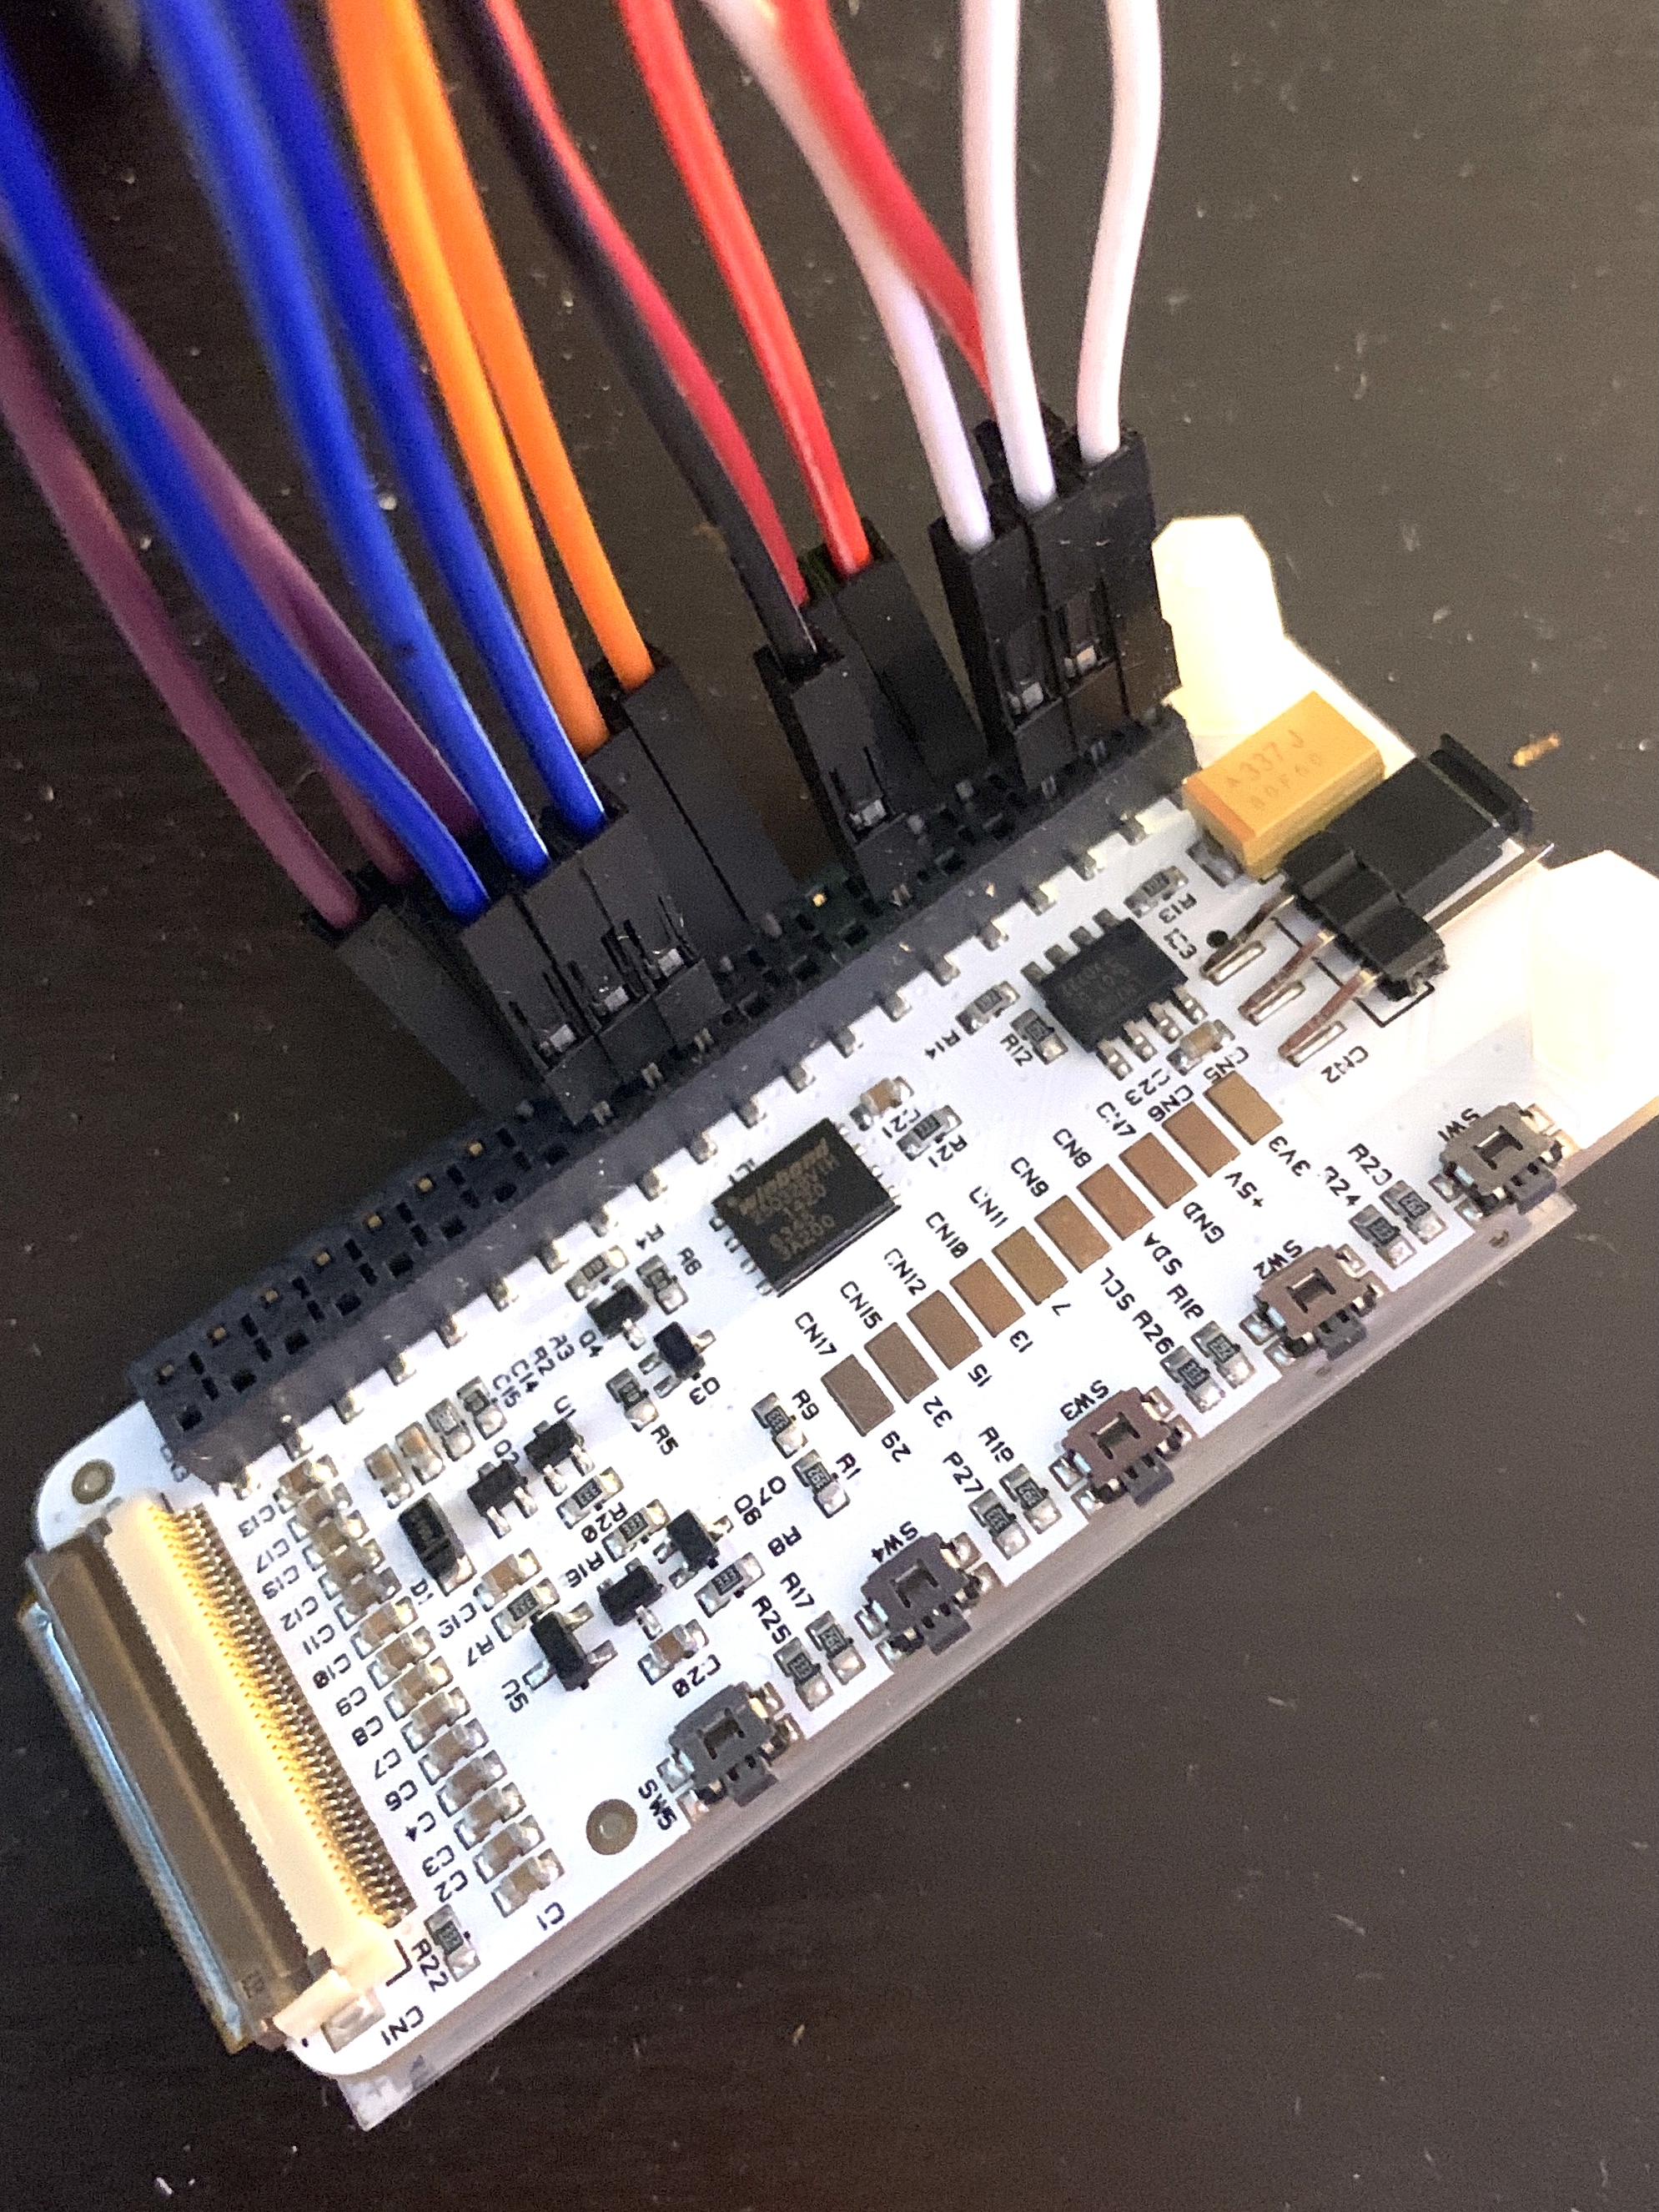
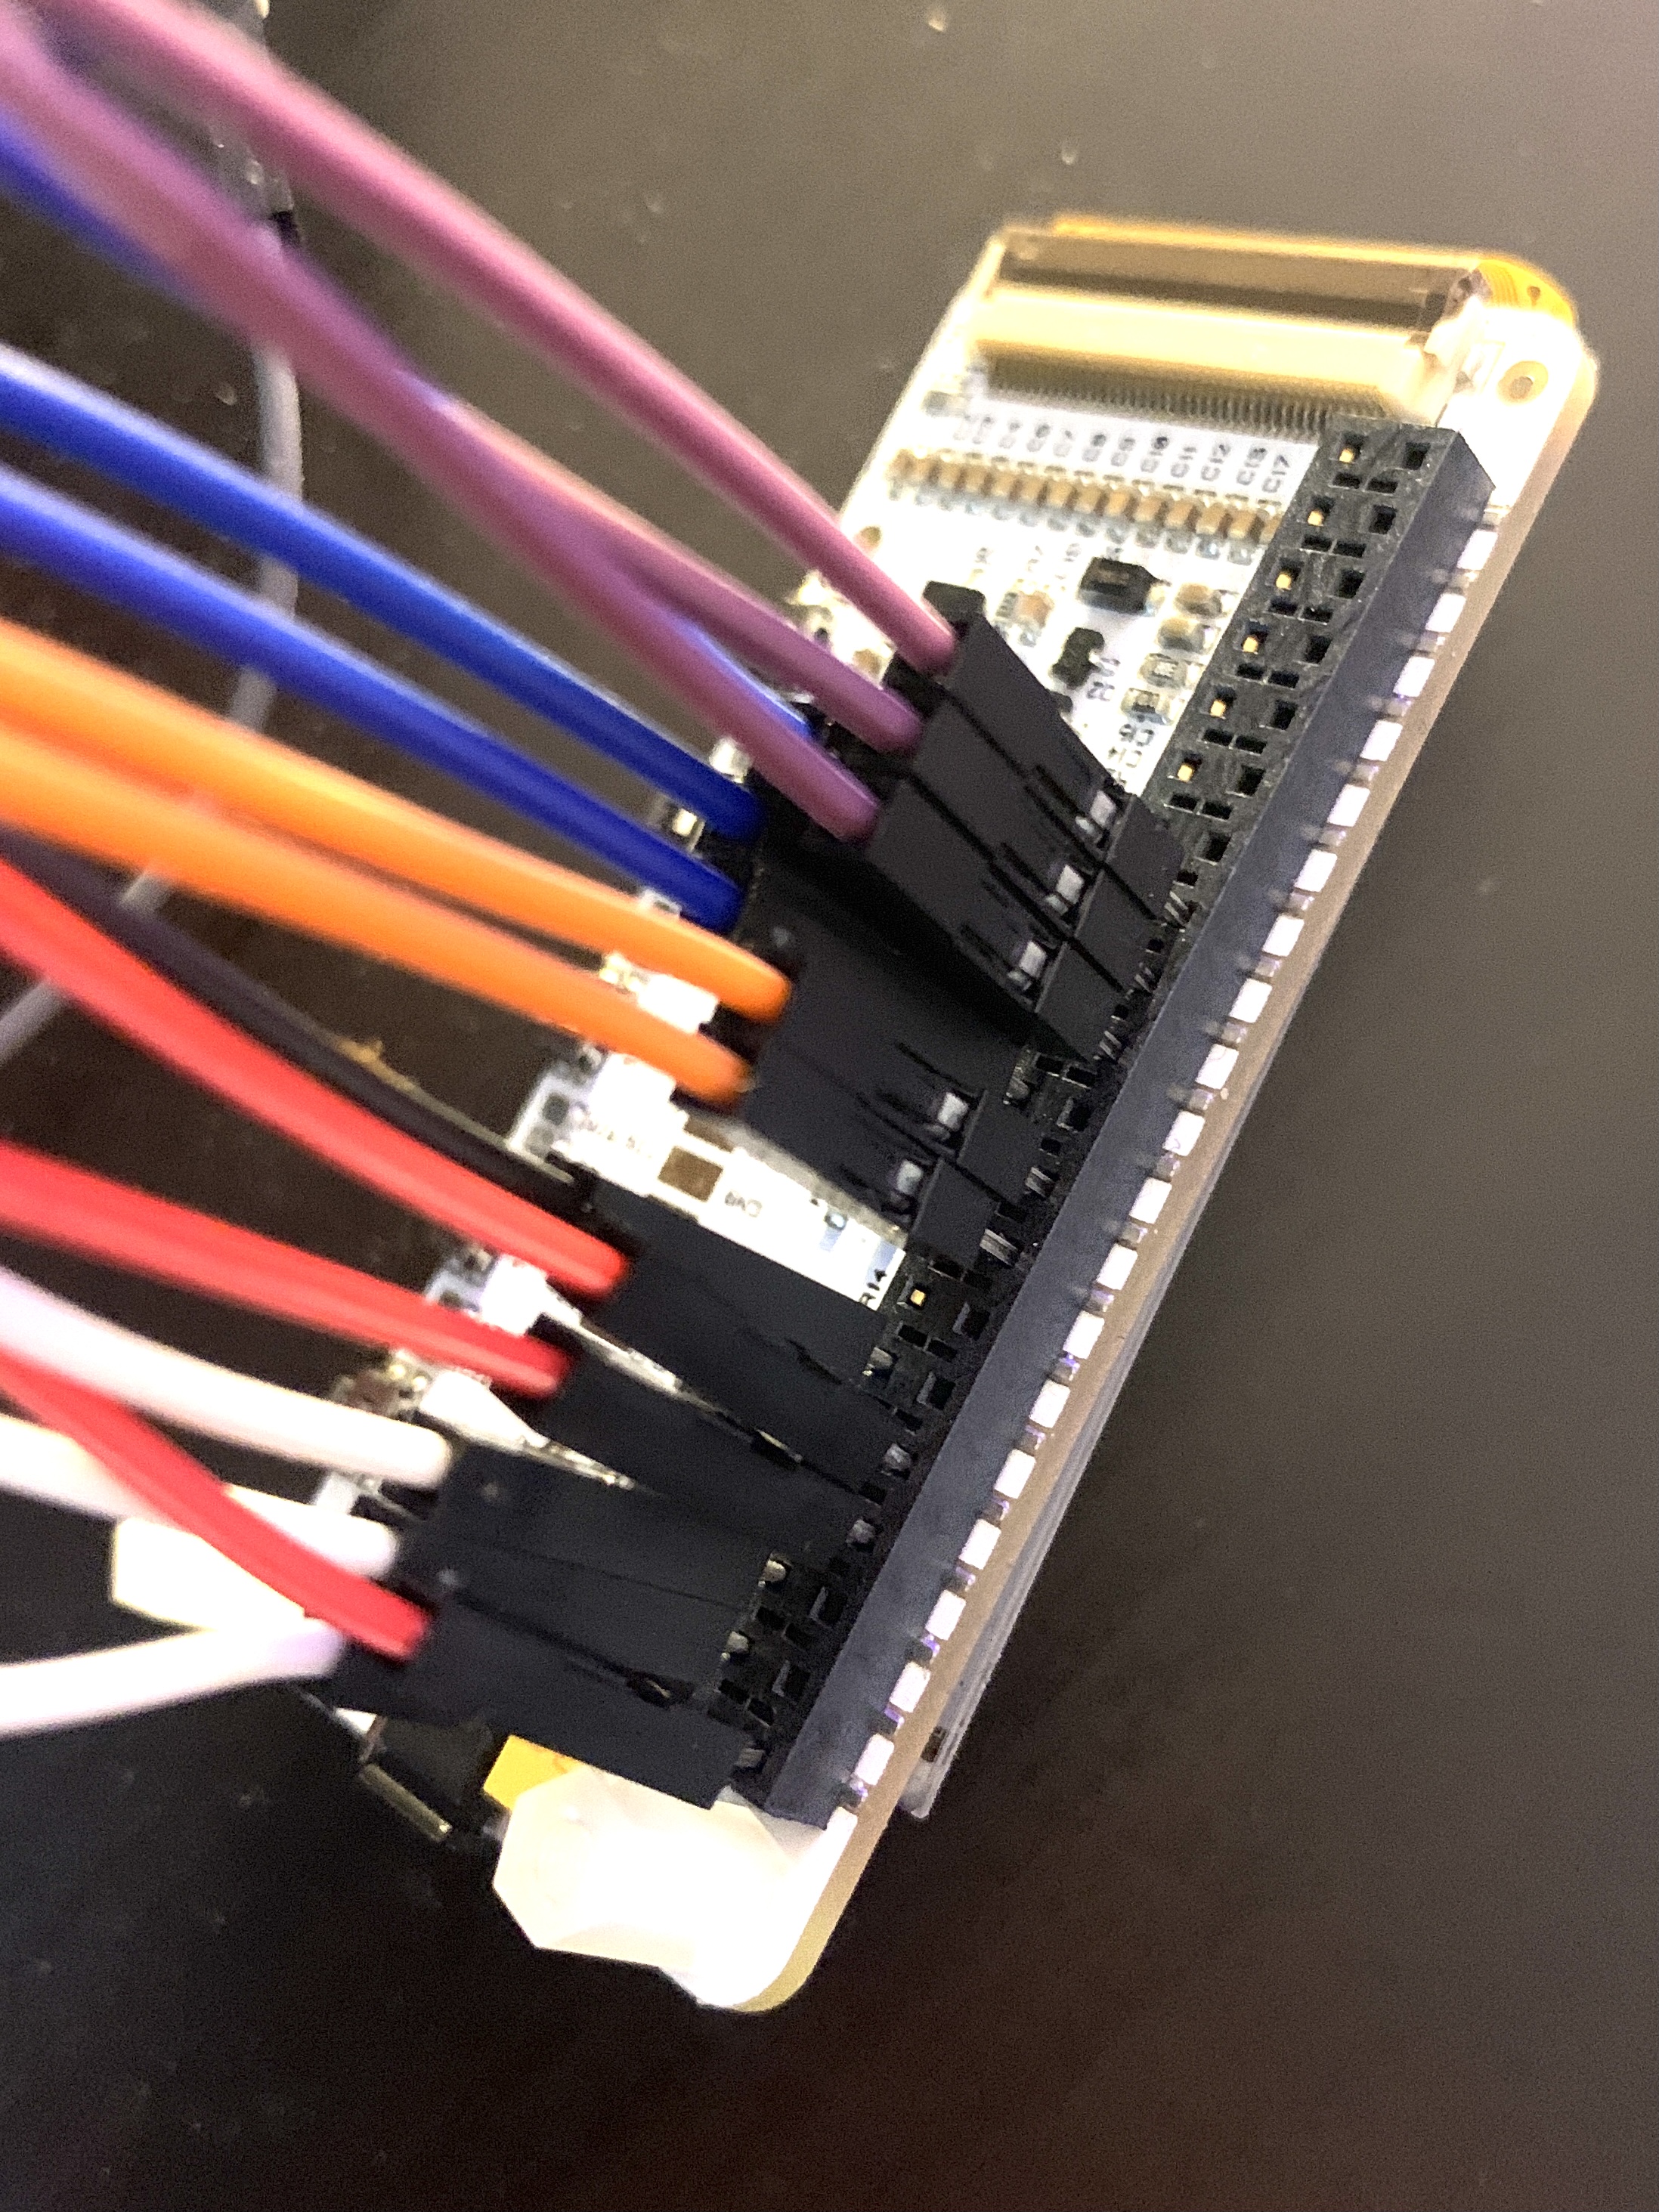
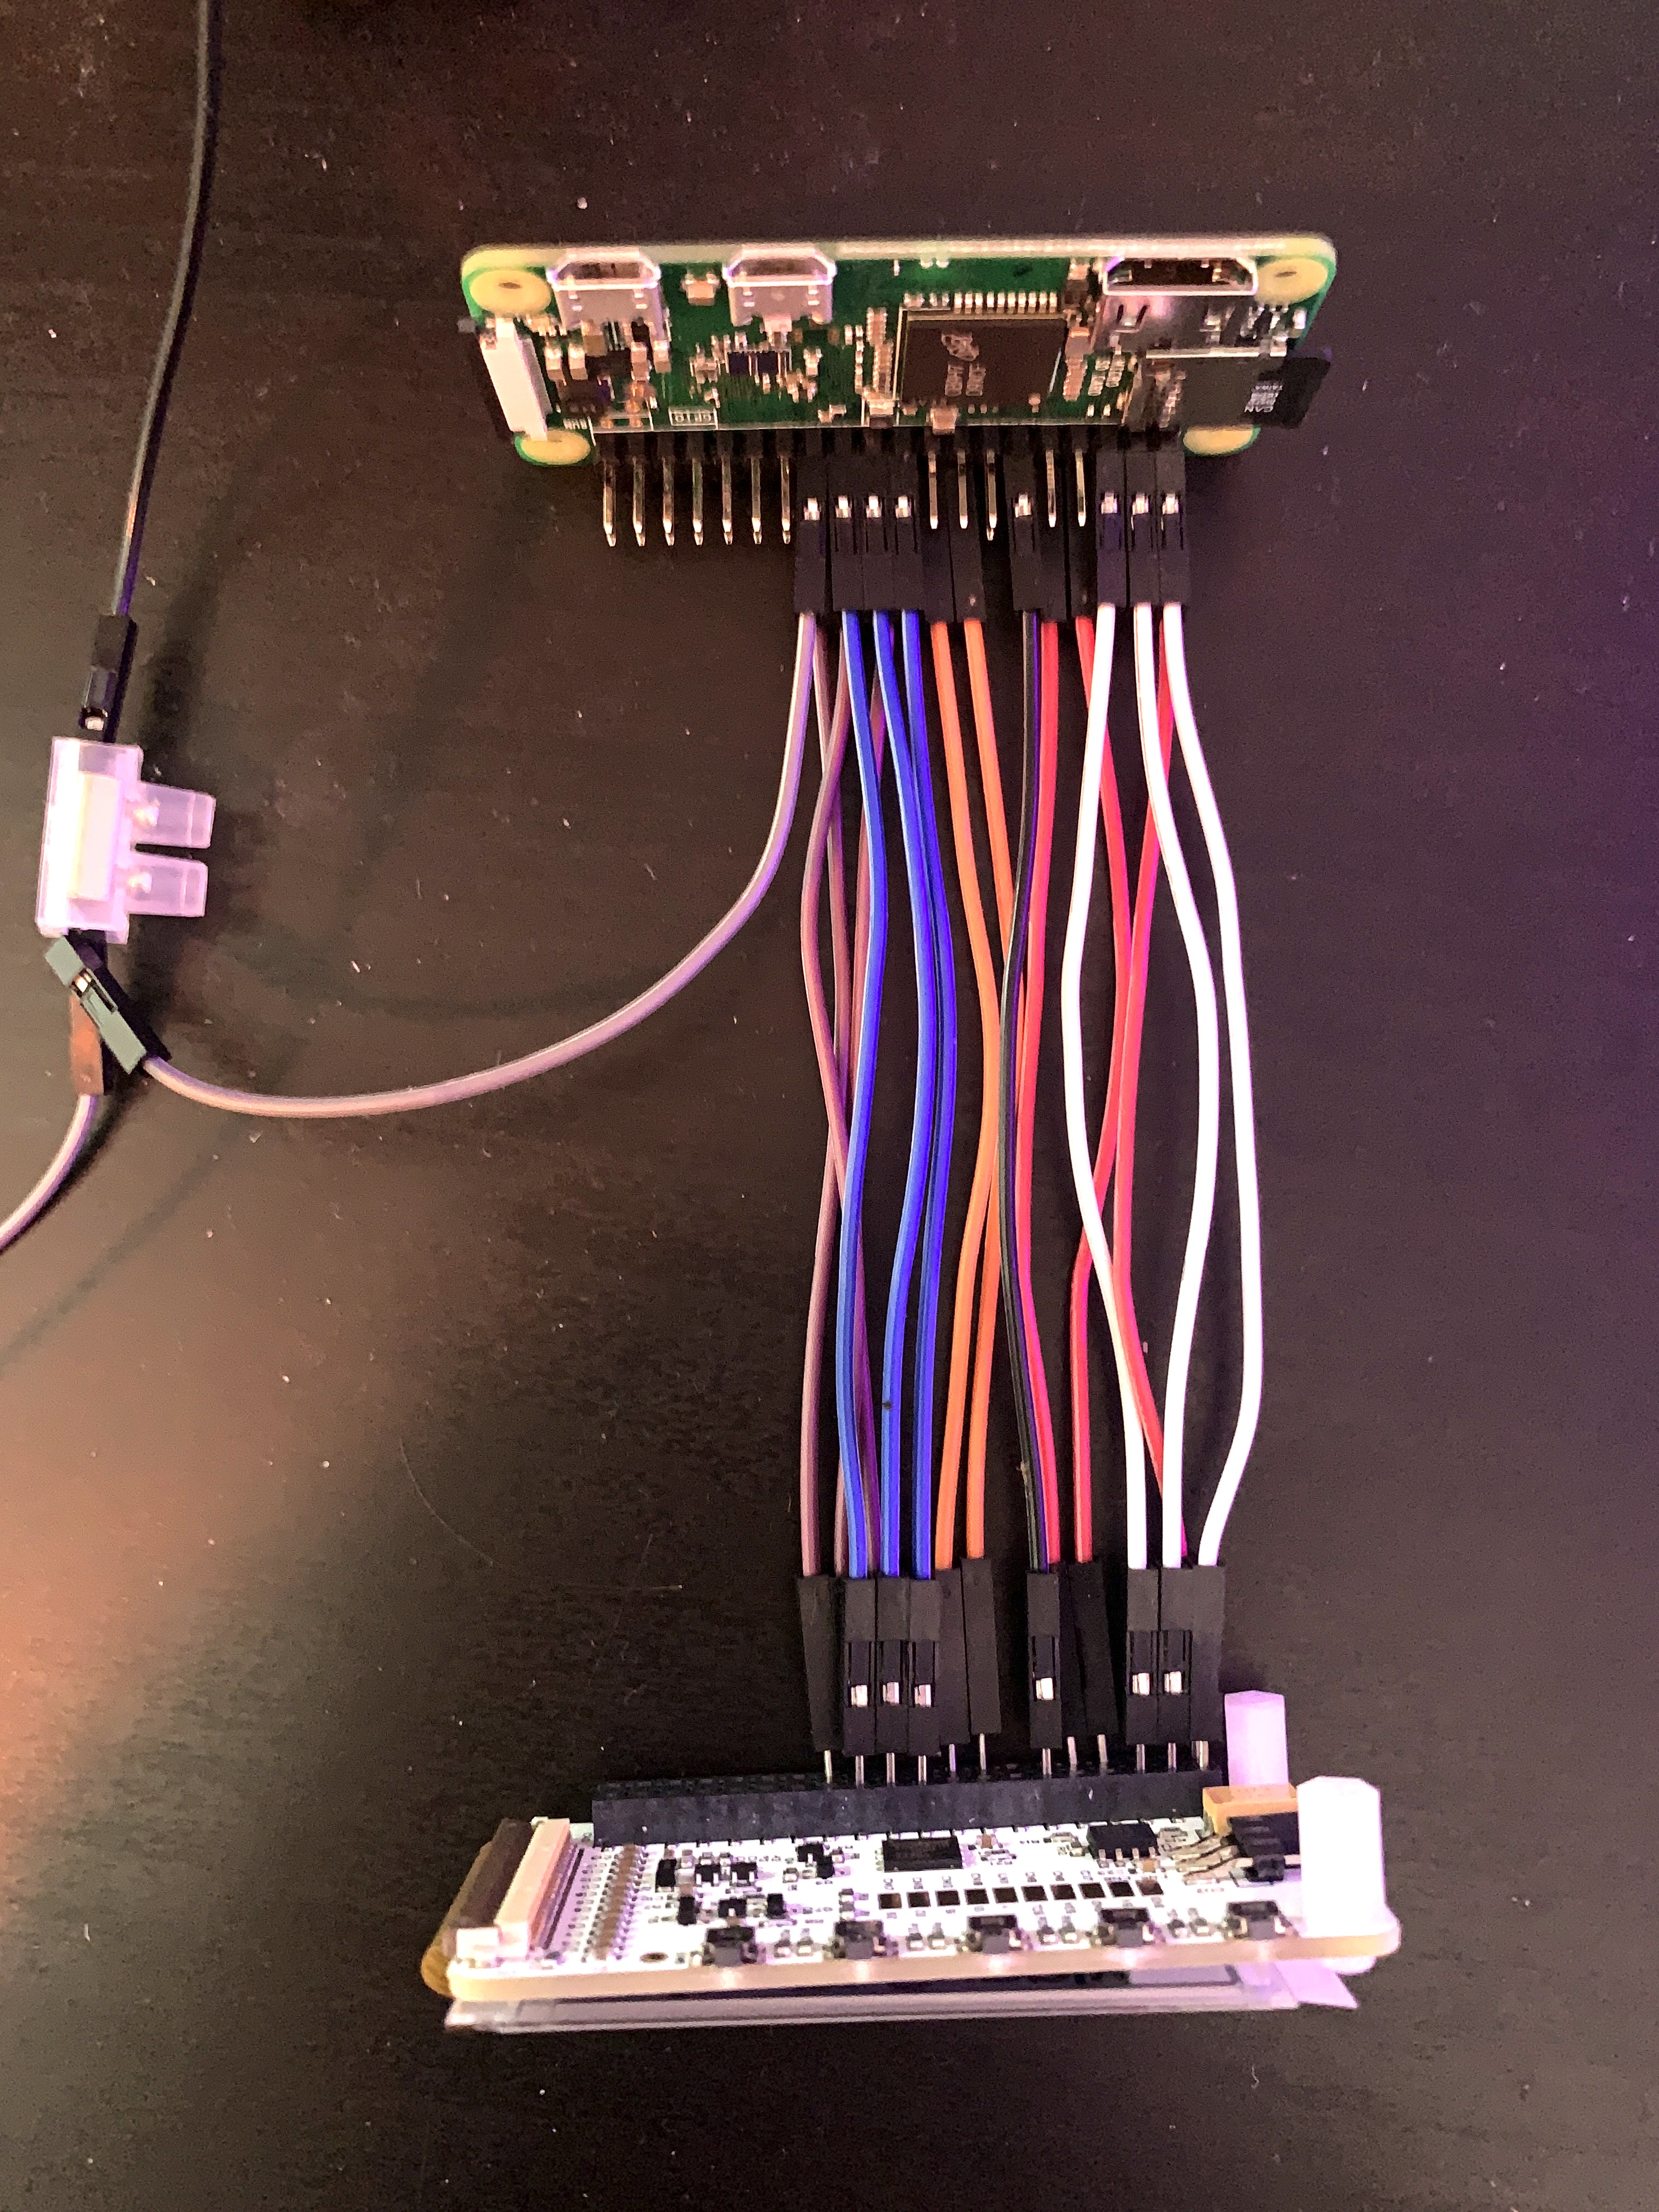
I'm also going to show you how to connect the E-ink screen to the Pi using jumper wires. The reason we do it this way is so that we can keep the 2 parts separate which gives us more room to work with, and it gives us access to the pins on the Raspberry Pi which means we can receive a signal from the coin acceptor when a coin is insterted.
Also, if we want to connect LED Buttons/Switches for confirming sats purchases, or for turning on the machine, we can now do that since we have access to the pins on the Pi.
Check the 5th image to see how the spare ground wire (from the coin acceptor's negative wire) connects to the Pi.
Step 8
Once you have everything connected up, it's time to connect the USB to a power supply and turn on the Raspberry Pi again.
When turned on, it should be displaying the IP address screen again.
Lets go back to our computer and open a program called PuTTY. It should open up and look similar to the picture below.
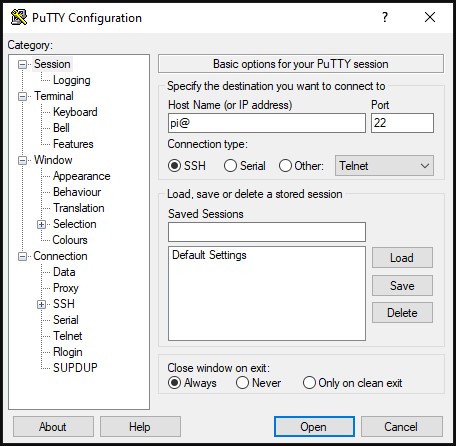
Where we can see "Host Name (or IP address)" box, we will type: pi@YOUR_RASP_IP make sure you insert your Raspberry Pi's IP address into that box after the @, then make sure the connection type is set to "SSH" then hit "Open".
Now we should see a command panel open up, the default password is set to: "raspberry" so just insert that when it asks for the password and hit Enter.
Now we have the option to setup our own password and/or hostname, so go ahead and do that, it may also ask to set up as a new digital fingerprint, type "yes".
Once you have all that you can type "logout" and hit Enter, it should automatically log you out.
Now we need to re-open PuTTY and log back in with the credentials we just created.
Now we should have the PuTTY command window open again and logged in with our new credentials.
So first we will type "git clone https://github.com/21isenough/LightningATM.git" and hit Enter. Now it will begin cloning the ATM files to the Raspberry Pi.
Once it has finished cloning we need to install the last few files, so this time lets type "cd LightningATM" hit Enter then type "pip3 install -r requirements.txt" and again hit Enter...It will now begin to install the QRcode, Zbar, Coingecko btc price etc.
Okay! Now you should be finished!
Type "./app.py" and within a few seconds you should see the "Welcome to the LightningATM" screen appear on your Pi's display!
You can now press Ctrl + C to switch off the ATM software, where you will see a "ATM turned off! Please contact operator" screen...You are now free to expand/customise the device any way you'd like! Have Fun! :)
Outro
If you found this guide helpful and informative, consider sharing it on social media. You can also stay updated on the latest content and discussions by following us on X (formely Twitter): @BitBlogxyz
Disclaimer: This guide is provided strictly for educational purposes and should not be considered financial advice. The content is designed to offer insights into various web3 topics & projects.
We do not recommend putting real money into random projects without conducting plenty of your own research first. It is crucial to make informed decisions based on your own understanding and risk tolerance.