Introduction
This guide will delve into the latest interface (Anodos Finance) and introduce a new feature (AMM) for the XRPL, providing simple step-by-step instructions on its utilization!
What is Anodos Finance?
Anodos Finance stands out as a sophisticated XRPL interface that not only integrates and streamlines the newest addition, AMM, but also offers a convenient Swap tool for seamless exchanges between XRP, USDC, BTC, and more!
Established by Panos Mekras, Peter Condilis, and Fabian Sinani, Anodos is driven by a shared vision of harnessing the transformative potential inherent in blockchain technology and cryptocurrency.
Step 1
Firstly, we need to install the wallet extension.
We had issues when we tried this with Chrome, so we're going to use Microsoft Edge for this guide.
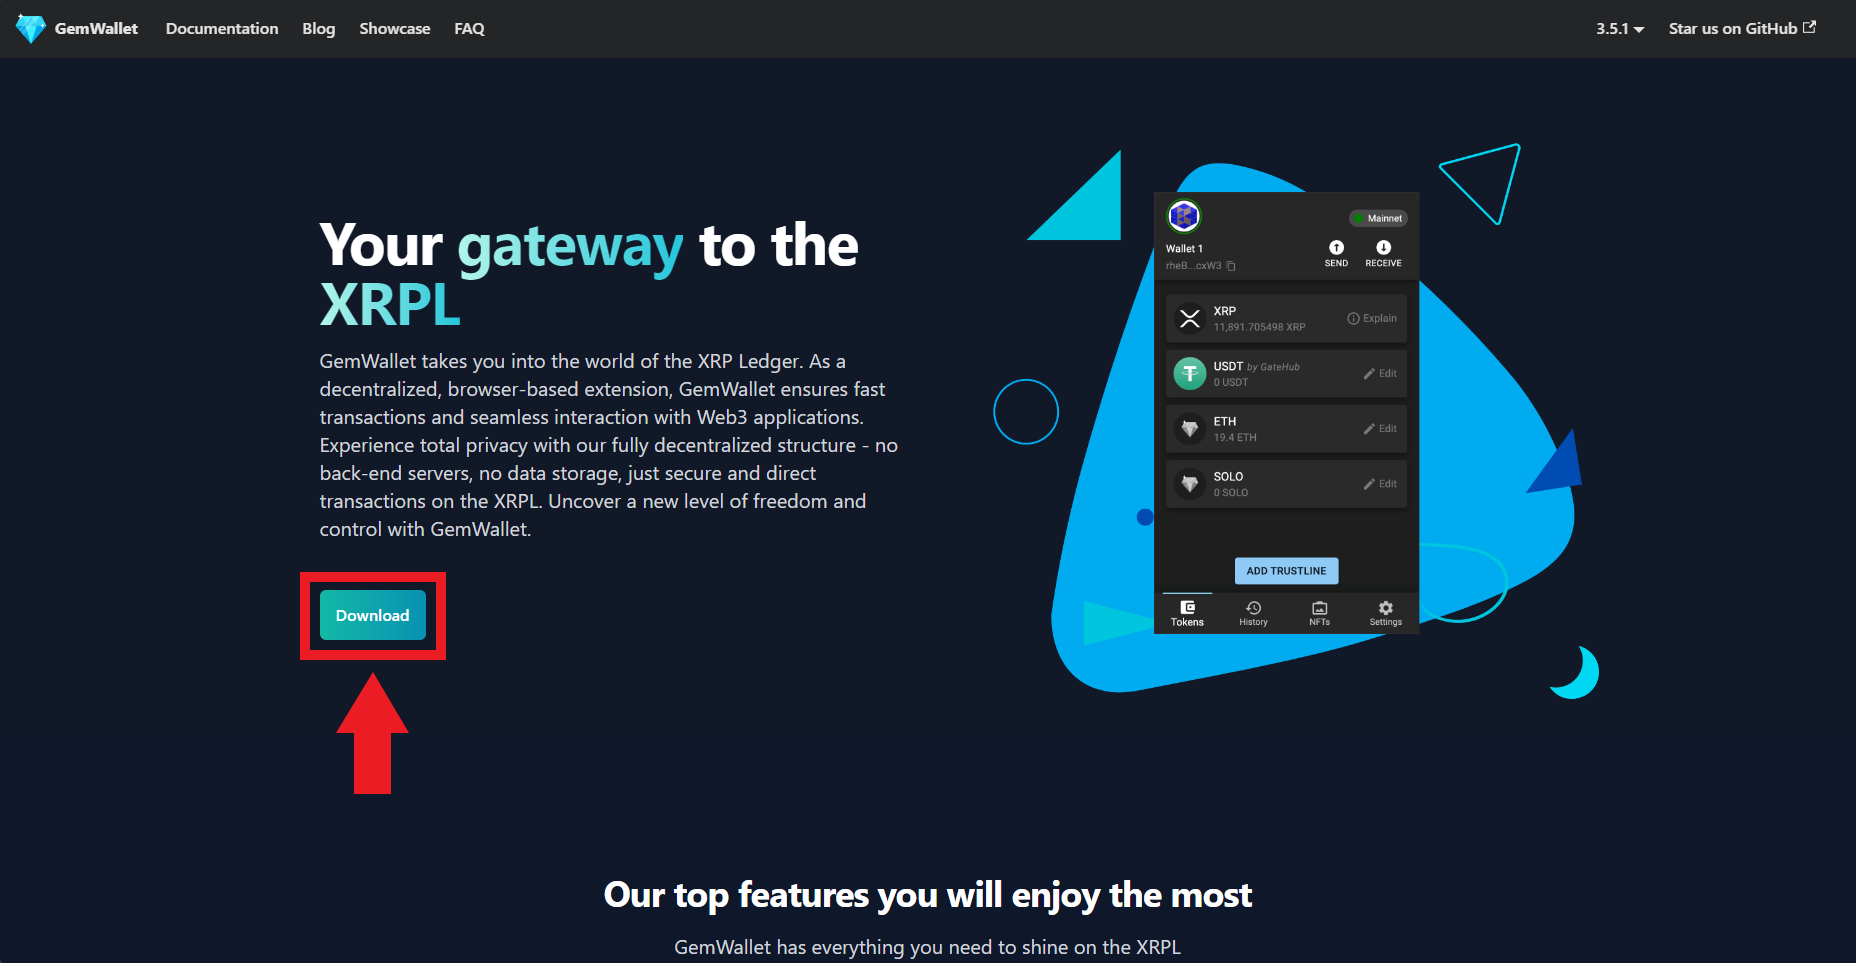
Head over to gemwallet.app & download/install the Gem Wallet extension.
Step 2
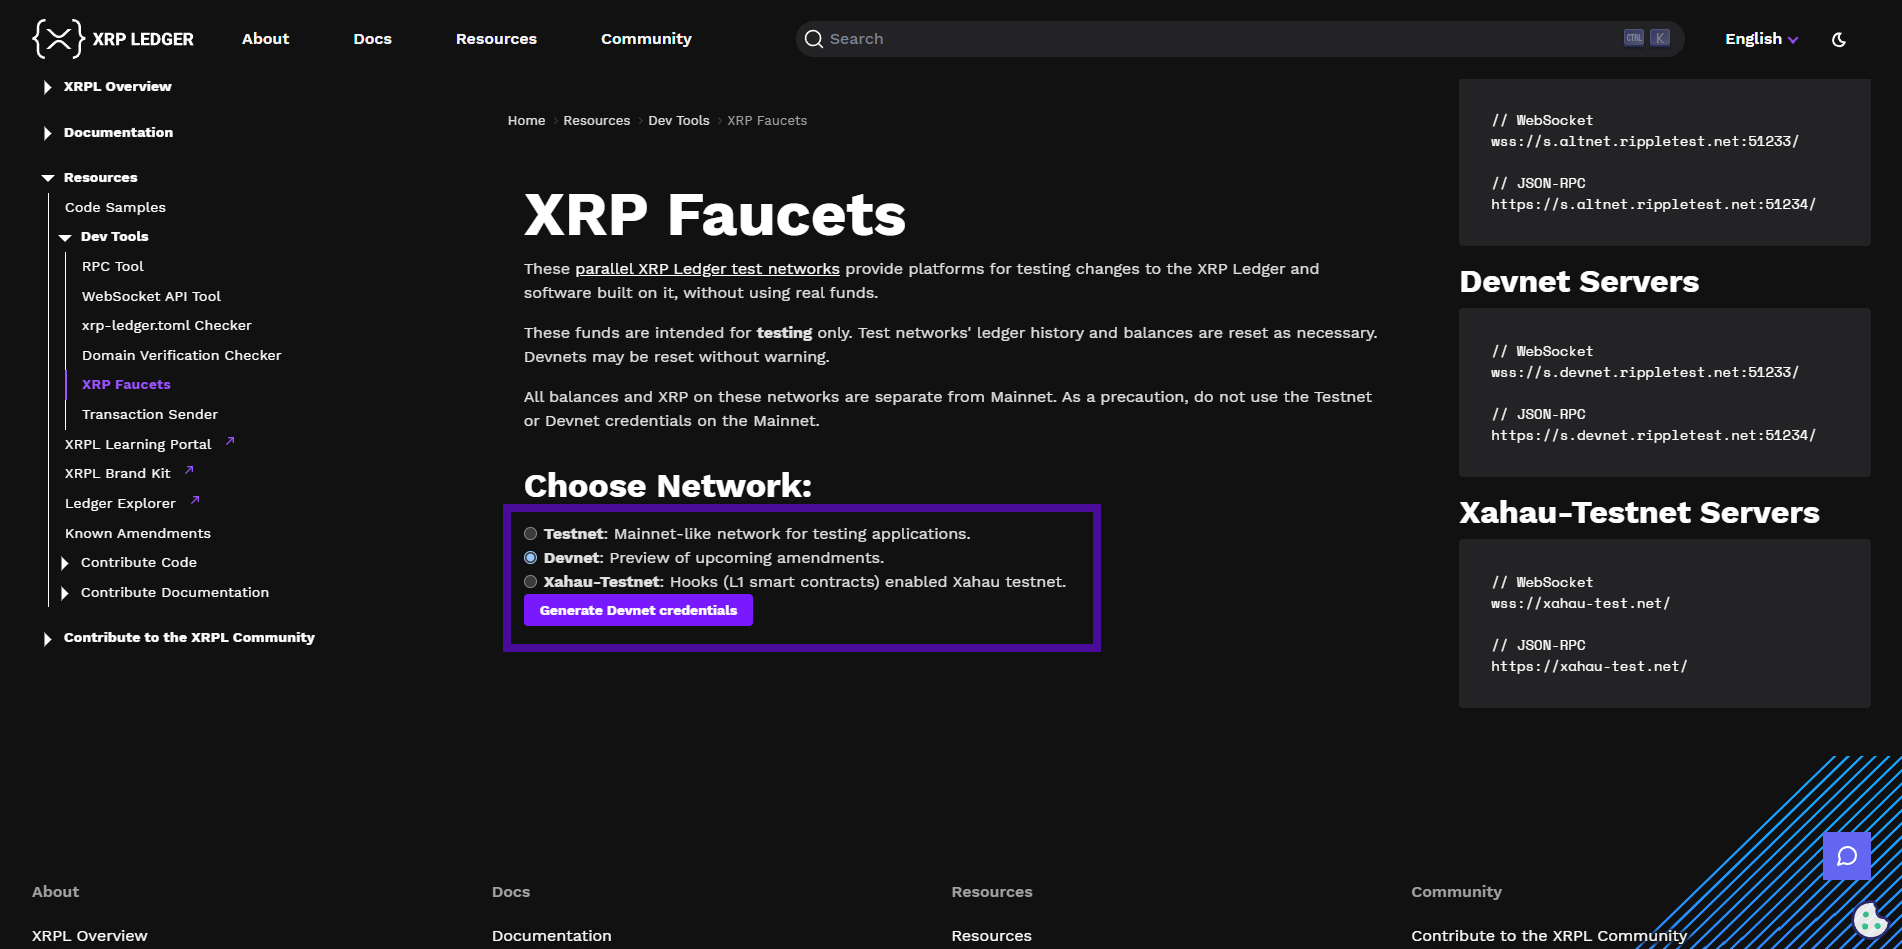
Go to XRPL Faucet
Select "Devnet" and "Generate Devnet Credentials".
Now we just need to copy down the "Secret" as we'll need it in the next step.
Step 3
Next, we're going to import this dev account into Gem Wallet.
So open Gem Wallet, select "Import a wallet", then "Family seed", and paste the secret from the previous step.
Now we need to click where it says "Mainnet" in the top-right corner & select "Devnet".
You should now see "9,990 XRP" (test tokens).
Step 4
Now we're ready to begin!
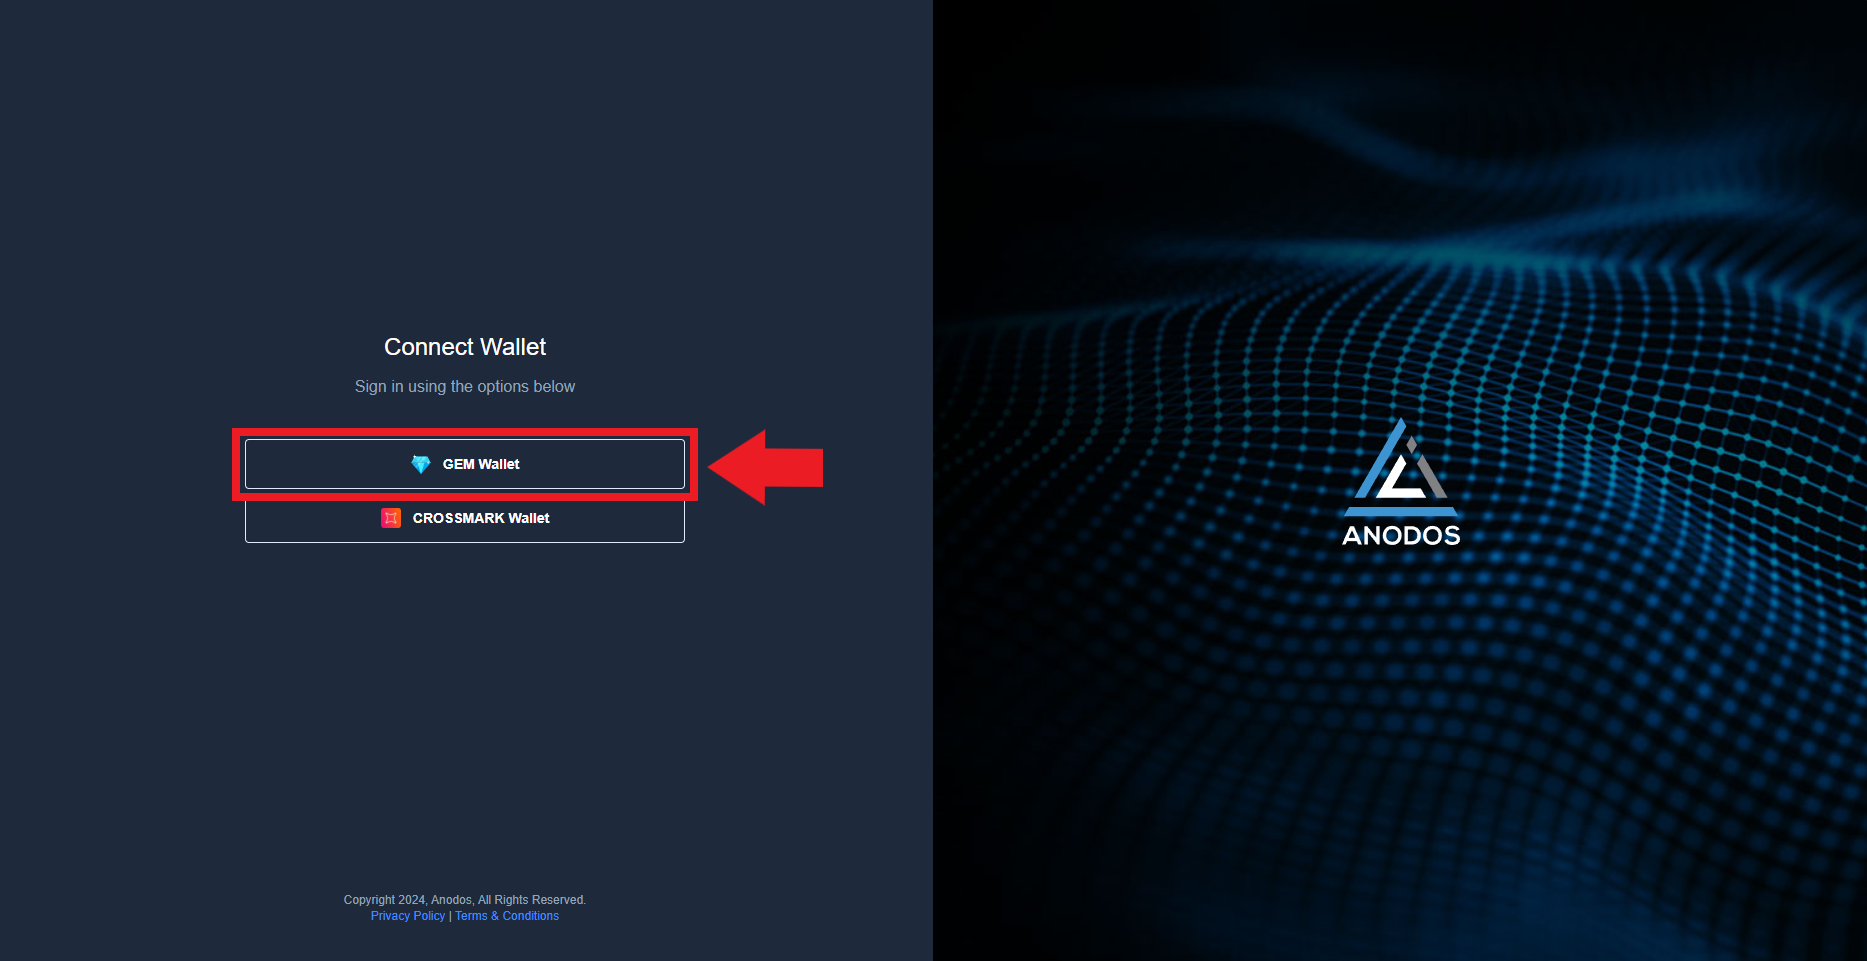
Head over to devnet.anodos.finance & click "Login".
Choose Gem Wallet and sign transaction.
Step 5
Now we need to setup a trustline so that we can send/receive tokens and perform swaps between certain tokens.
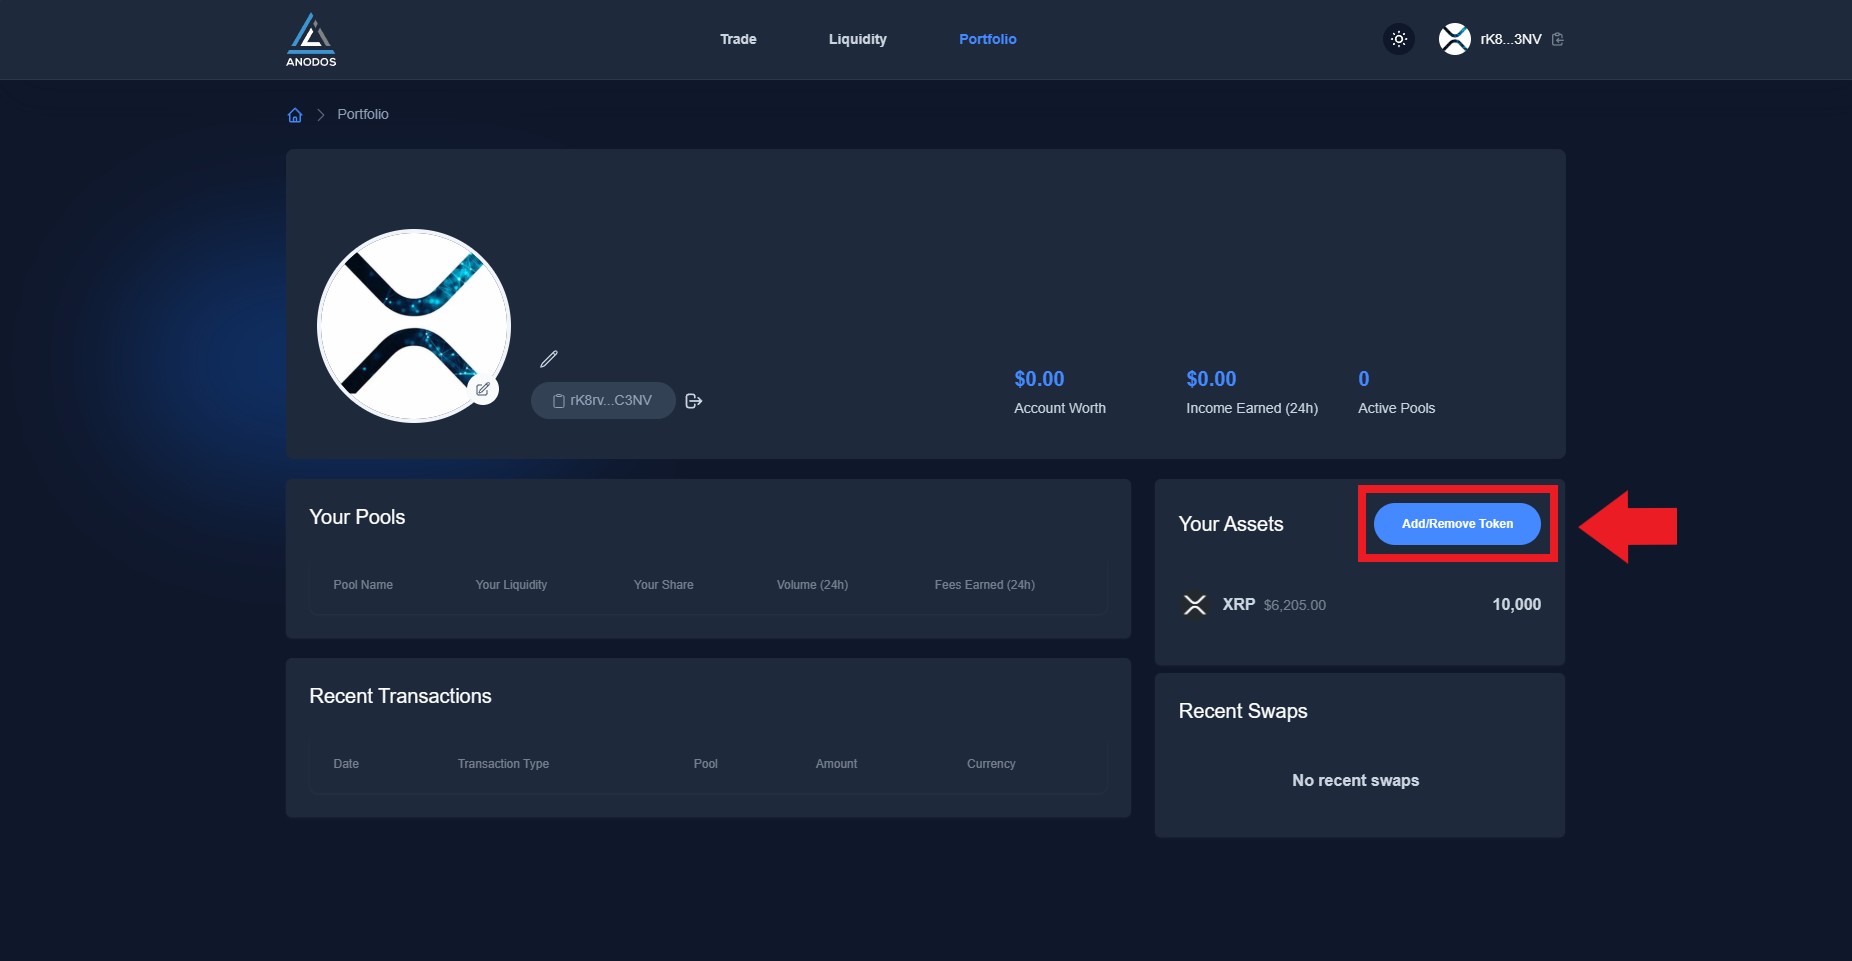
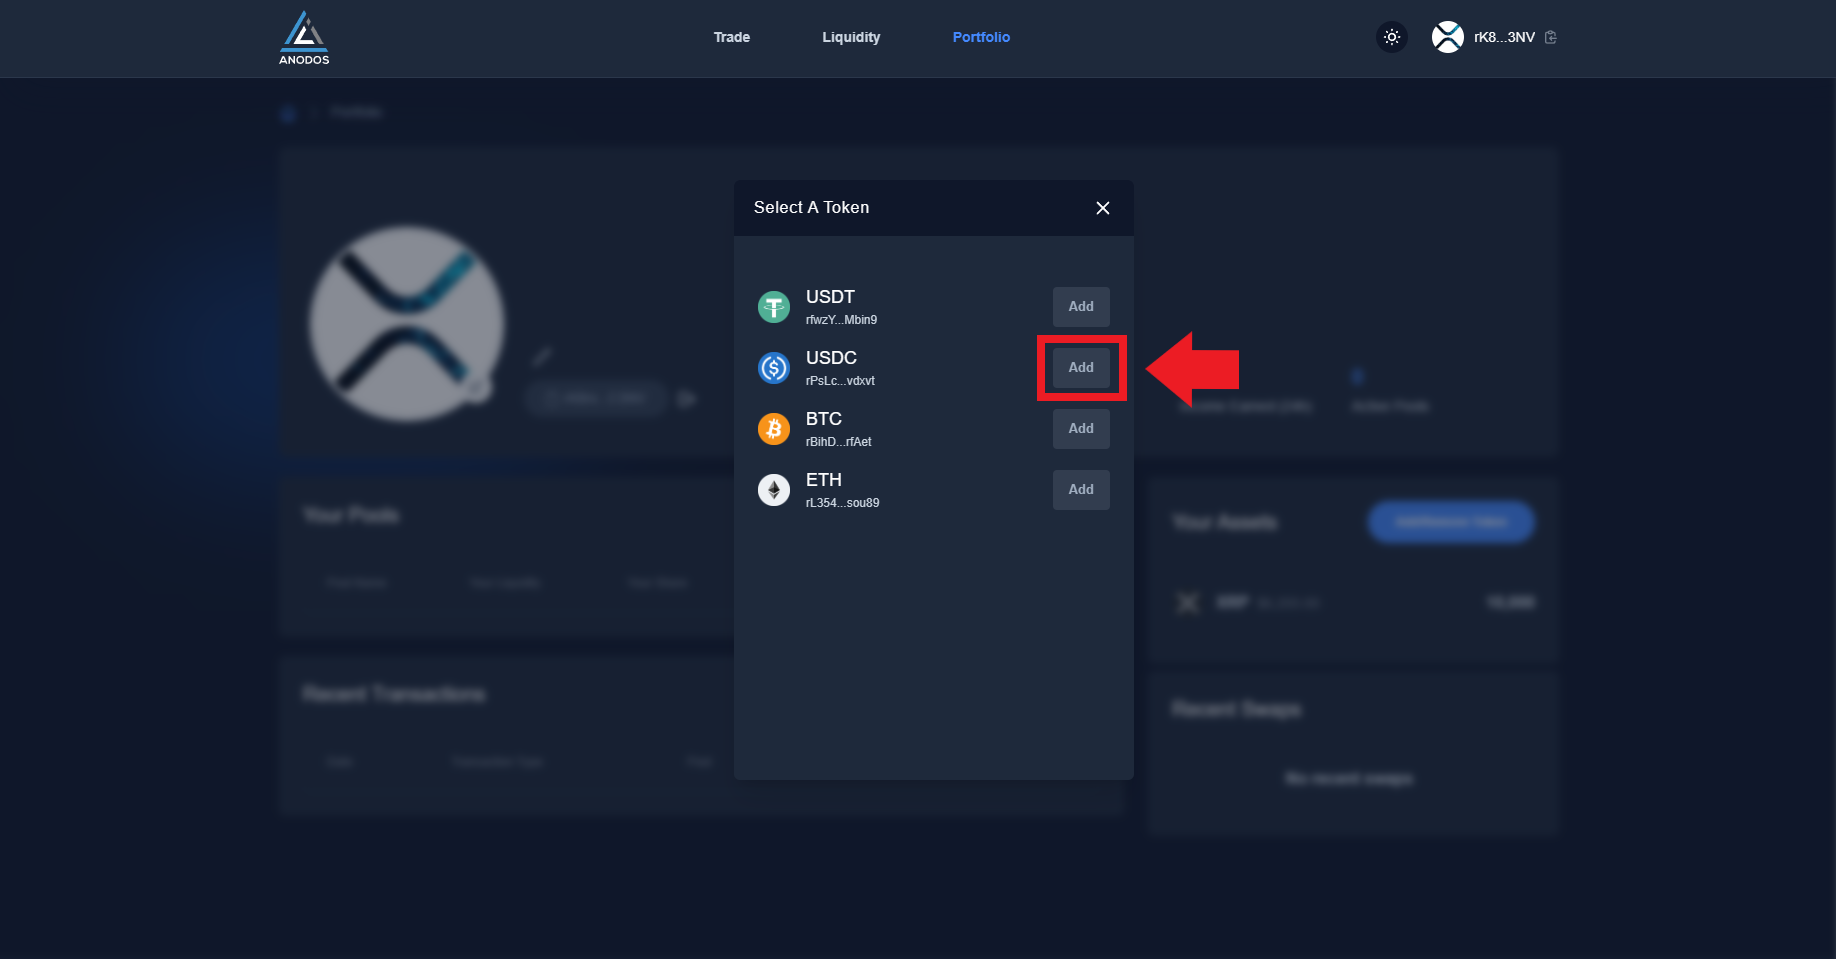
Head over to devnet.anodos.finance/portfolio and press the "Add/Remove Token" button, for this guide, we will demonstrate the process using USDC, so select "Add" for the USDC token.
Approve the transaction with Gem wallet.
The added token should now be visible in Gem wallet and we can now swap between XRP and USDC.
We can do the same thing for the other tokens, such as USDT, BTC & ETH.
Step 6
Now let's perform some swaps from XRP to USDC!
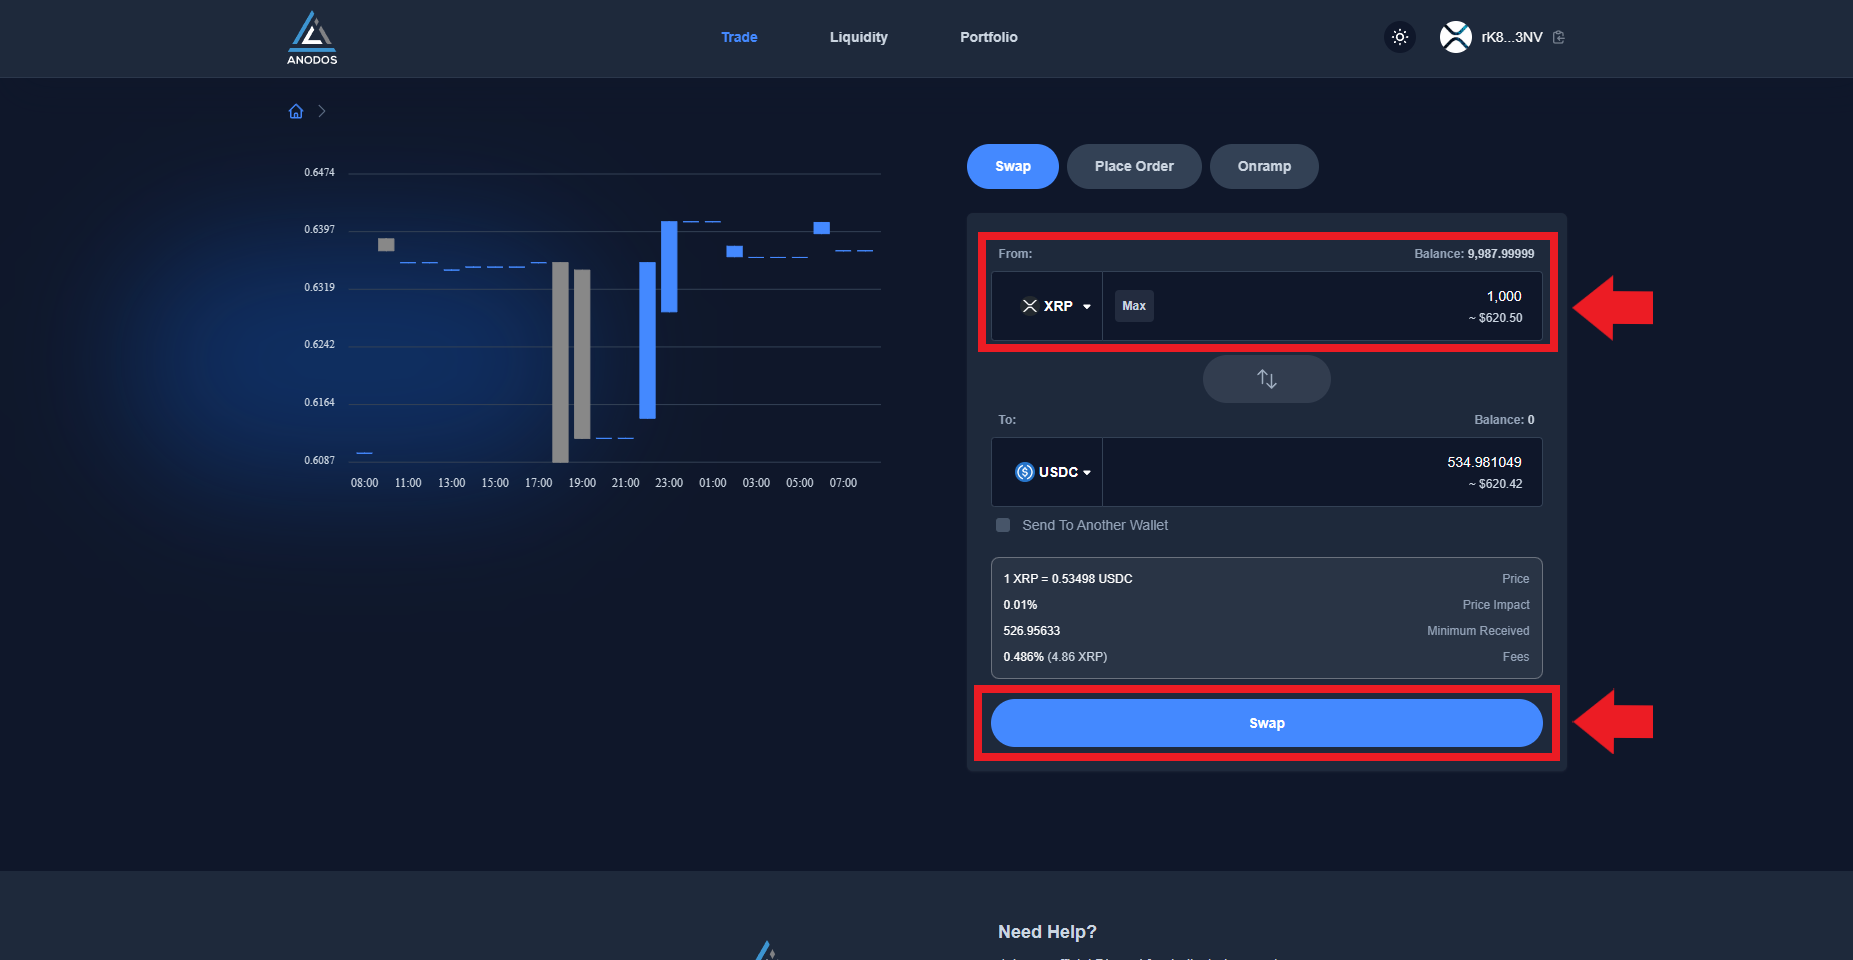
Go to the Trade tab at the top, insert any amount of available XRP, hit "Swap" and confirm transaction.
We can also swap to the other test tokens, such as USDT, BTC & ETH.
Step 7
Now let's explore Pools!
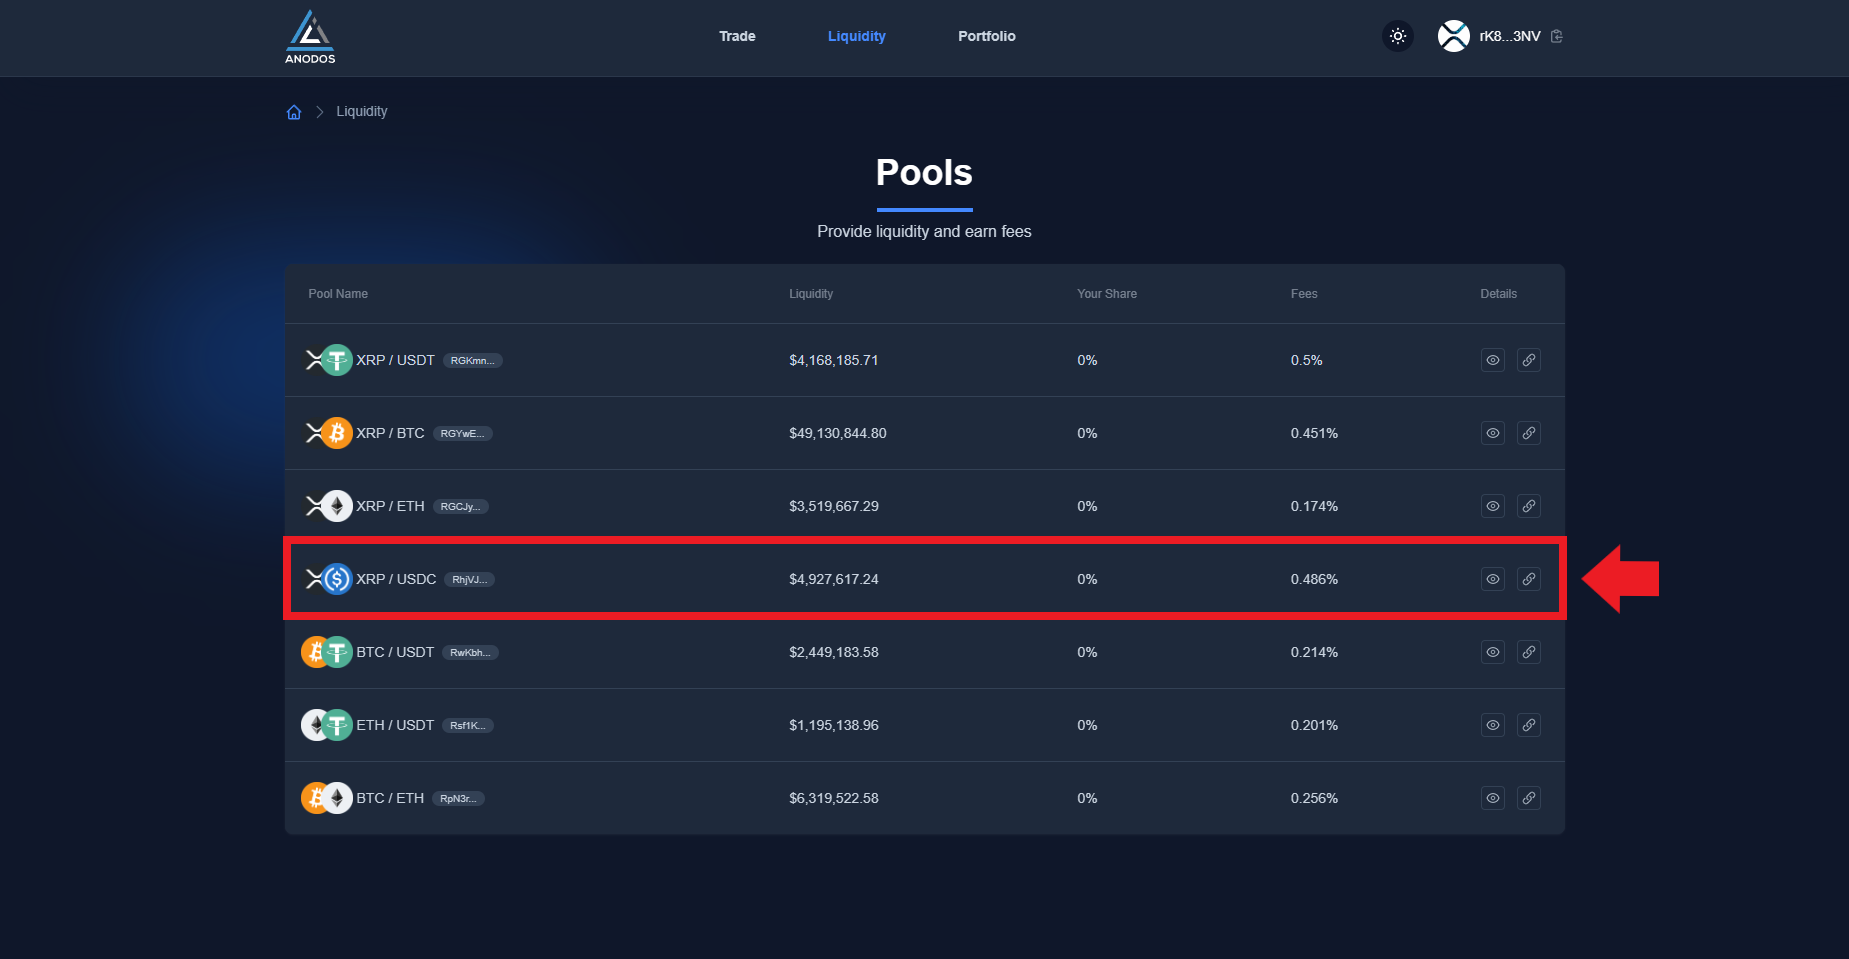
Go to the Liquidity tab at the top and select the XRP/USDC pool.
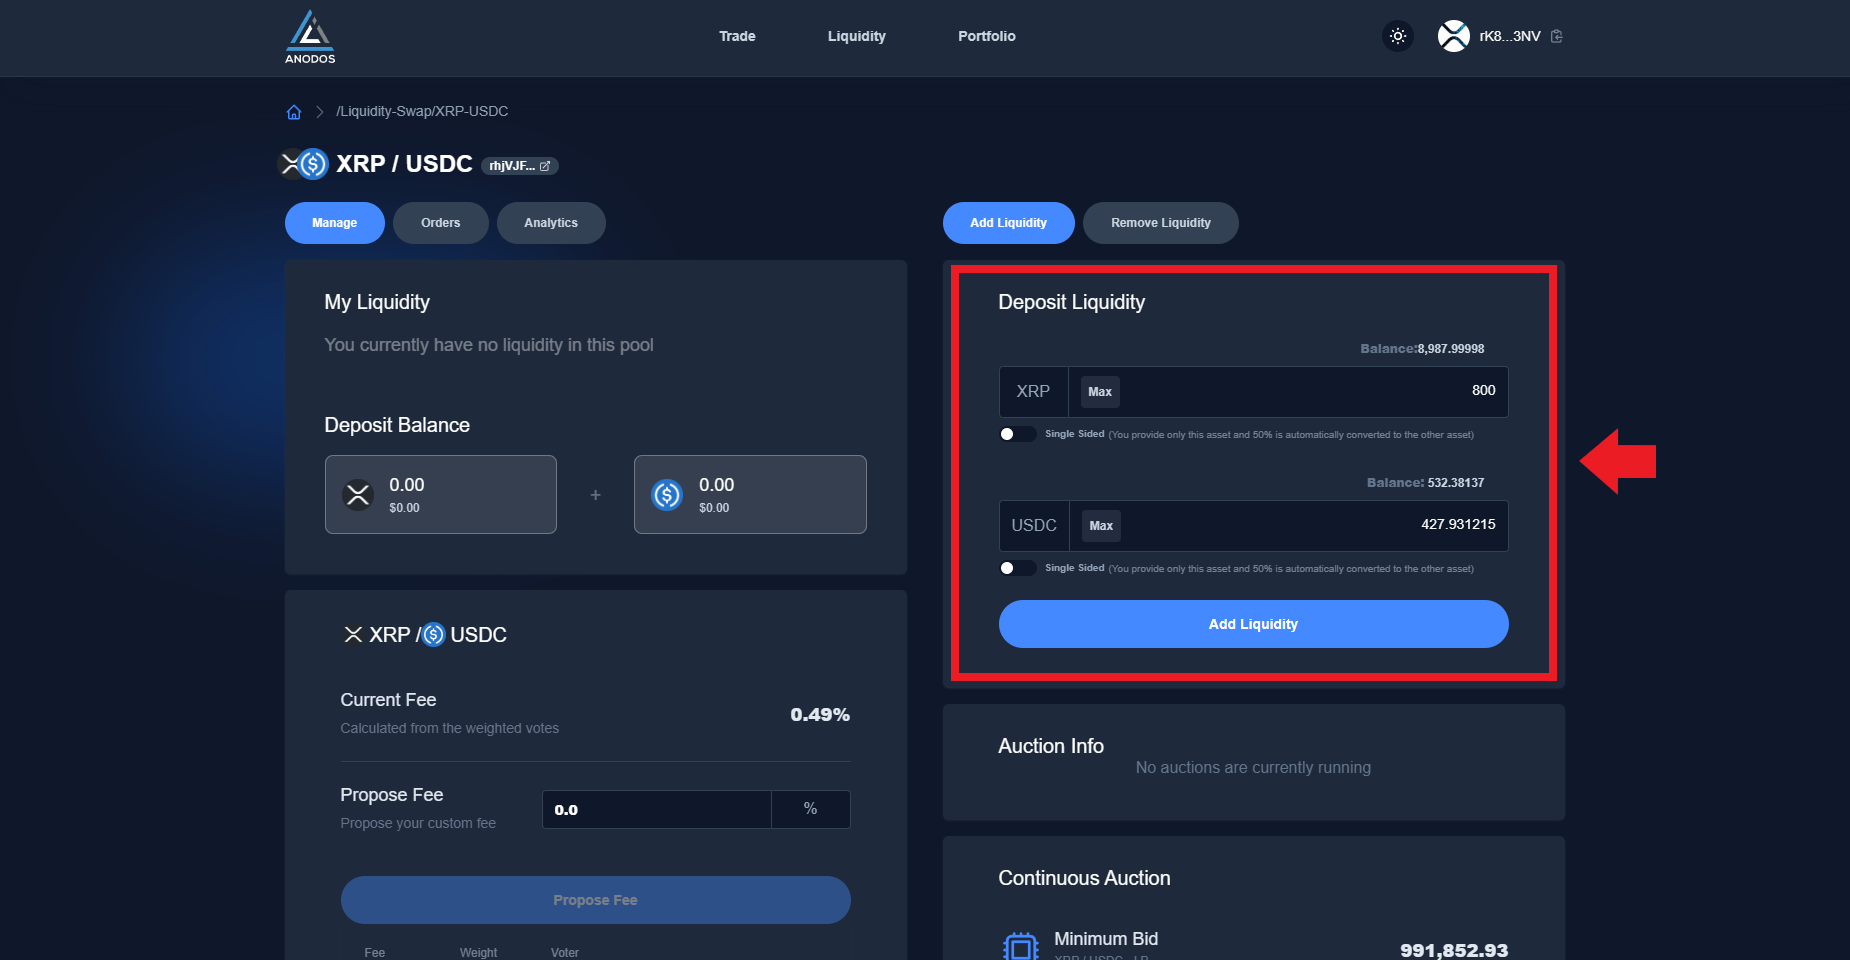
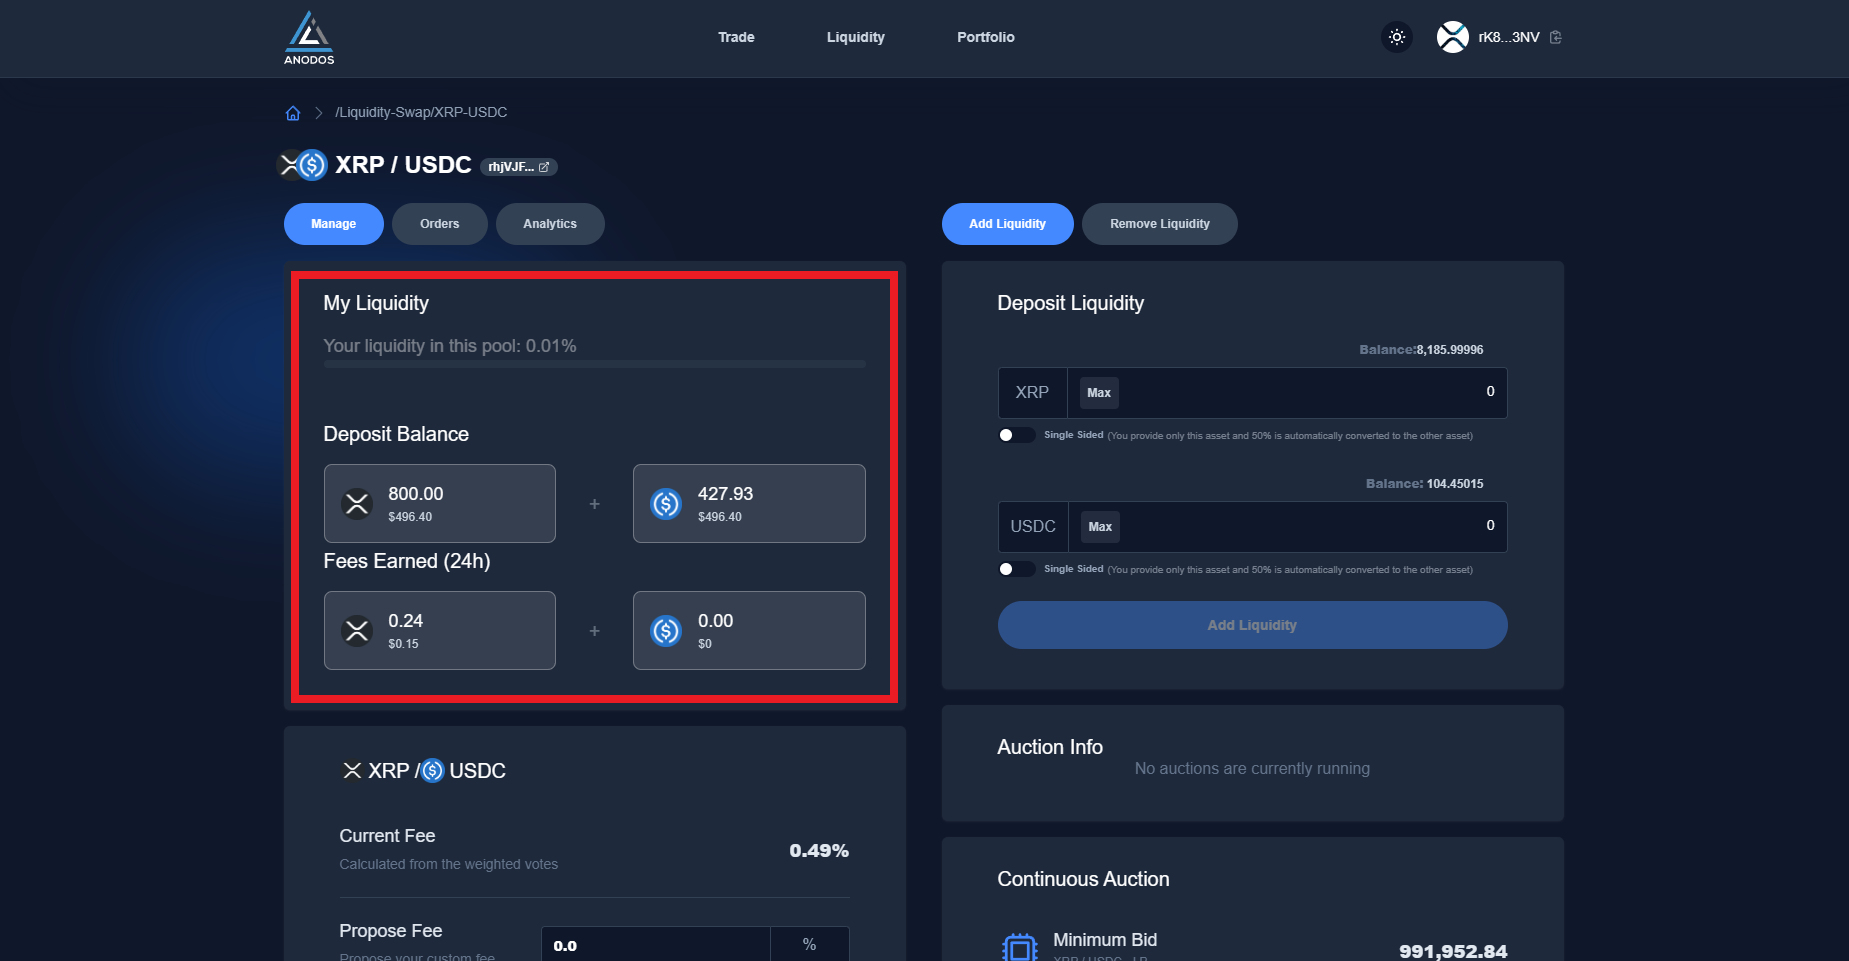
Now on the right side we can see "Deposit Liquidity", in the first box we can insert any amount of available XRP and in the second box the equivalent amount in USDC will be automatically calculated and inserted, now we can hit "Add Liquidity".
Confirm transaction and shortly after you should see your liquidity position!
Outro
If you found this guide helpful and informative, consider sharing it on social media. You can also stay updated on the latest content and discussions by following us on X (formely Twitter): @BitBlogxyz
Disclaimer: This guide is provided strictly for educational purposes and should not be considered financial advice. The content is designed to offer insights into various web3 topics & projects.
We do not recommend putting real money into random projects without conducting plenty of your own research first. It is crucial to make informed decisions based on your own understanding and risk tolerance.