Introduction
In this guide, we're going to take a look at BeraChain and how to interact with the ongoing testnet in order to become eligible for a potential airdrop reward!
What is Berachain?
Berachain is a high-performance blockchain with Proof-of-Liquidity consensus, based on the Cosmos-SDK.
It functions as an EVM-compatible Layer 1 blockchain, supporting familiar tooling and operations, while incorporating additional features optimized for proof-of-liquidity and abstracted use-cases like DEXs and Oracles.
The platform utilizes Polaris EVM, a framework developed by Berachain, to create a modular stack that separates the EVM runtime layer for enhanced flexibility.
What is Proof-of-Liquidity?
Proof of Liquidity (PoL) improves upon the limitations of Proof of Stake by introducing additional elements. Users gain Bera Governance Tokens (BGT), the native token for Proof of Liquidity, by providing liquidity to BEX liquidity pools.
- Users delegate their BGT to validator(s).
- Validators produce blocks according to their proportionate BGT delegation.
- Delegators and Validators receive rewards from the chain.
- Validators participate in voting for future BGT inflation across various liquidity pools.
- Bribes, if created by the validator, are distributed from validators to their delegators.
Step 1
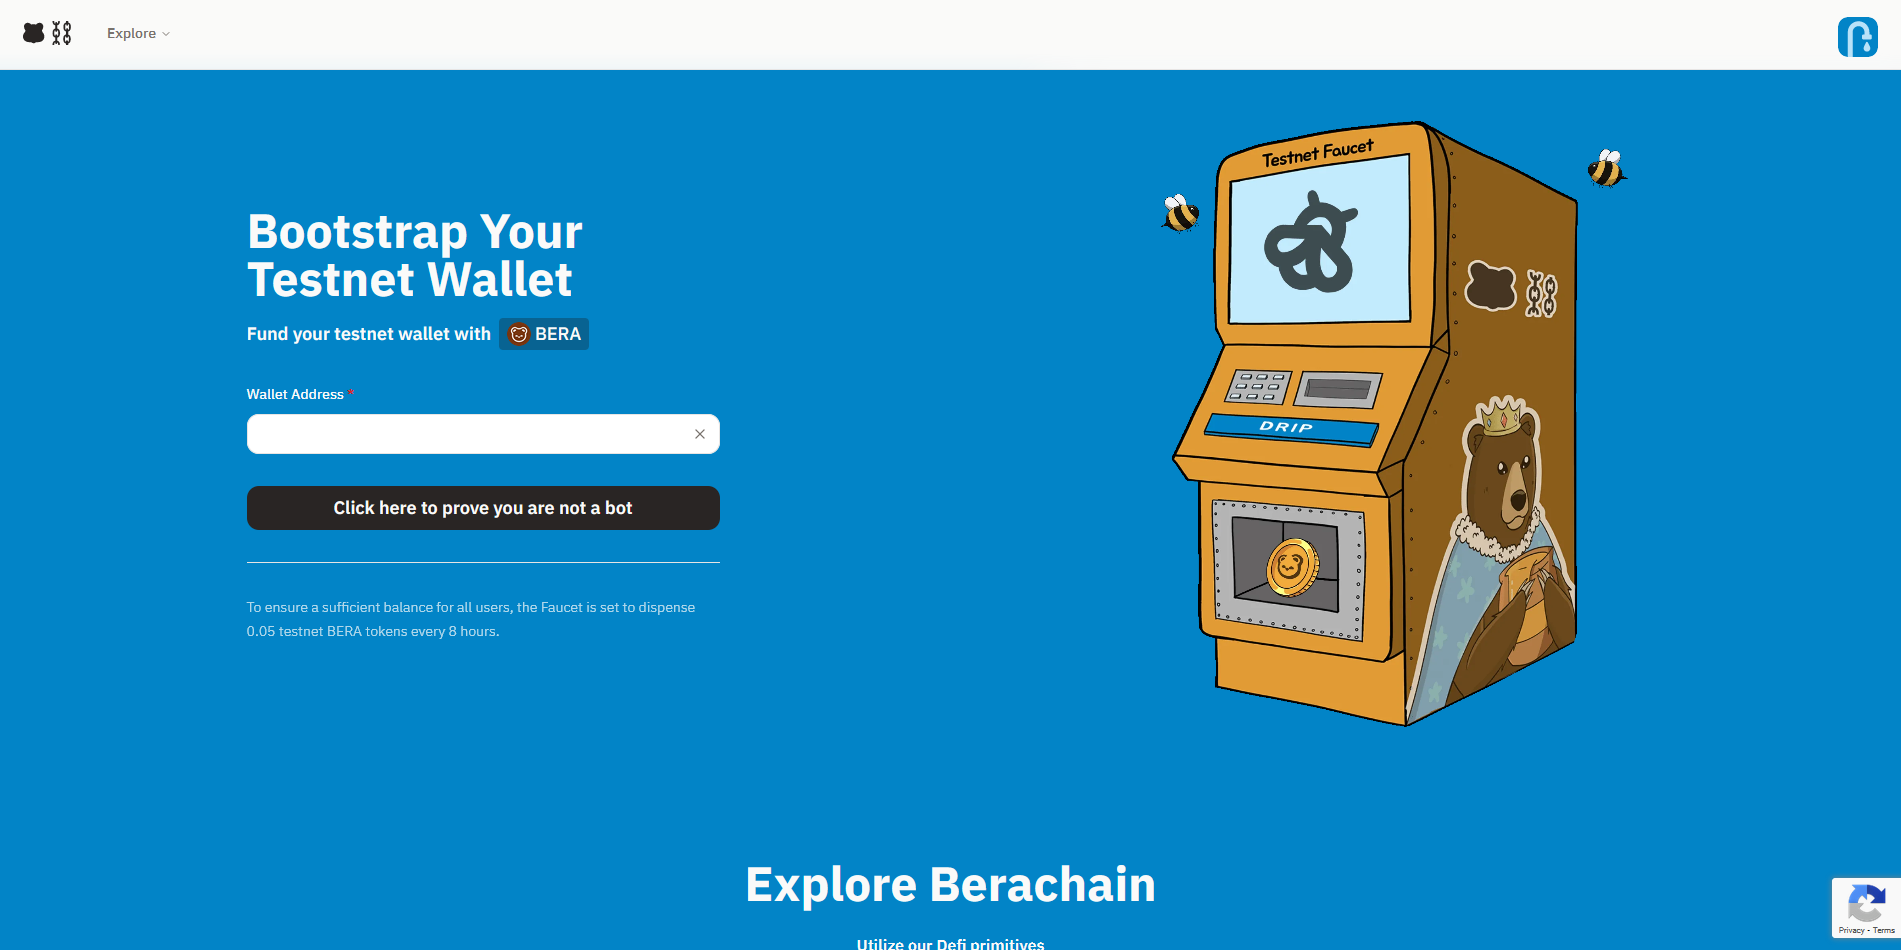
First of all, we need to claim some test tokens.
To do this, go to artio.faucet.berachain.com & input your MetaMask wallet address.
Click the button to prove you're not a bot.
Then click "Drip Tokens".
If you're encountering errors, or you aren't receiving the test tokens, please wait 8 hours and try again.
Step 2
Now let's perform some testnet interactions!
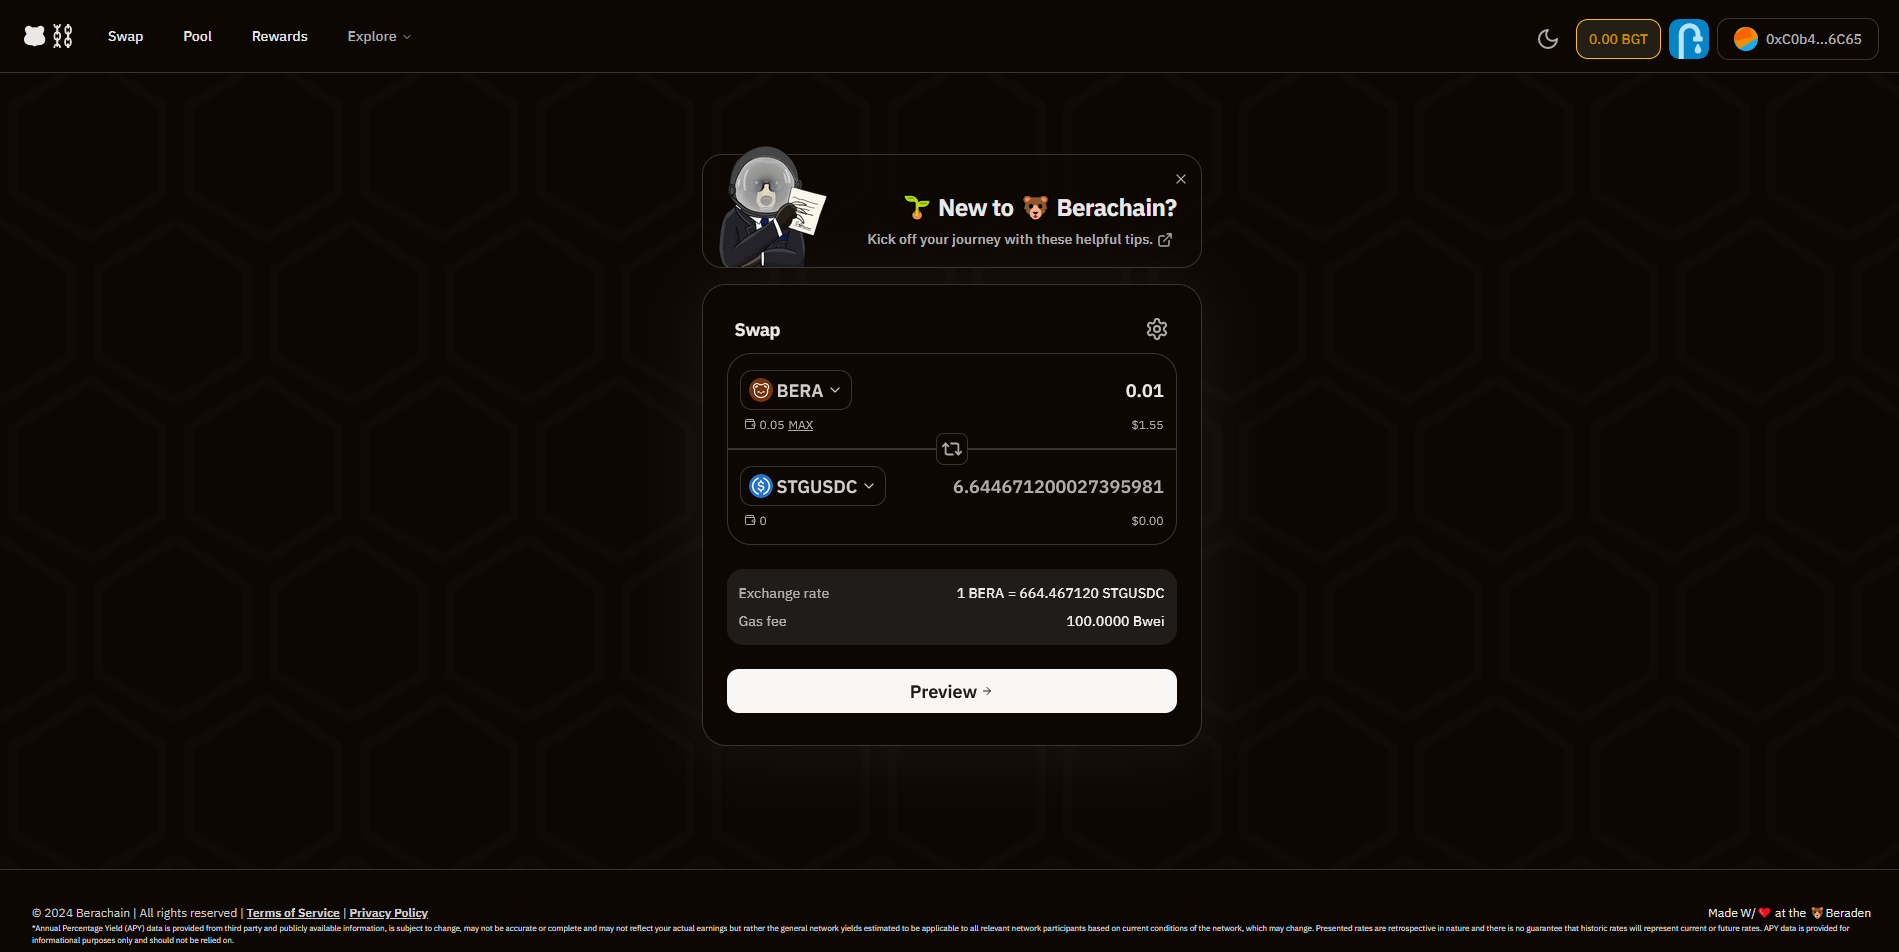
Head over to artio.bex.berachain.com/swap & connect your MetaMask wallet. Allow it to add the BeraChain network to MetaMask.
Now set the first token as "BERA" and the second token as "STGUSDC"
Insert any amount & click "Preview".
Finally, click "Swap", then approve/confirm transaction.
If you're encountering any errors, or JSON RPC errors, then please wait some time and try again.
Step 3
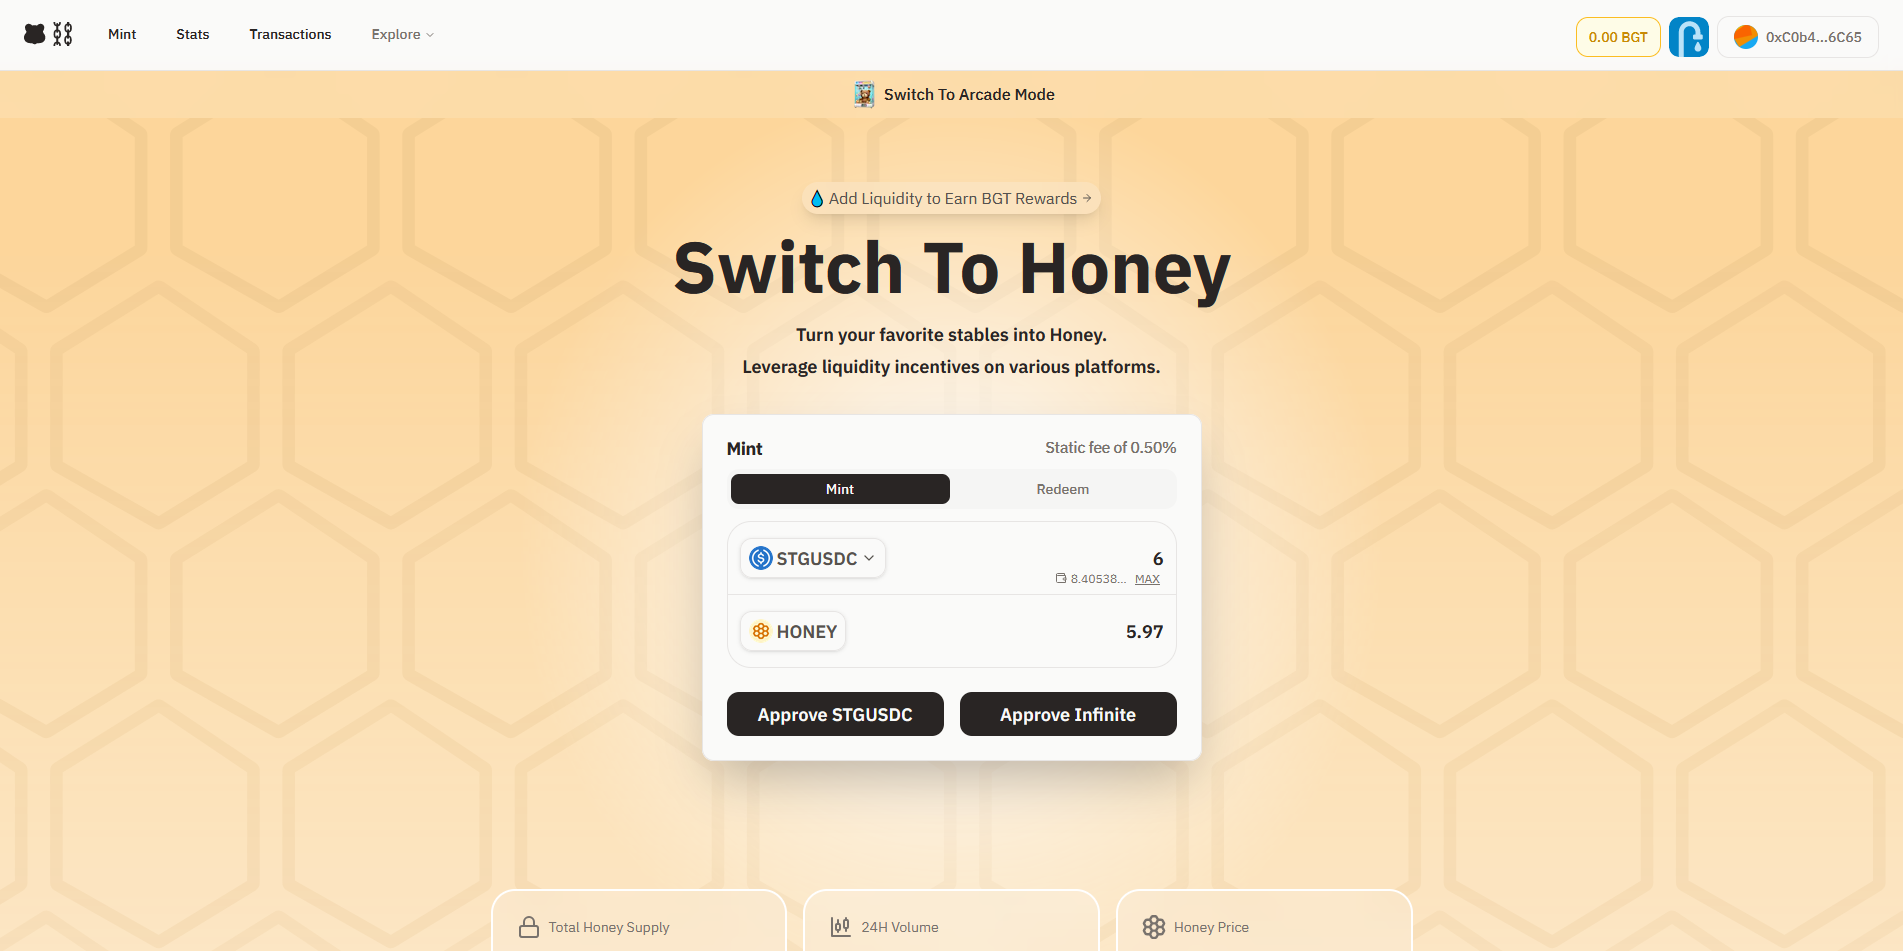
Next, we can mint HONEY using the STGUSDC tokens we received in the previous step!
To do this, head over to artio.honey.berachain.com & once again connect your MetaMask wallet.
Now just insert any amount of STGUSDC and click "Approve STGUSDC", then "Mint".
If you encounter JSON RPC errors then it's likely the testnet is experiencing high traffic.
Step 4
Now let's earn BGT tokens by providing liquidity using our STGUSDC & HONEY!
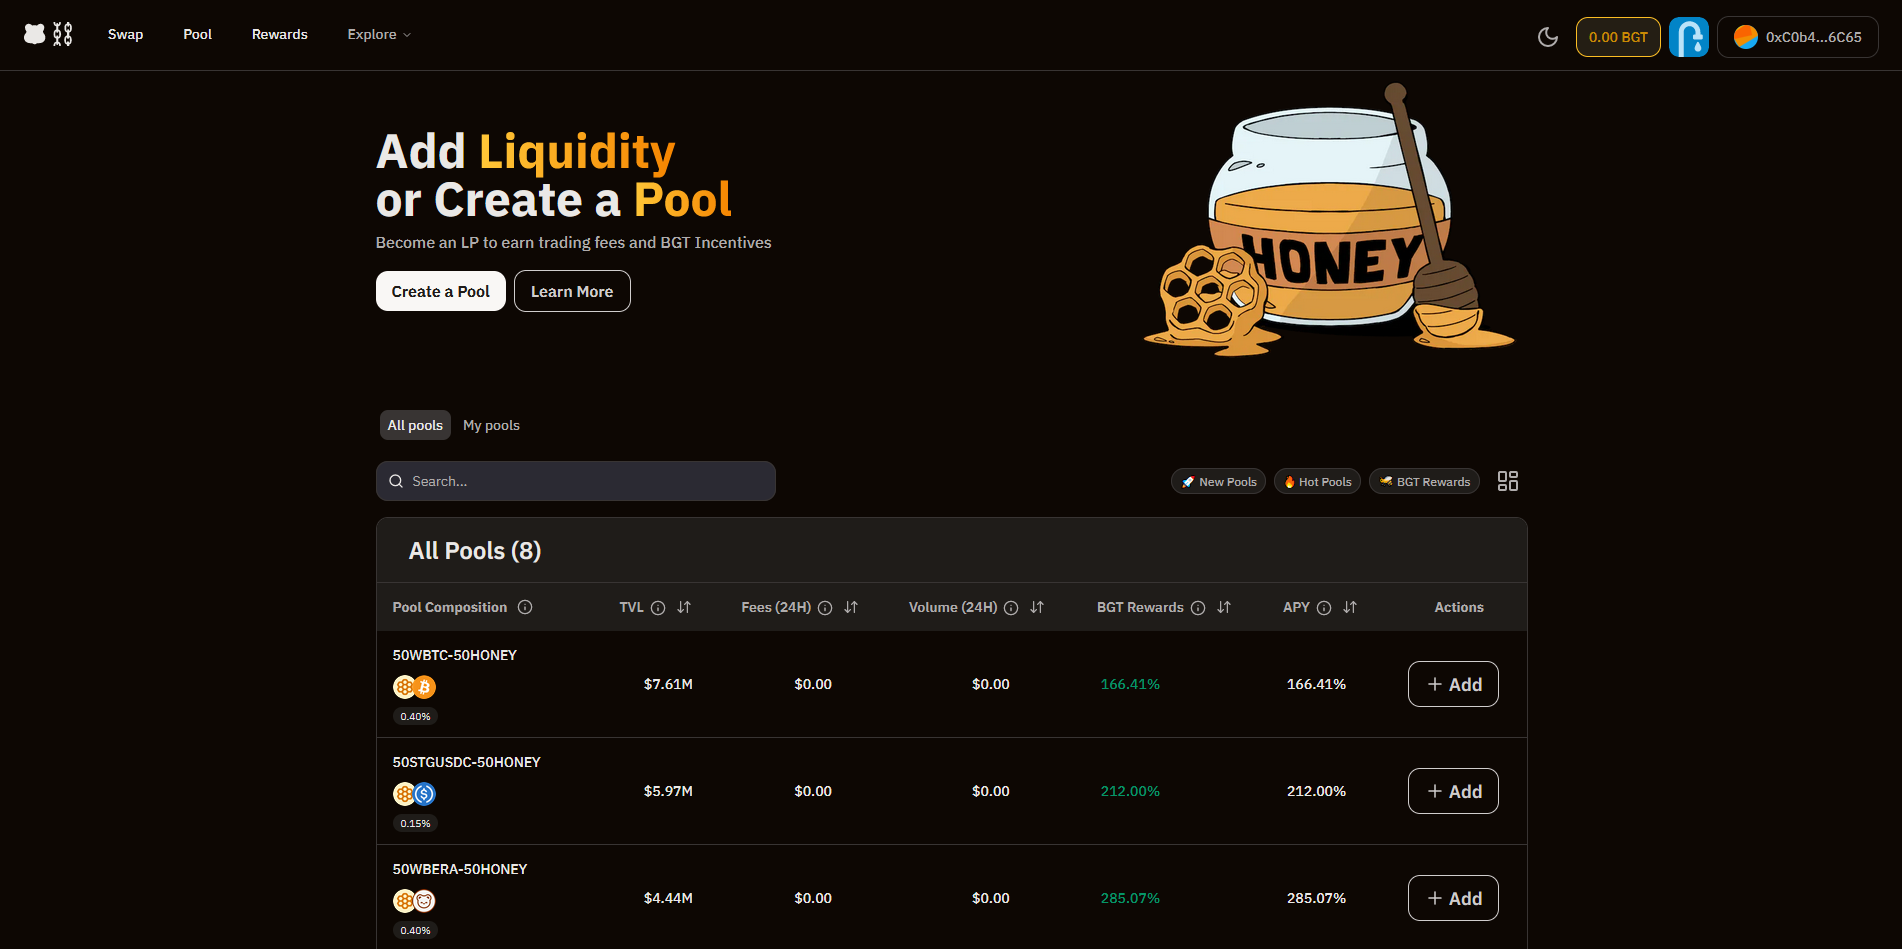
To do this, head over to artio.bex.berachain.com/pool & connect your wallet.
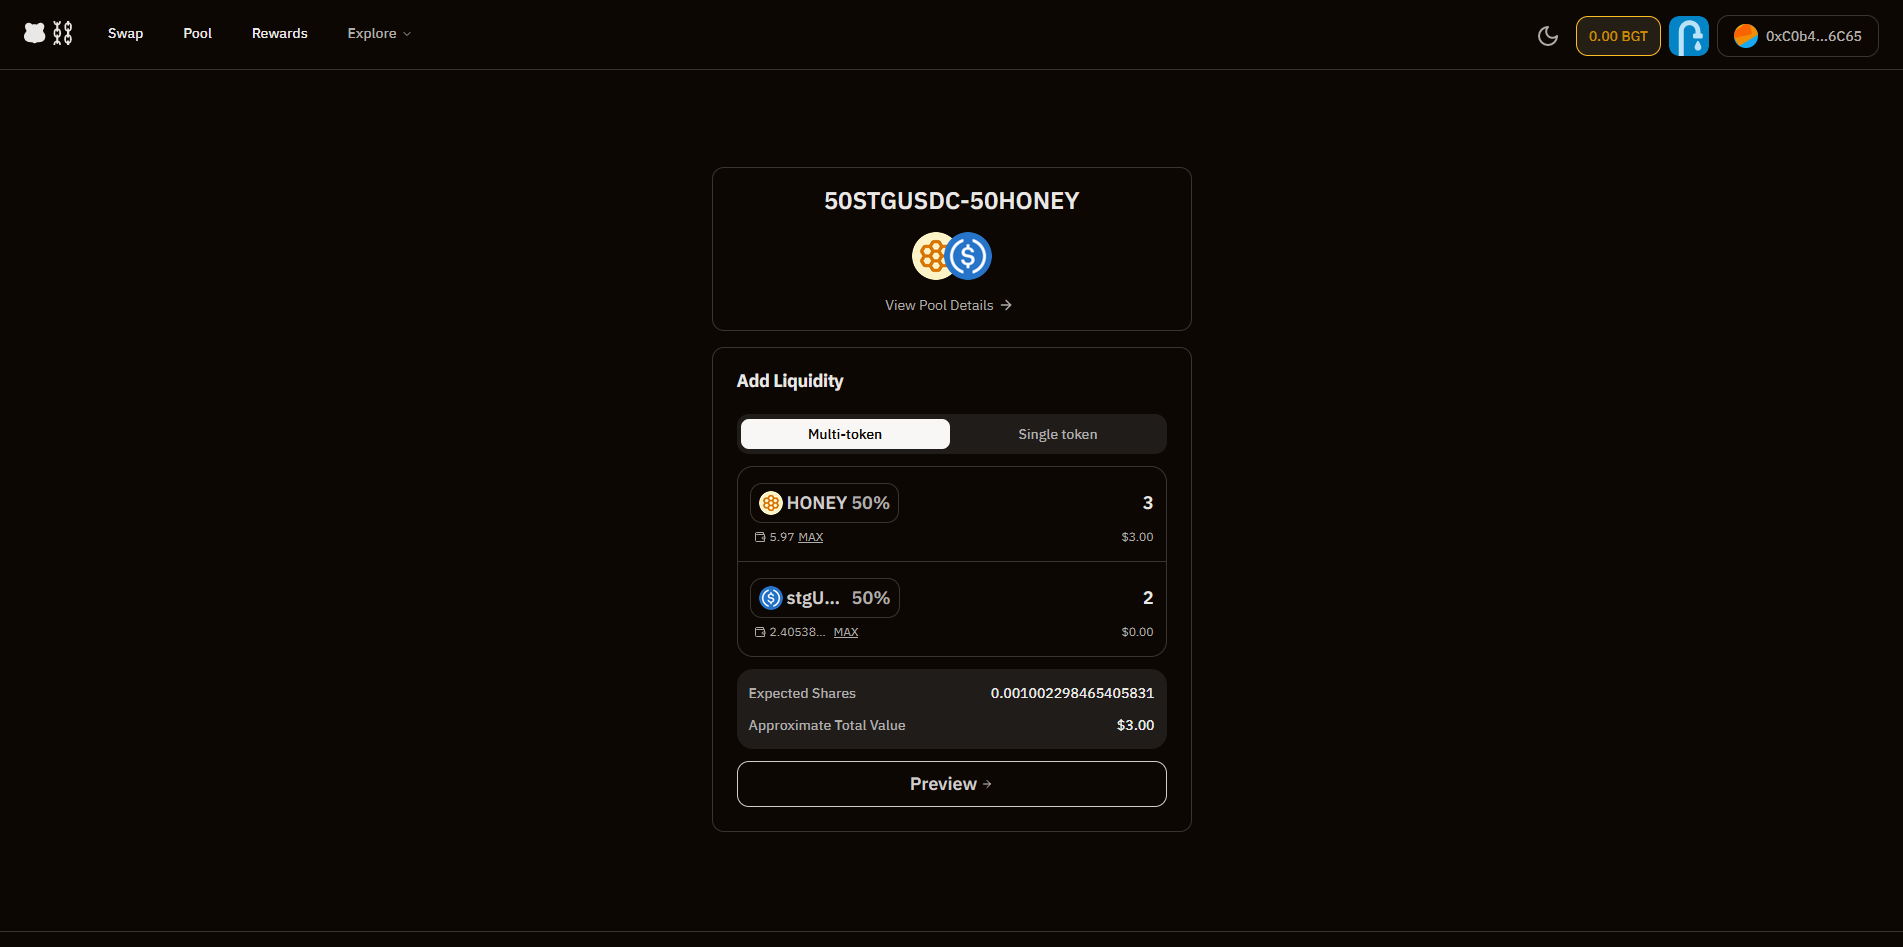
Now select a Pool from the list, I'm going to select the one that uses STGUSDC & HONEY.
Insert any amount of each token and click "Preview", then "Approve HONEY", "Approve stgUSDC", and finally "Add Liquidity".
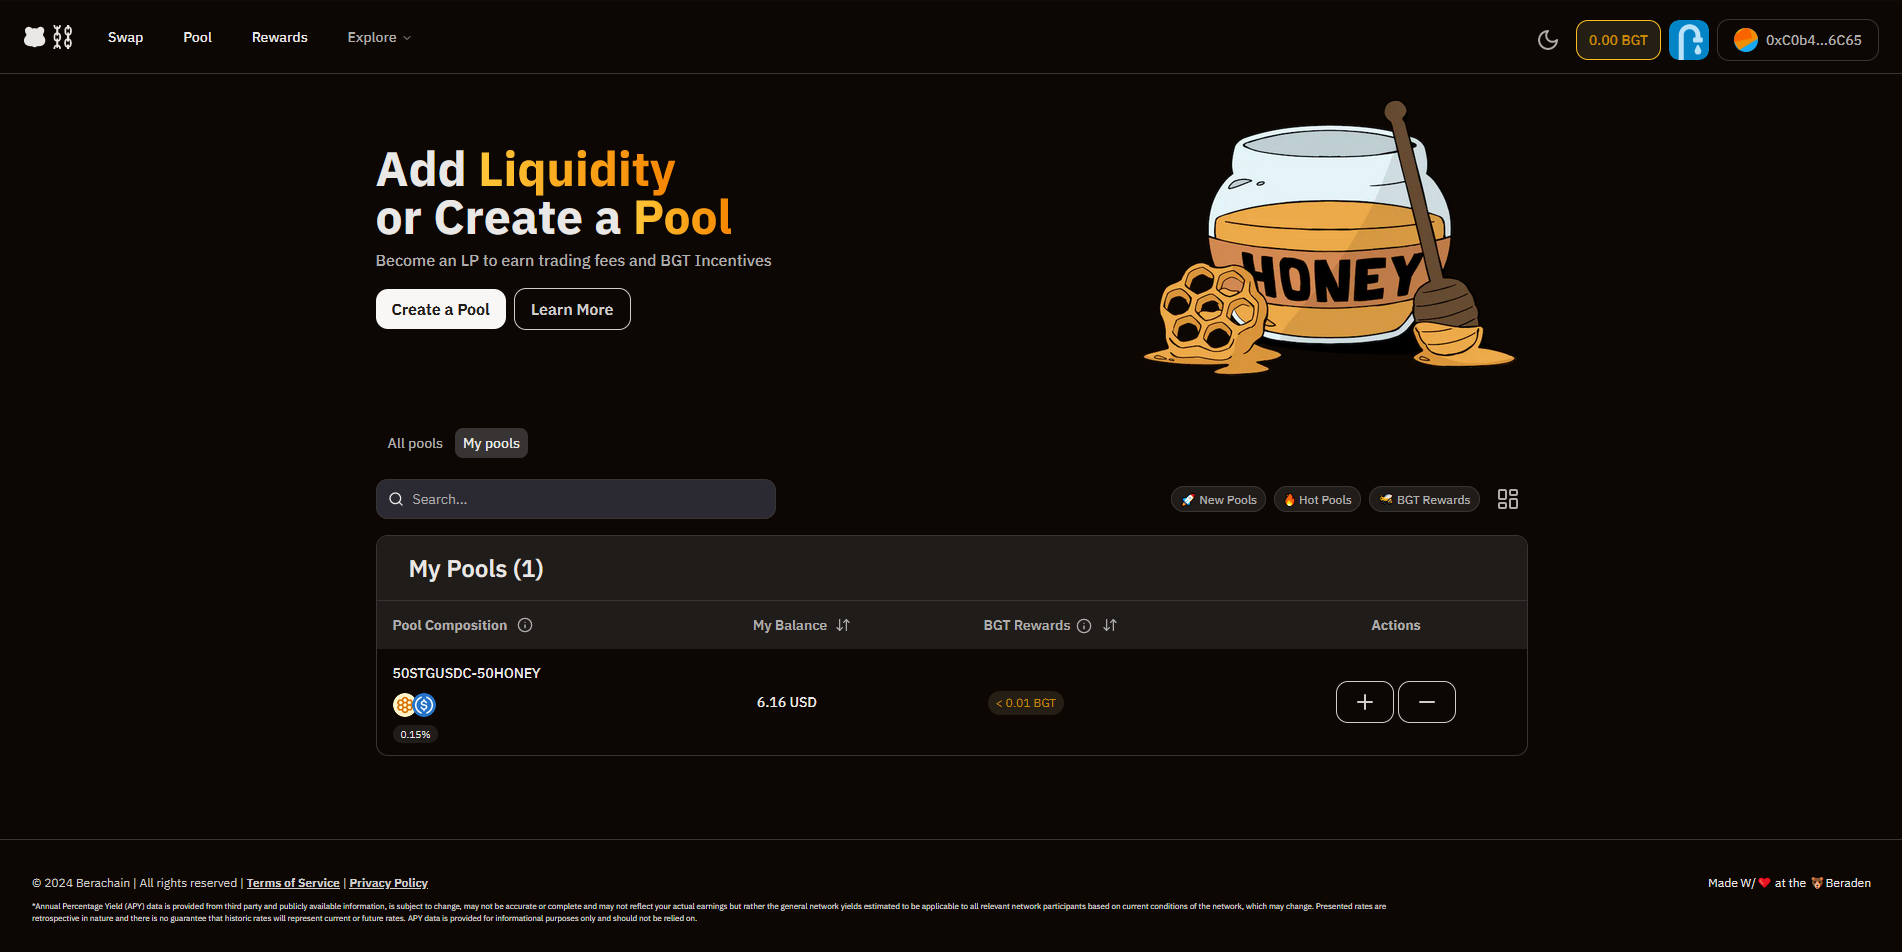
Now we can go to "My Pools" to view & manage our liquidity position.
If you encounter some failing transactions, just try again and they should go through.
Step 5
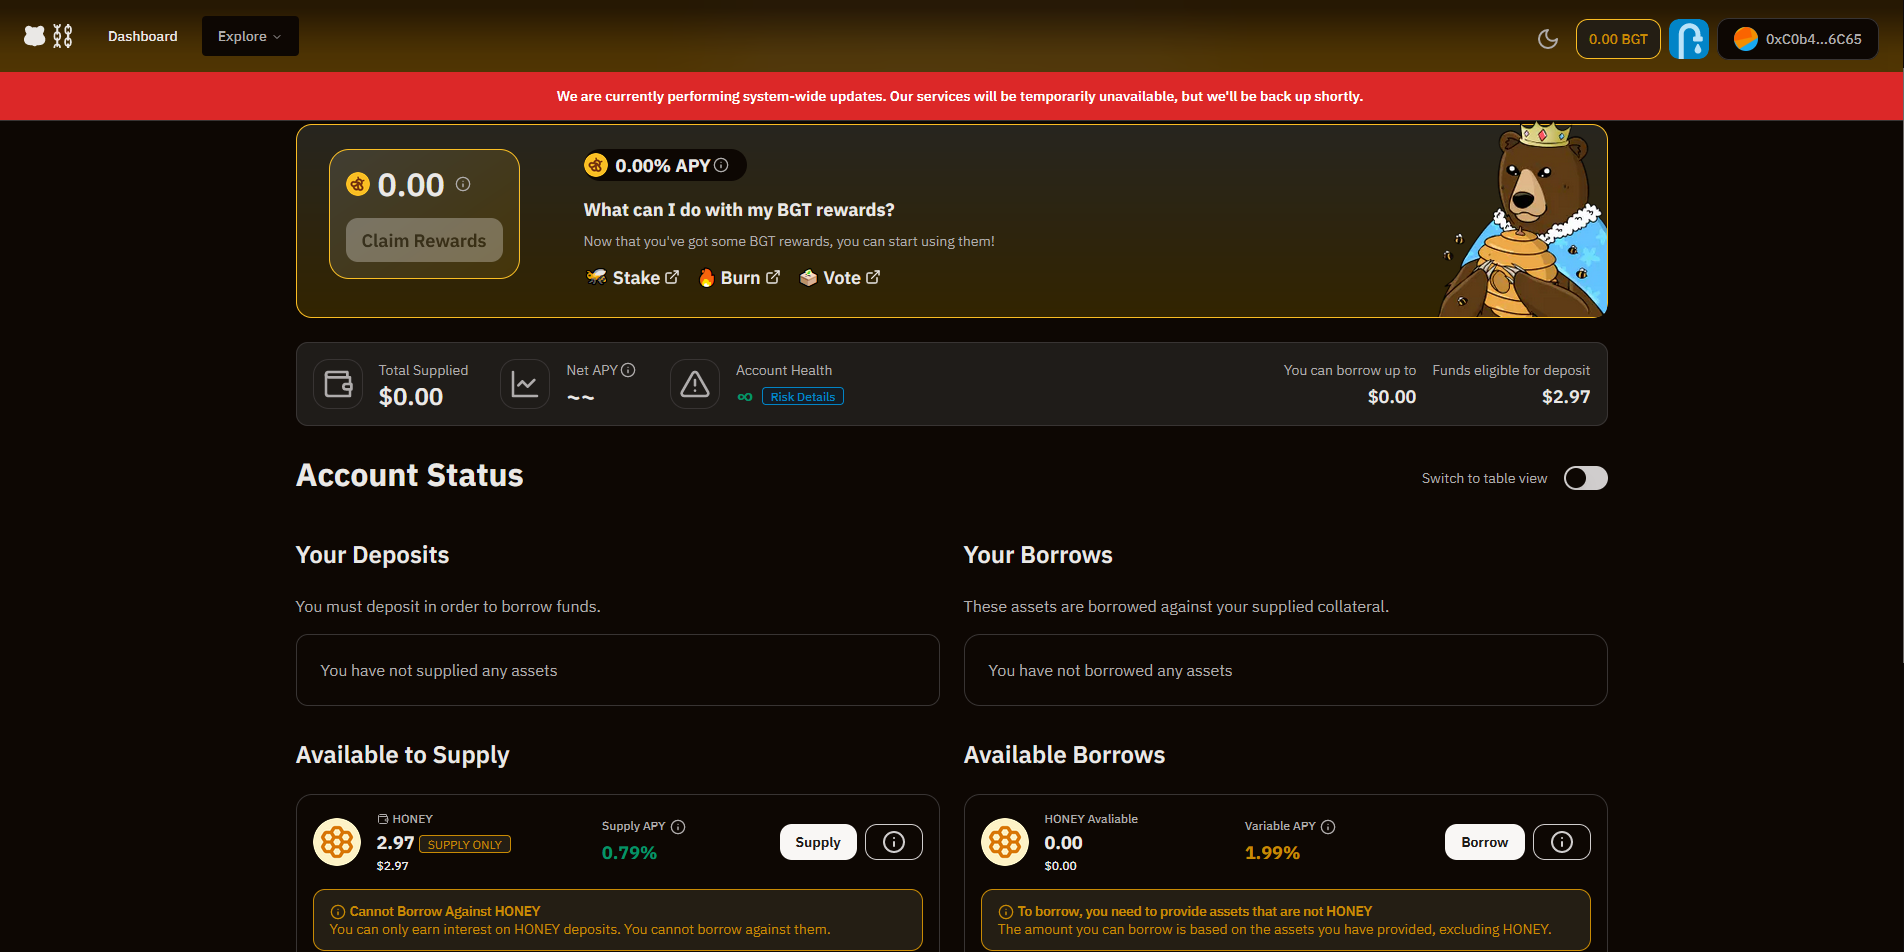
Now let's head over to artio.bend.berachain & connect our wallet.
Scroll down and click "Supply" on HONEY, enter an amount, approve and confirm transaction.
We can also "Borrow" HONEY.
Step 6
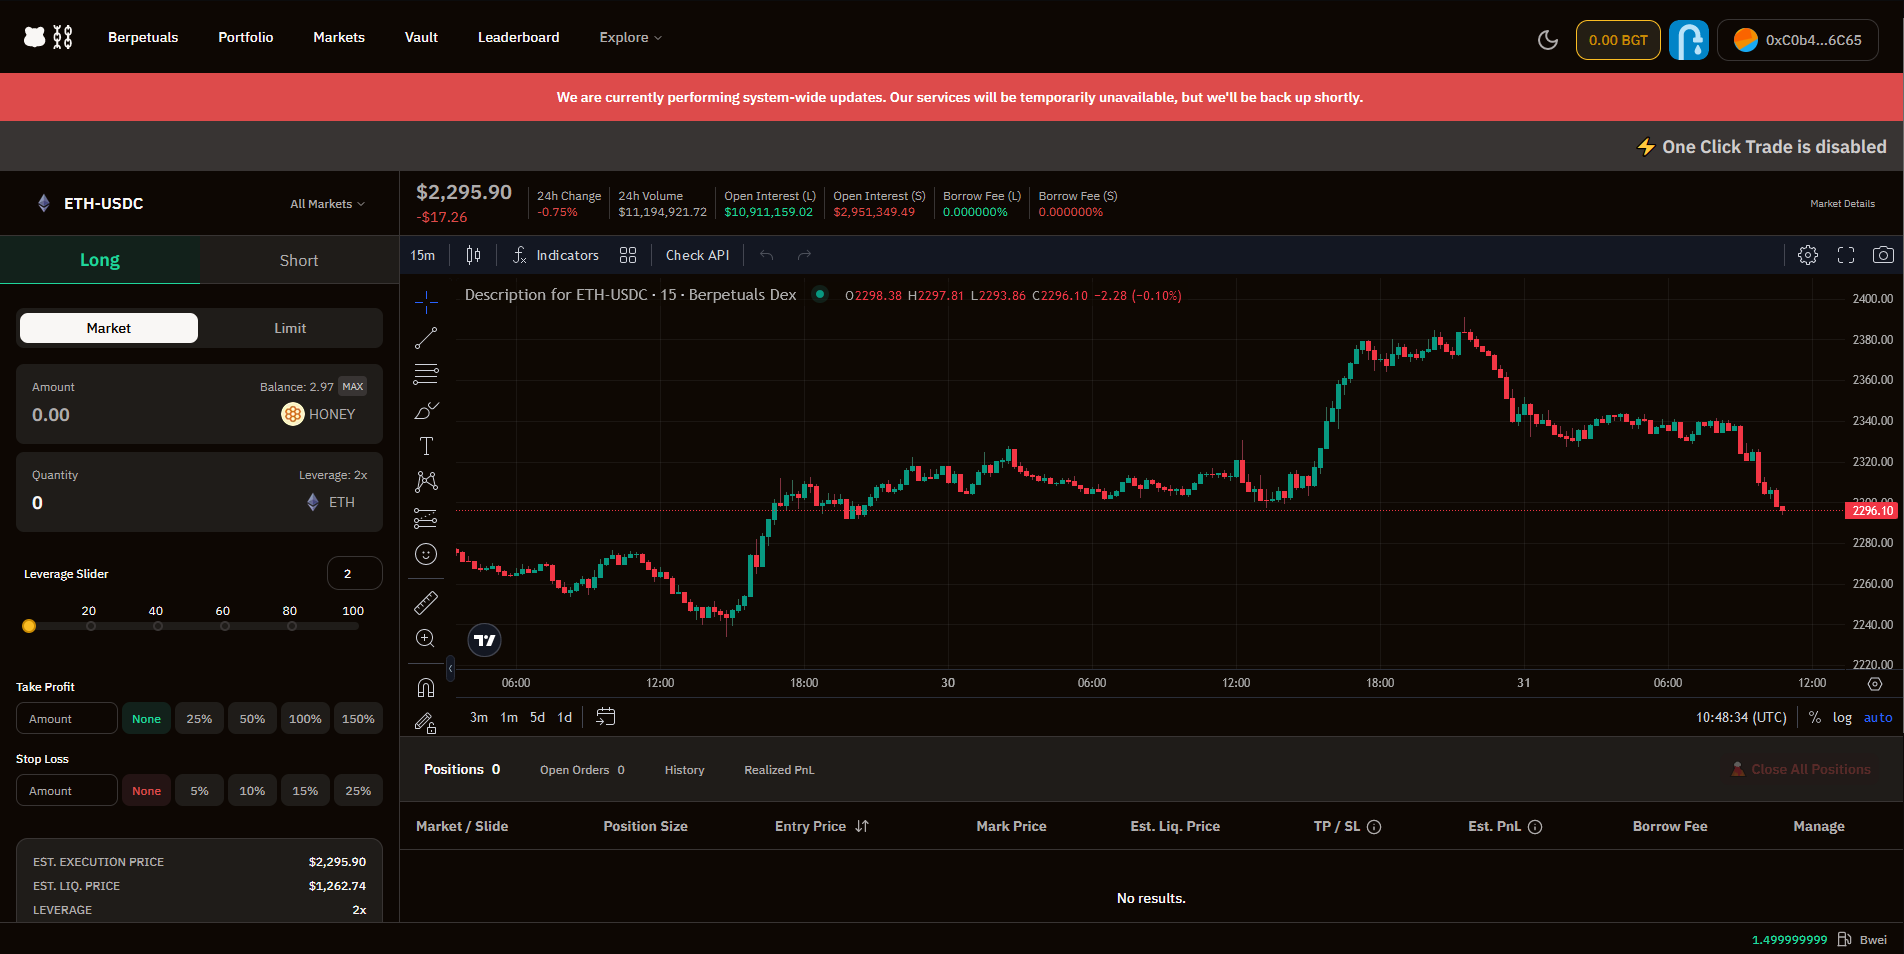
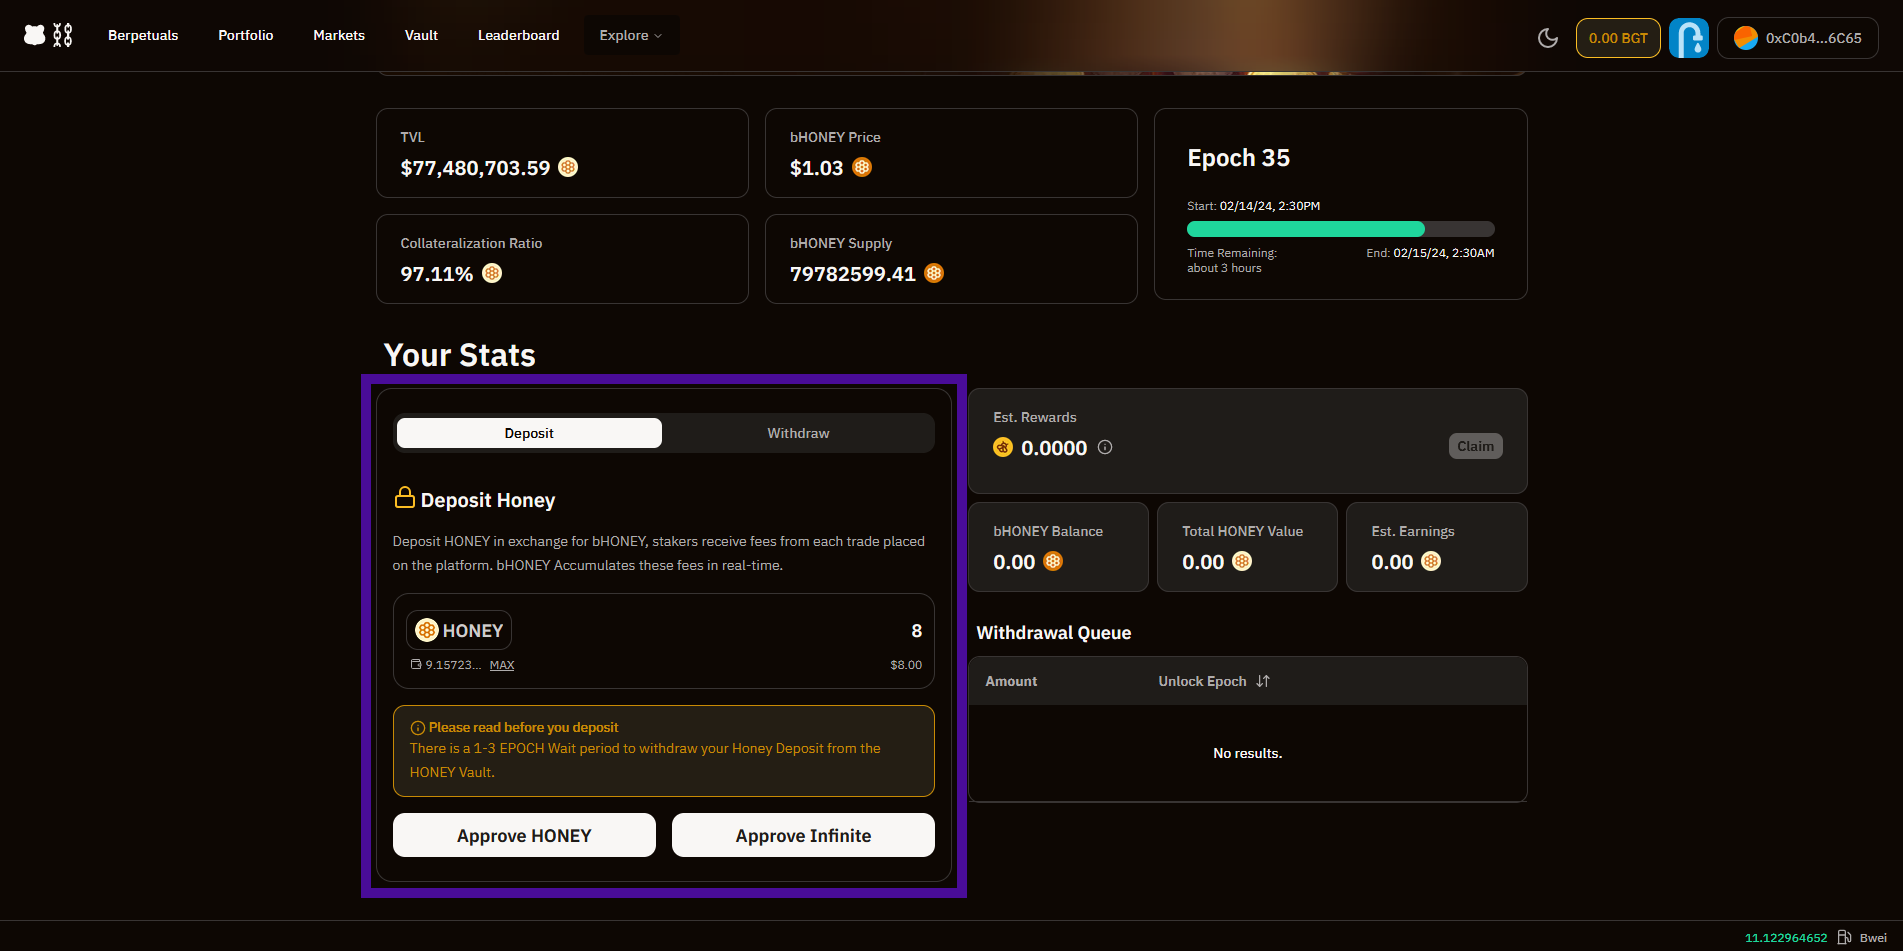
Now let's head over to artio.berps.berachain.com/berpetuals & connect our wallet.
Here we can open Long/Short positions and leverage.
We should also select "Vault" at the top and deposit HONEY.
Step 7
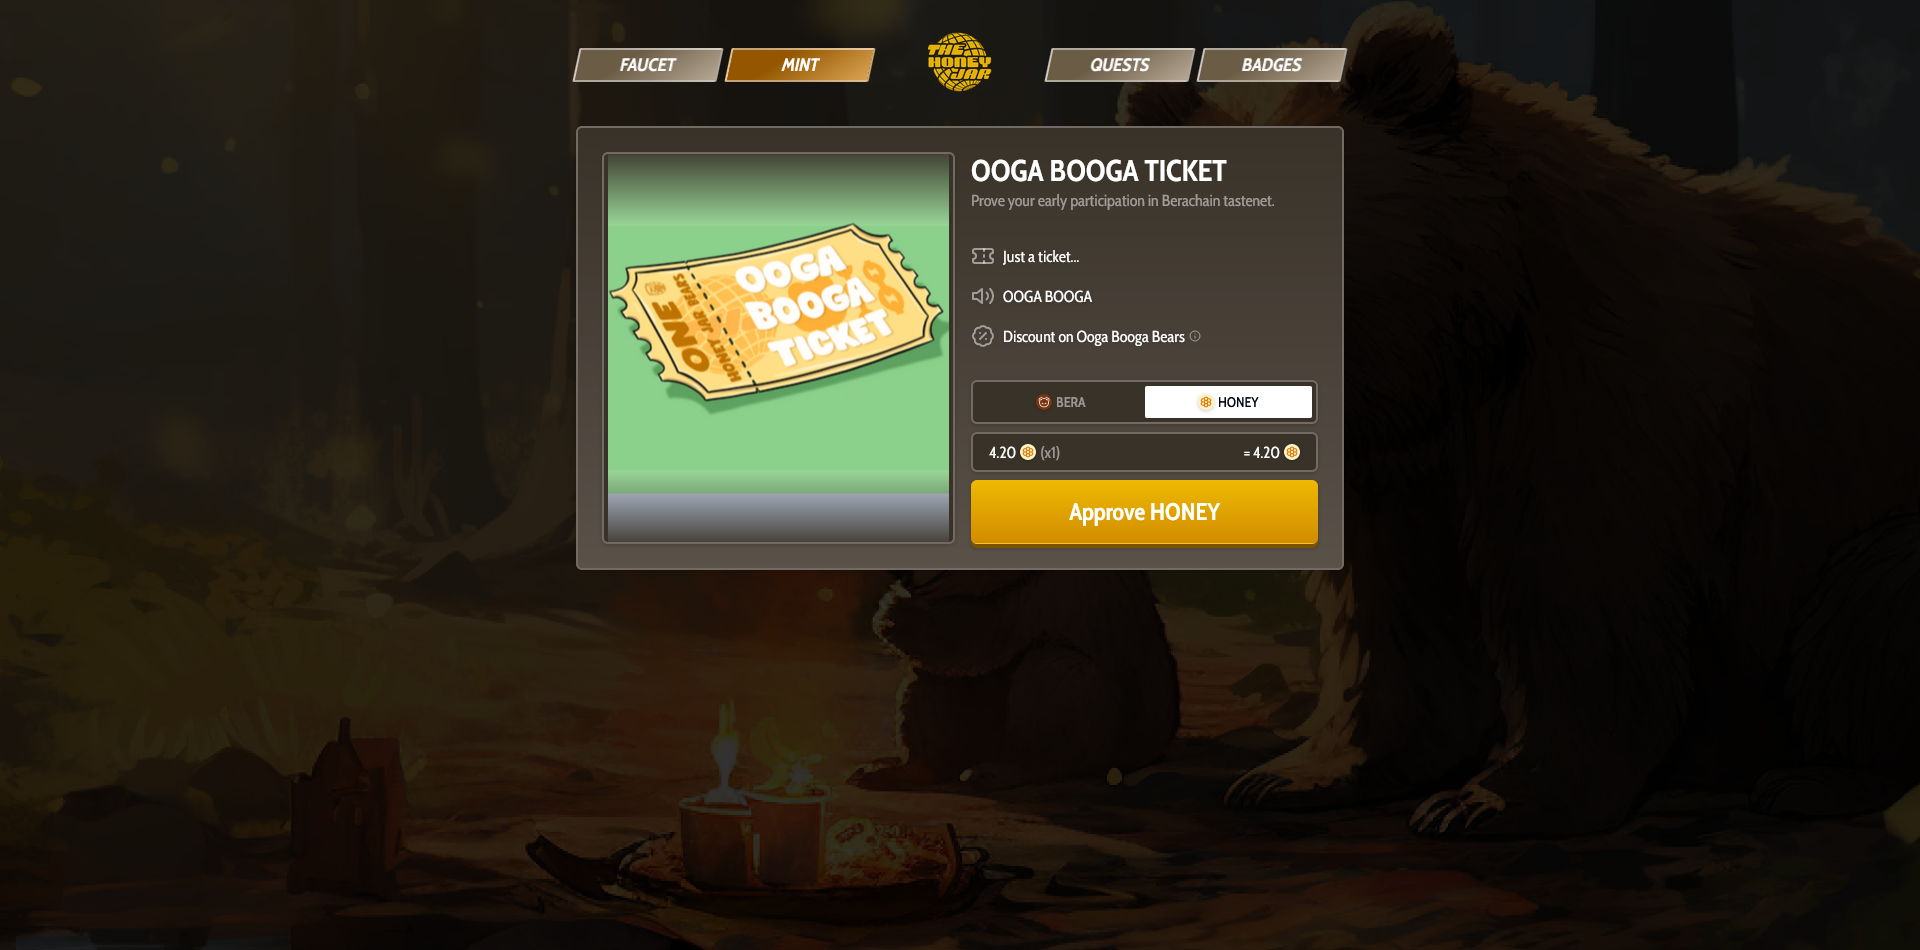
Now let's mint an NFT!
Head over to faucet.0xhoneyjar.xyz/mint & connect your wallet.
We can use either BERA or HONEY to mint the NFT.
If you need more BERA or HONEY, you can either use the BERA Faucet or you can swap BERA for HONEY at: artio.bex.berachain.com/swap
Step 8
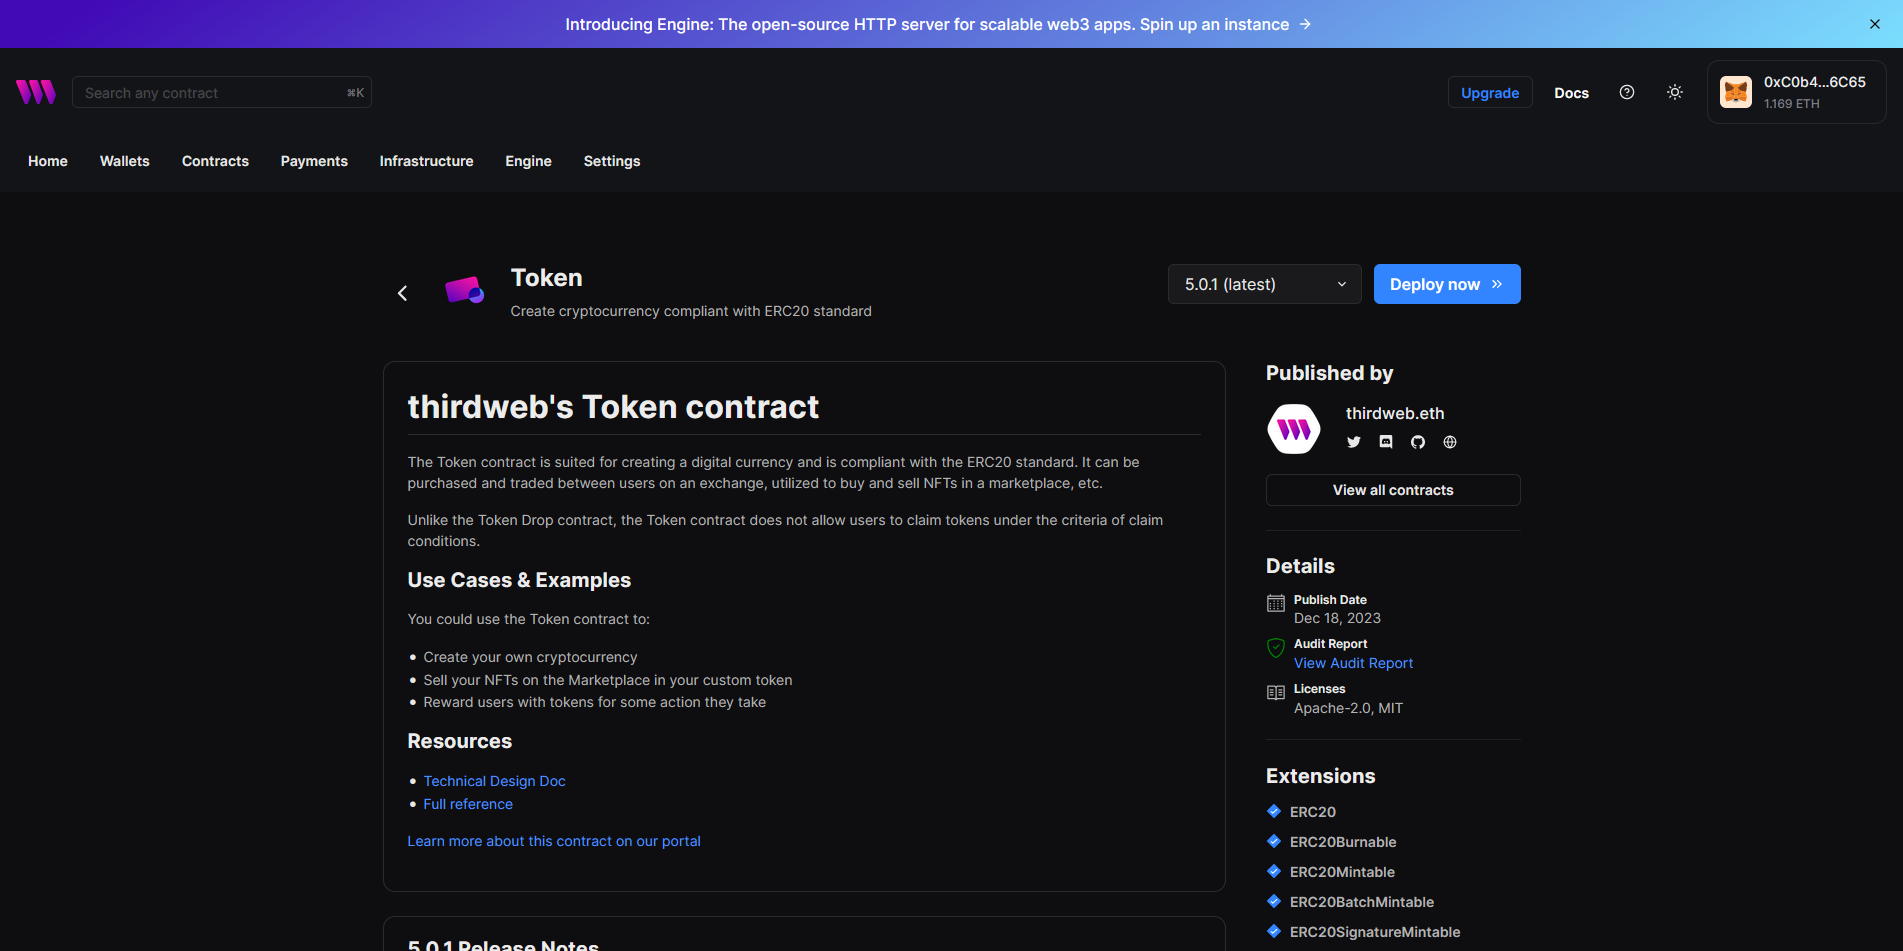
Next, we're going to deploy a token contract.
To do this, we need to go to thirdweb.com/thirdweb.eth/TokenERC20, make sure your network is set to BeraChain and then connect your wallet.
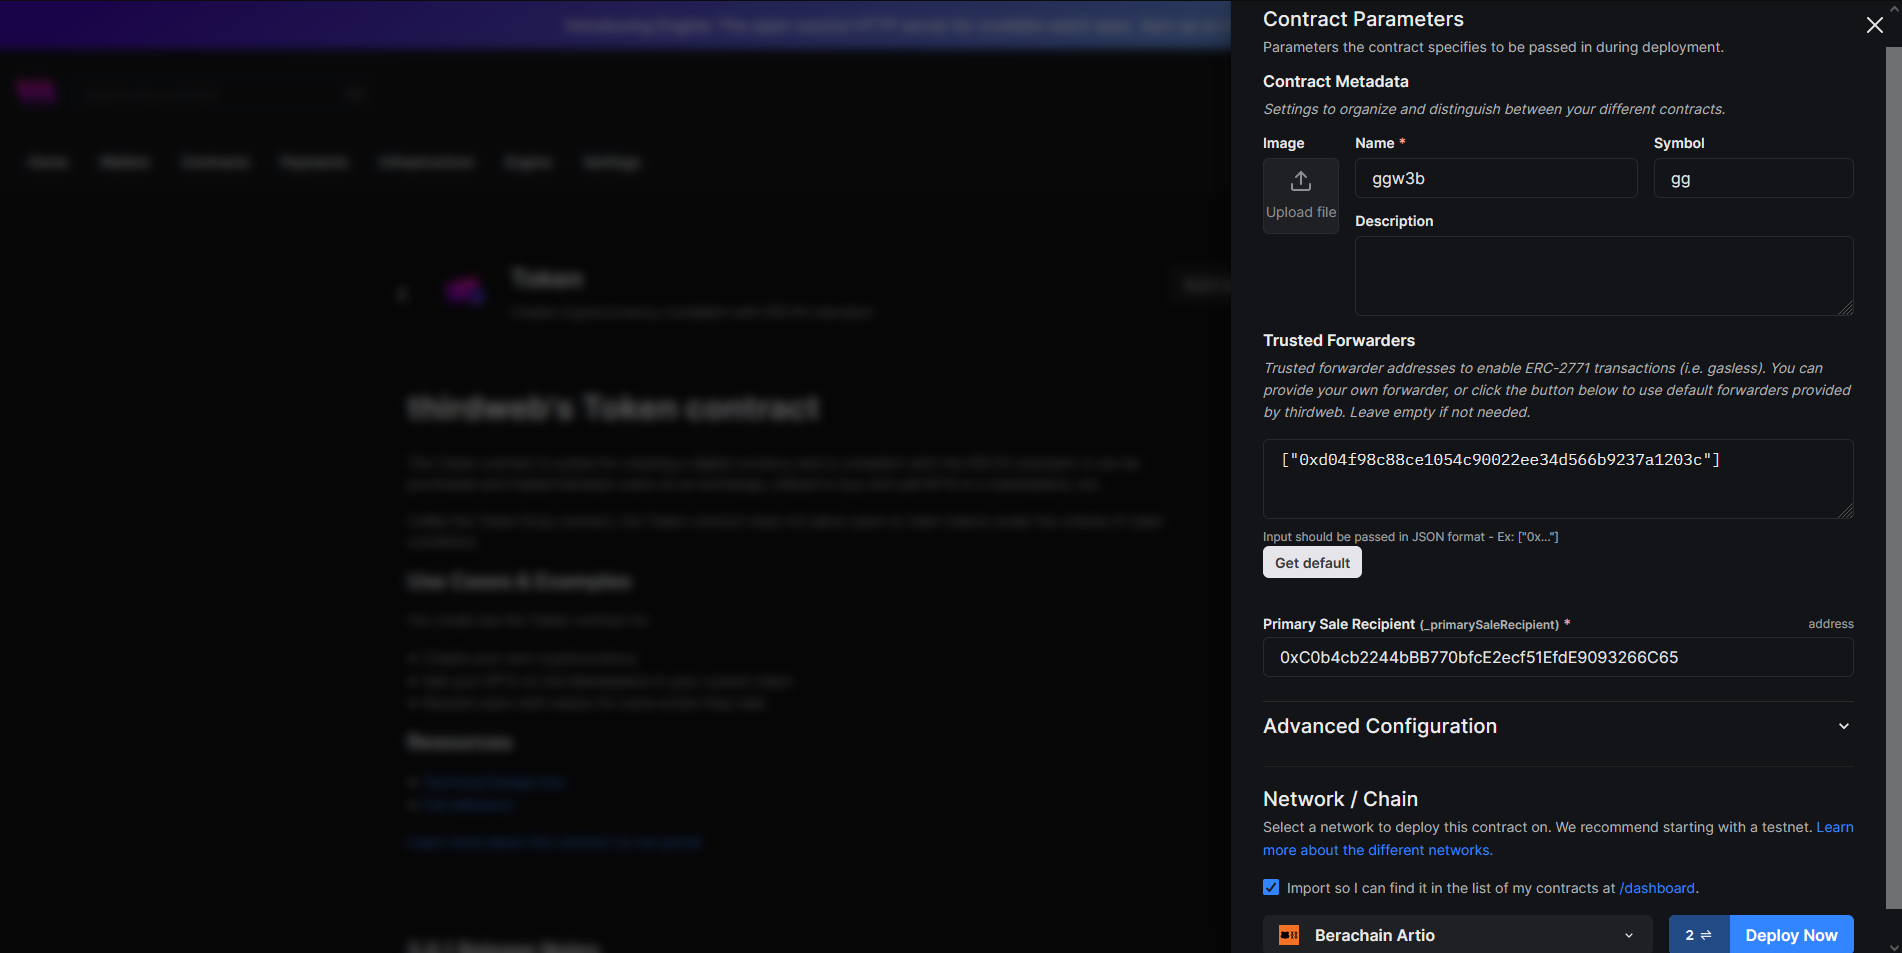
Press "Deploy Now", fill out some information such as token name, image (optional) and set the "Primary Sale Recipient" as your own wallet address.
Finally, click "Deploy Now".
Step 9
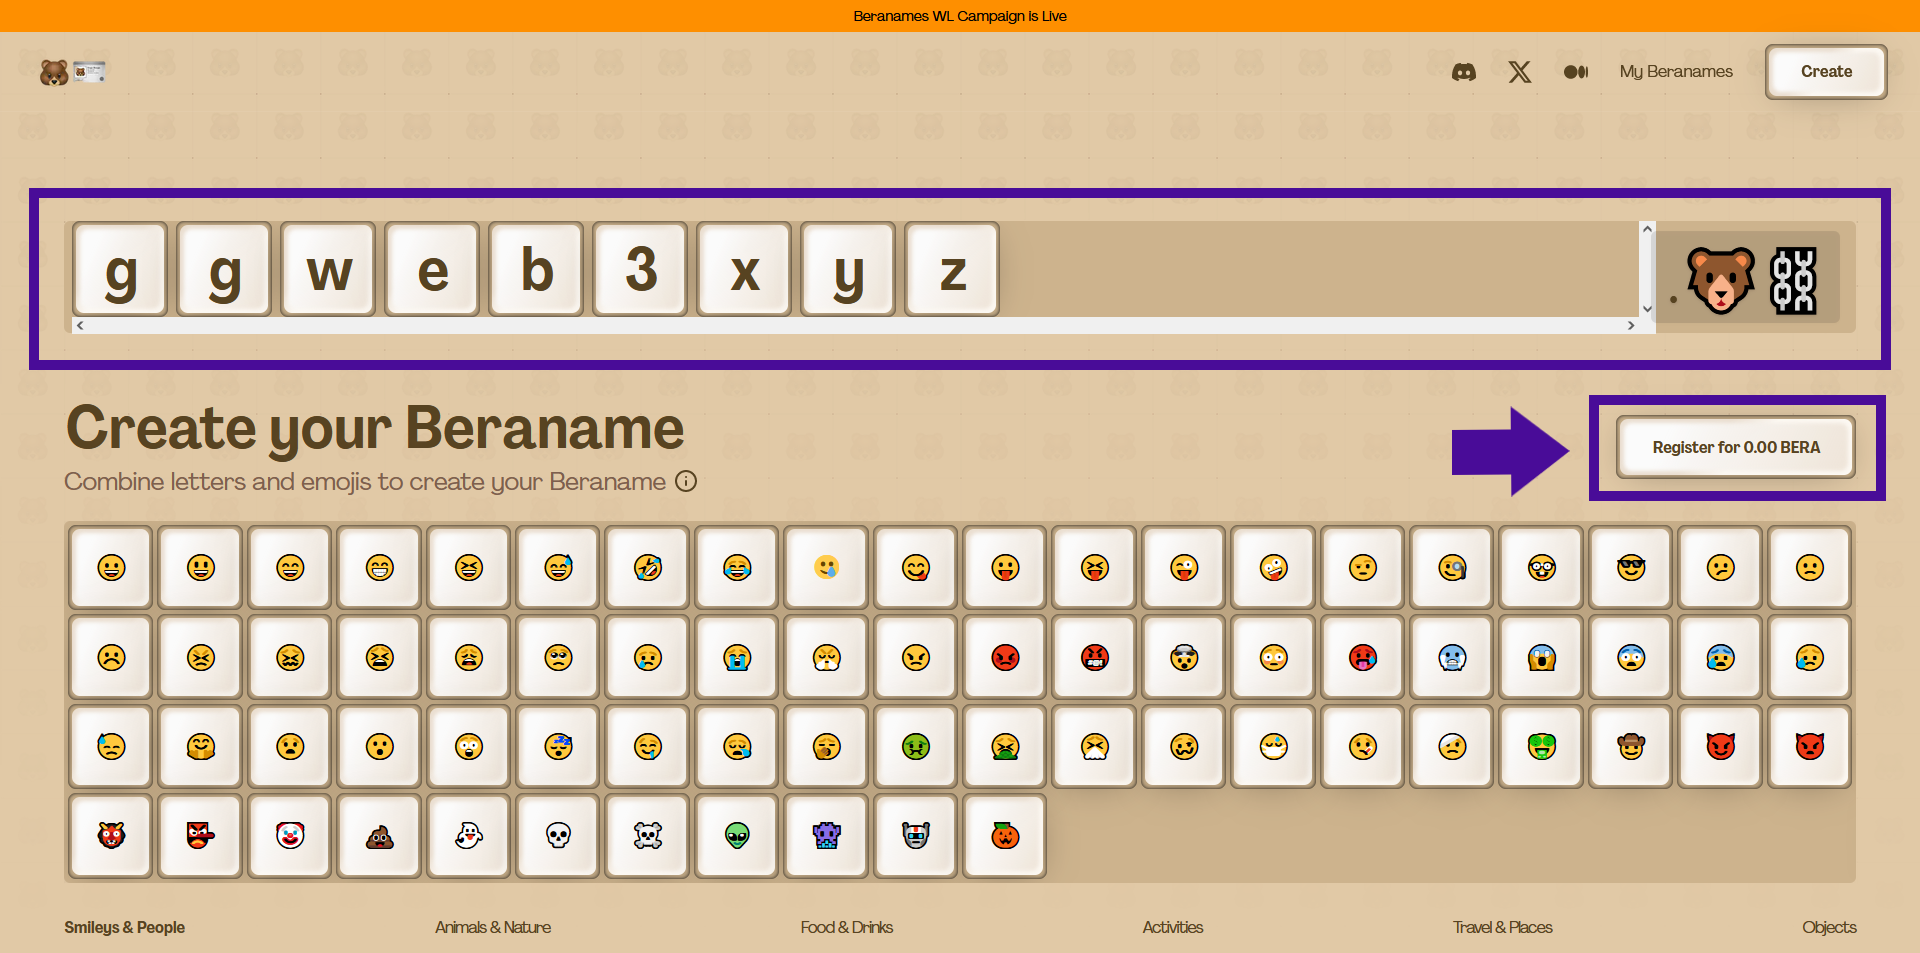
Next, we can create a Bera domain over at: BeraNames
Connect wallet and type out a custom domain of your choice, then hit "Register".
Once you've done that, you can head over to the BeraNames Galxe Campaign to complete some extra tasks.
Step 10
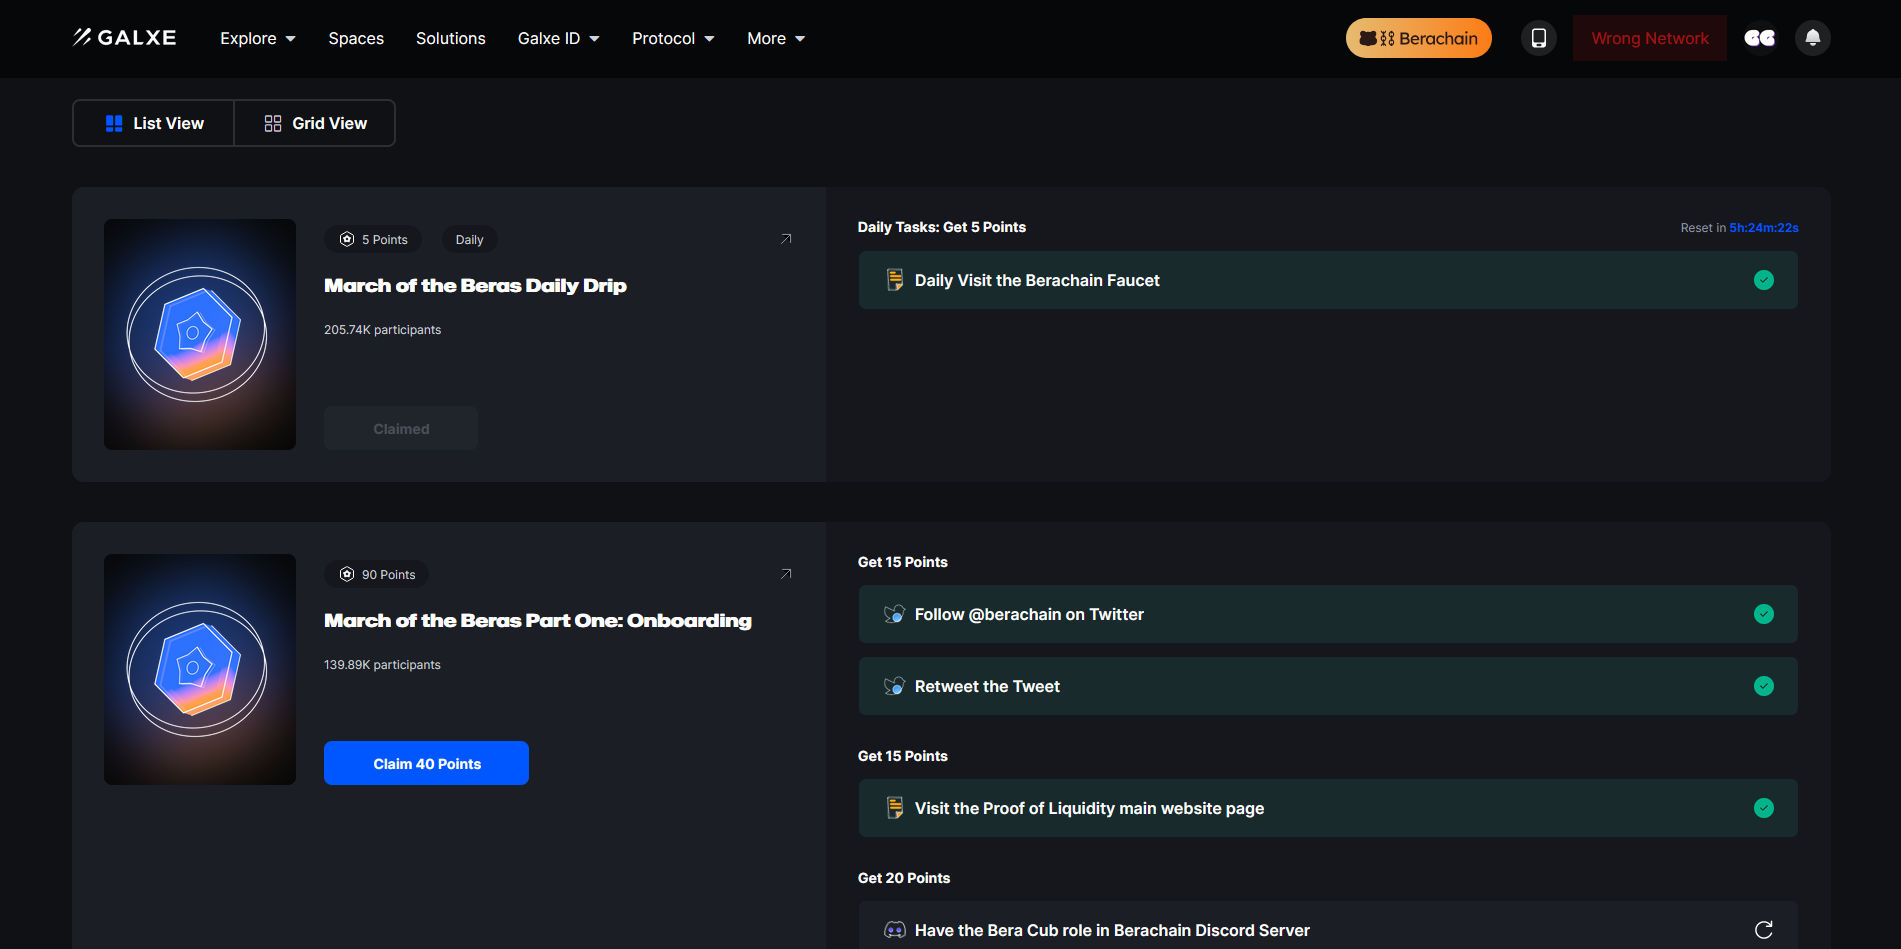
Finally, let's complete some quick tasks on the BeraChain Galxe Campaign & claim some points.
The Bera Cub role in Discord can be earned by being consistently active or assisting other users.
Outro
If you found this guide helpful and informative, consider sharing it on social media. You can also stay updated on the latest content and discussions by following us on X (formely Twitter): @BitBlogxyz
Disclaimer: This guide is provided strictly for educational purposes and should not be considered financial advice. The content is designed to offer insights into various web3 topics & projects.
We do not recommend putting real money into random projects without conducting plenty of your own research first. It is crucial to make informed decisions based on your own understanding and risk tolerance.