Introduction
In this guide, we're going to take a look at Espresso on the Milan Devnet and how to interact with the faucet & bridge.
What is Espresso?
Caldera integrates with Espresso, a decentralized sequencing network, enabling Decentralized Sequencing. Instead of relying on a rollup's mempool, user transactions are directed to Espresso Sequencer.
Rollup nodes retrieve sequenced transactions from Espresso's sequencer node, eliminating the need for a centralized sequencer and ensuring fairness in transaction processing.
Caldera is a deployment platform designed for creating customizable, high-performance rollups using frameworks like Arbitrum Nitro and Optimism Bedrock. Each Caldera rollup includes efficient RPC nodes, a block explorer, data indexer, and a bridge to the settlement chain. Moreover, it offers seamless integration with over 40 leading Web3 infrastructure providers.
The Espresso Sequencer involves interactions among various components:
- HotShot network: This network comprises numerous nodes, although for simplicity, it's often viewed as a single node for external interactions. Internally, it communicates with thousands of replicas based on a consensus protocol. Client applications can communicate with any HotShot node or multiple nodes for resilience.
- L1 (layer 1) blockchain: This blockchain serves as the platform where rollups utilizing the sequencer post state checkpoints. The HotShot network also checkpoints its state and history on L1, acting as an interface for the rollups. While the primary focus is integrating with Ethereum as the layer 1, the sequencer could potentially interface with other smart contract platforms like Solana or layer 2 solutions like Arbitrum.
- L2 (layer 2) rollups: These are applications that utilize HotShot as a sequencer. They range from app-specific chains to fully-featured smart contract systems, such as EVM rollups. Each L2 operates as a rollup: it receives ordered transactions, executes them off-chain in a deterministic virtual machine, and periodically posts state updates to L1, accompanied by either a proof of validity (for ZK-rollups) or a potential fraud proof (for optimistic rollups).
Step 1
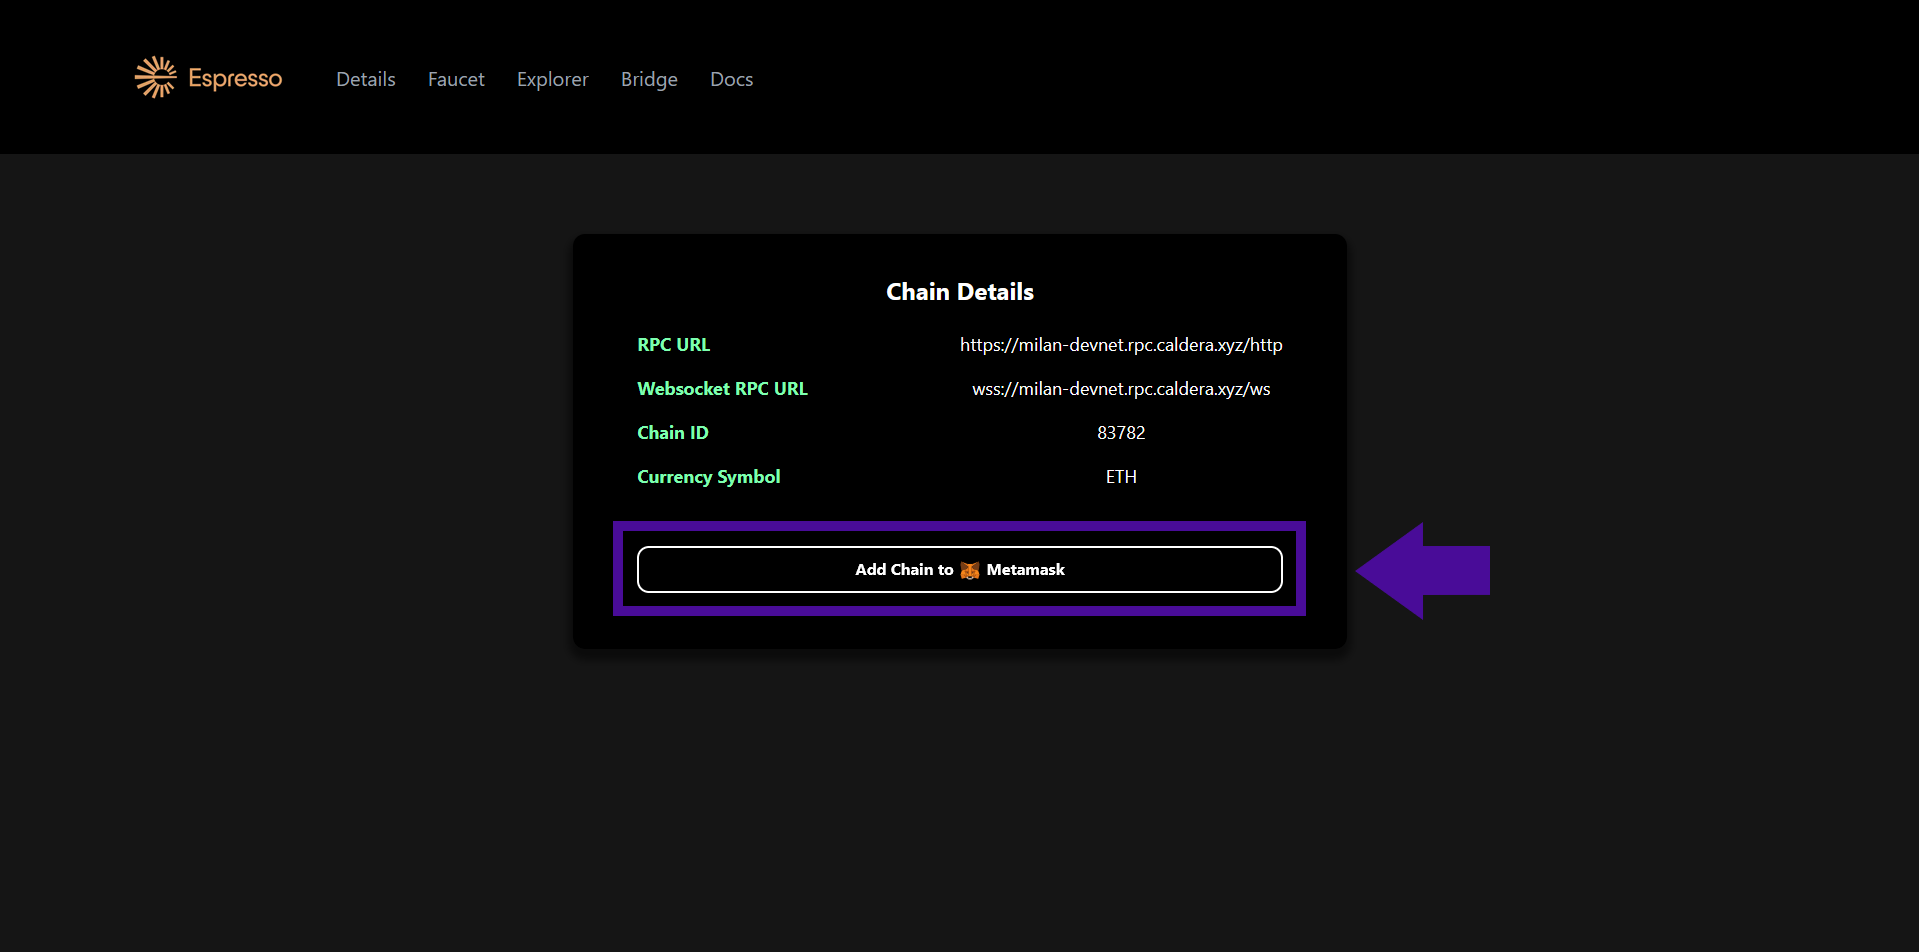
To get started, we need to add Milan network to our MetaMask wallet, to do this, go to milan.caldera.dev & click "Add chain to MetaMask".

Step 2
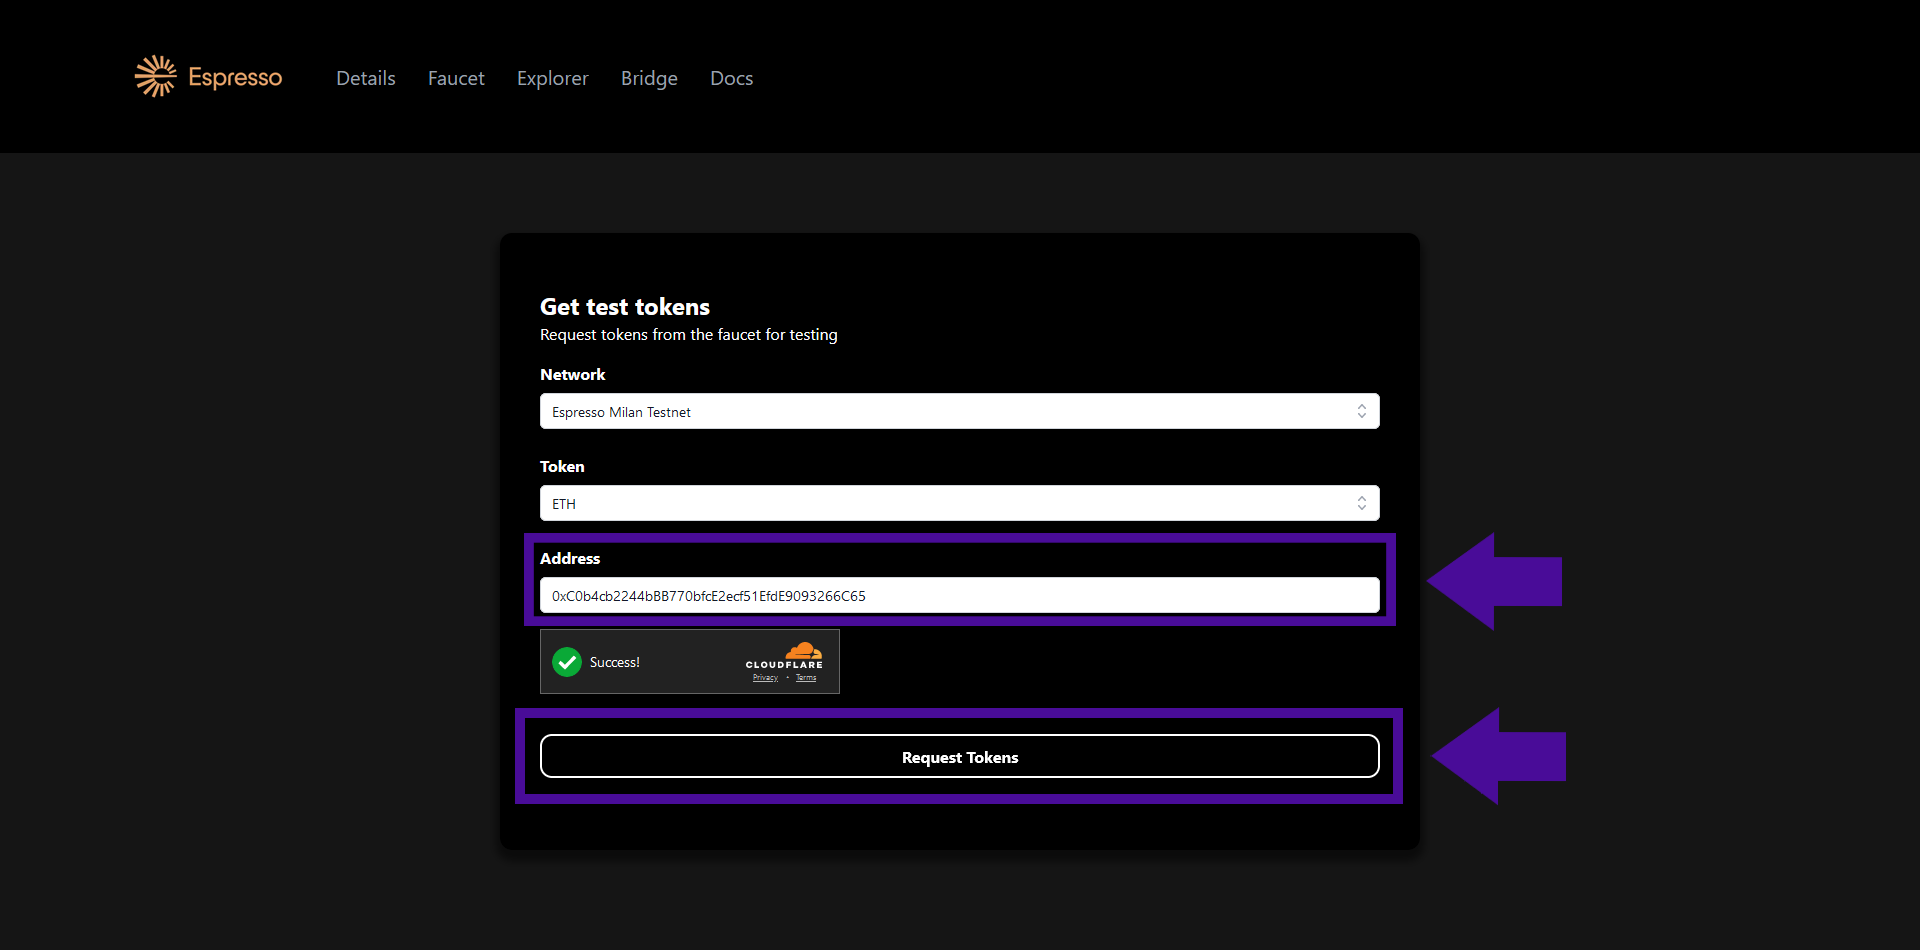
Next, we need to claim some test tokens so that we can test the networks features.
Head over to milan.caldera.dev/faucet, insert your MetaMask wallet address and hit "Request Tokens".

Step 3
Now let's bridge some ETH from Sepolia to Milan.
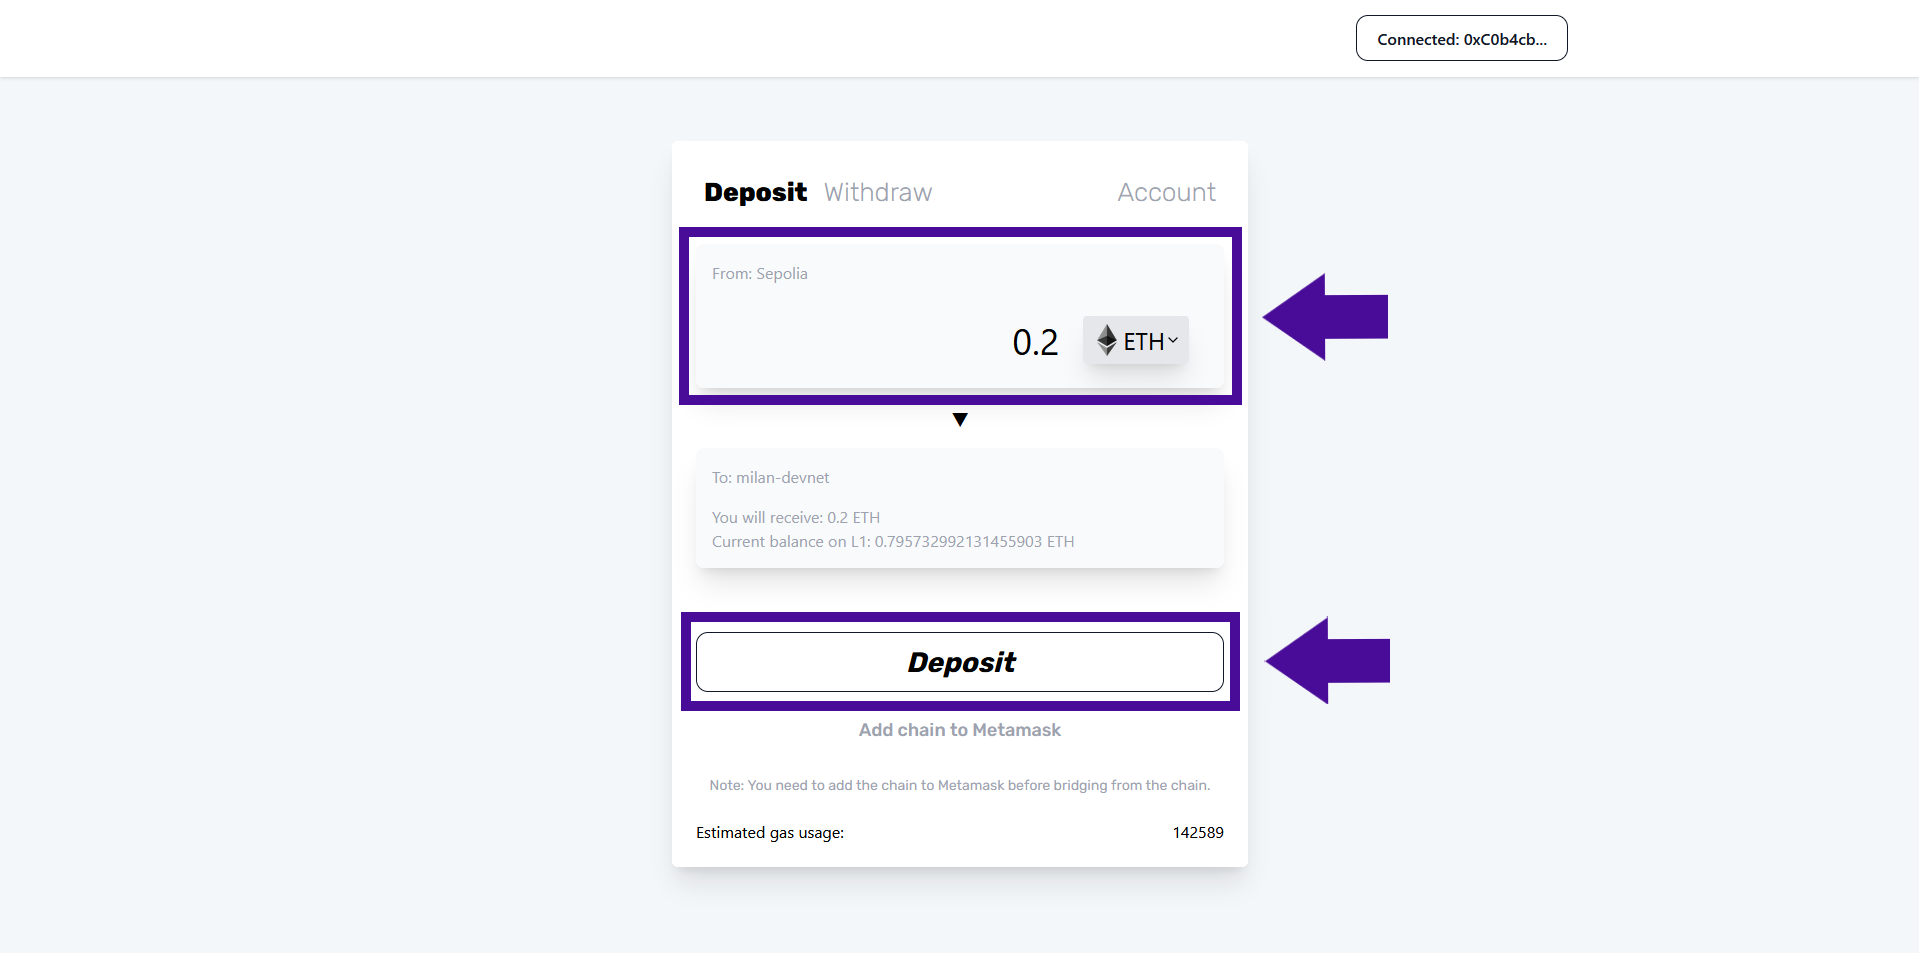
To do this, go to milan-devnet.calderabridge.xyz & connect your wallet.
Insert any amount of ETH and hit "Deposit".
If you don't have any test ETH on Sepolia, you can either go to: infura.io/faucet/sepolia, or sepoliafaucet.com to claim some.
We can also select the "Withdraw" tab to bridge some ETH back to Sepolia from Milan.

Step 4
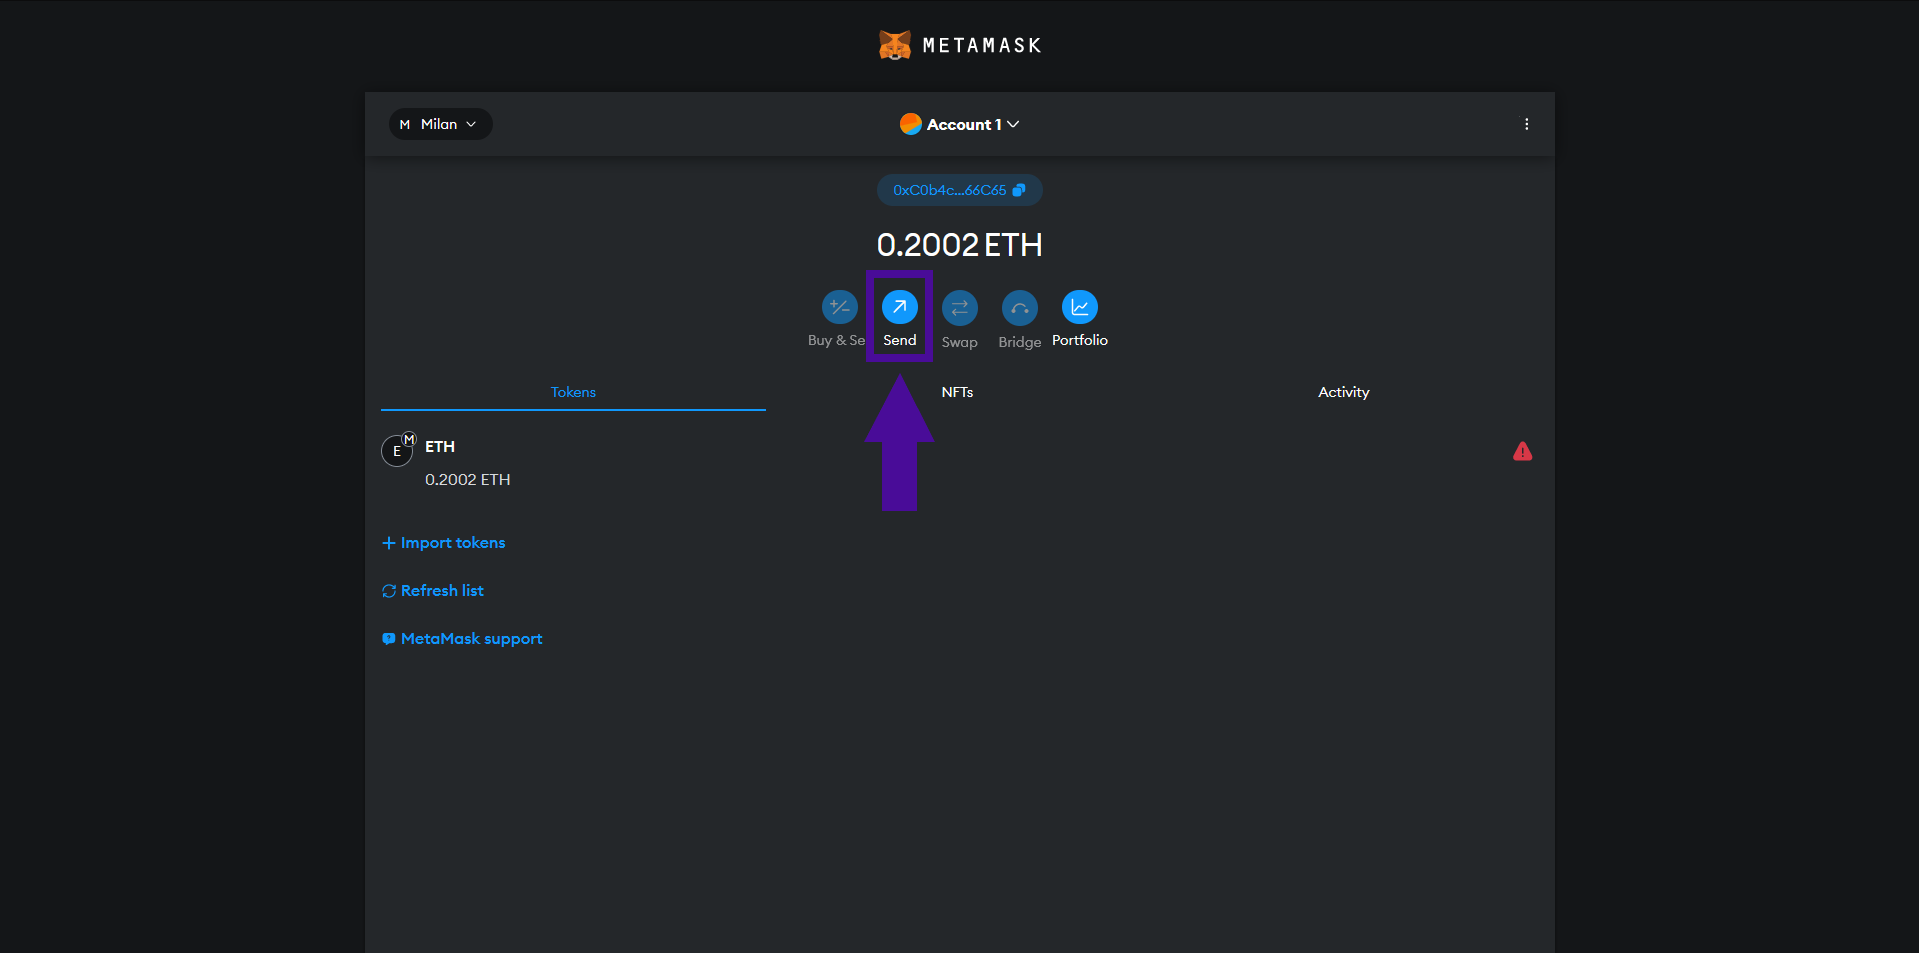
We can also perform some transfers by sending some ETH on Milan to another ETH address.
If you have a second wallet/account in MetaMask, you can just send funds between those two accounts to increase your network activity.

Outro
If you found this guide helpful and informative, consider sharing it on social media. You can also stay updated on the latest content and discussions by following us on X (formely Twitter): @BitBlogxyz
Disclaimer: This guide is provided strictly for educational purposes and should not be considered financial advice. The content is designed to offer insights into various web3 topics & projects.
We do not recommend putting real money into random projects without conducting plenty of your own research first. It is crucial to make informed decisions based on your own understanding and risk tolerance.