Introduction
In this guide, we're going to explore SwanChain and take a look at how to interact with the ongoing Saturn testnet!
What is SwanChain?
Swan Chain is a cutting-edge Ethereum layer 2 blockchain for AI computing, developed using the OP Stack. It distinguishes itself in the blockchain arena with its exceptional compatibility with AI and DePIN projects like Lagrange, Filecoin, and IPFS, alongside its ample computing capabilities. Swan Chain is ideally positioned to facilitate advancements in AI and DePIN technologies, offering users a broad spectrum of computing resources. This makes it an ideal choice for developers seeking to harness blockchain's potential in AI and DePIN ventures.
Step 1
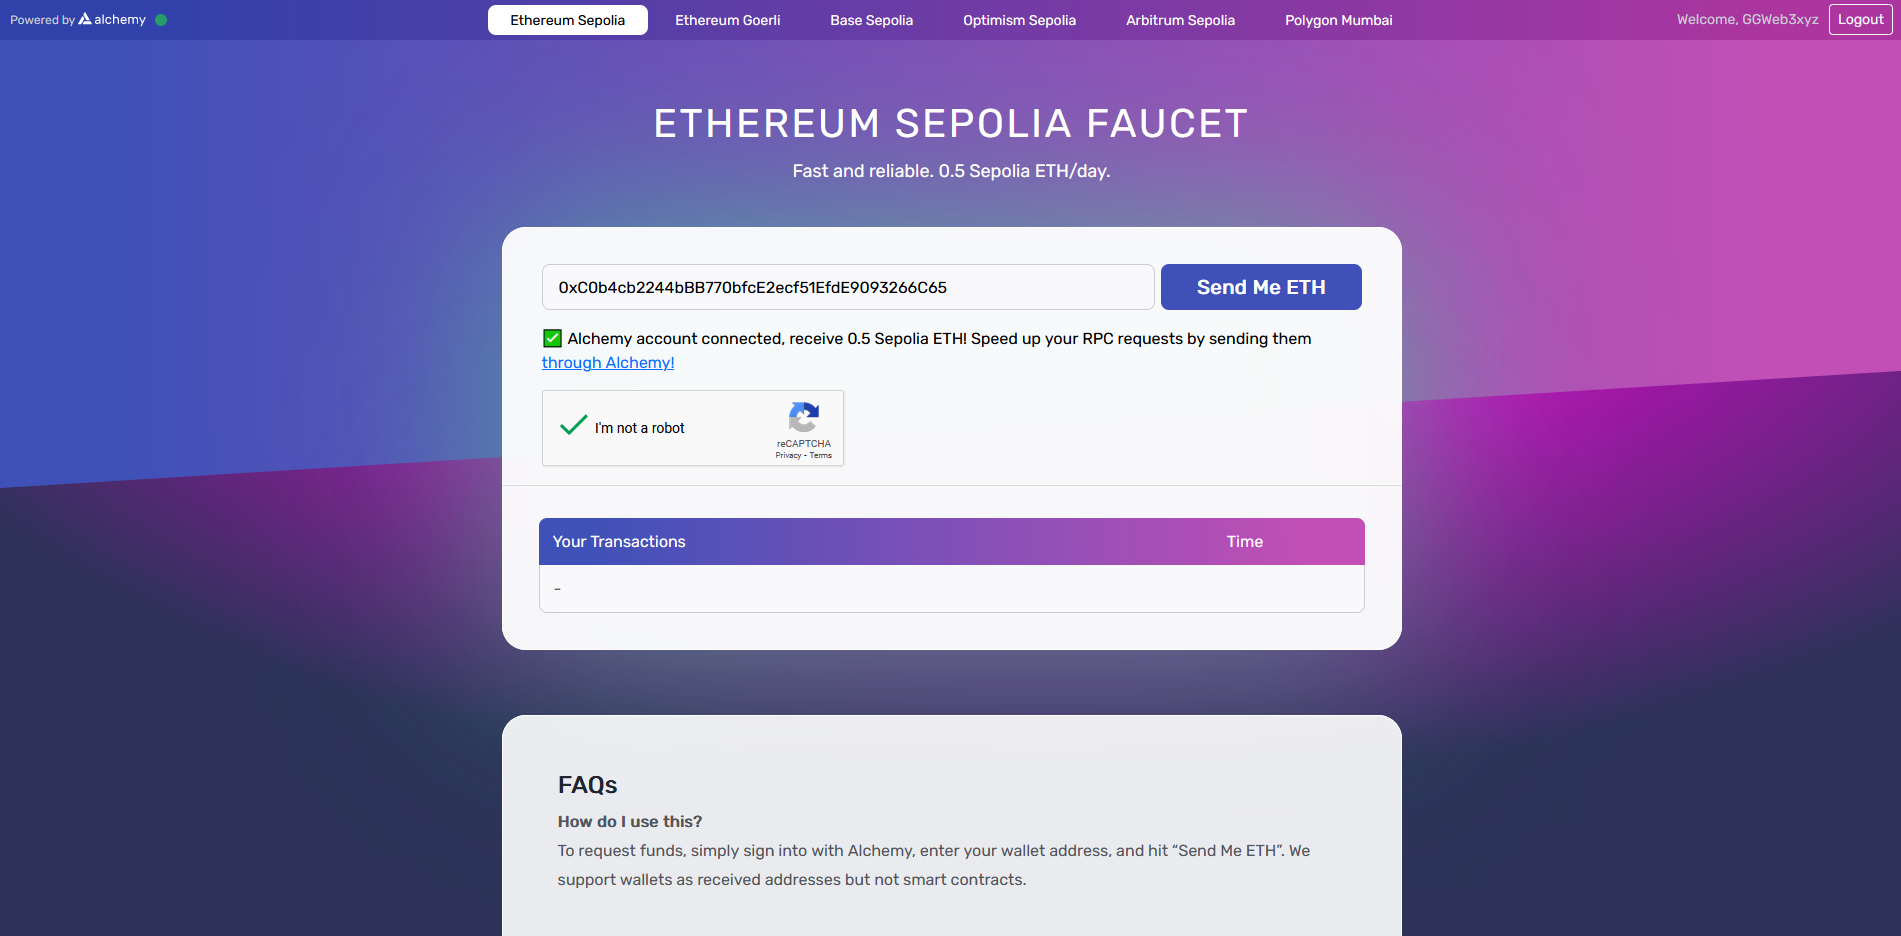
First, go to alchemy.com/faucets/ethereum-sepolia and request some test ETH on Sepolia.
Step 2
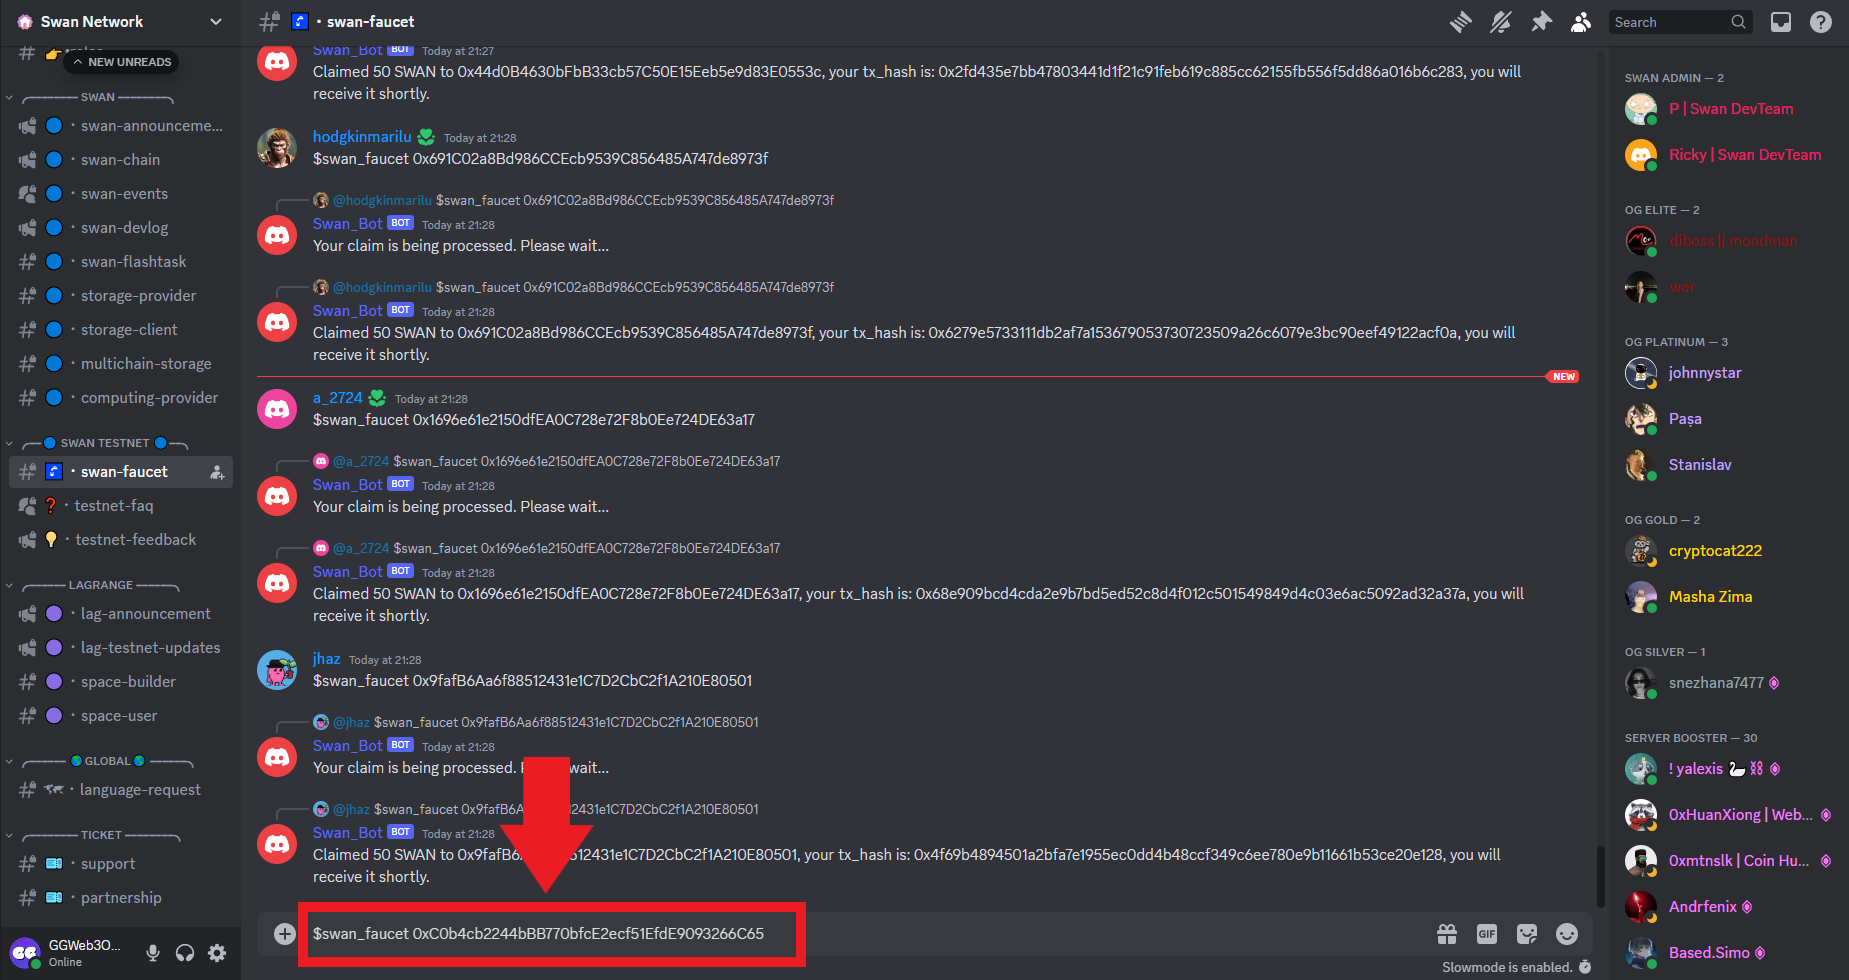
Now let's join the Swan Discord Server so that we can claim some test tokens.
Verify yourself in the server and head to the "swan-faucet" channel.
Type: $swan_faucet your_wallet_address as seen in the image below.
Step 3
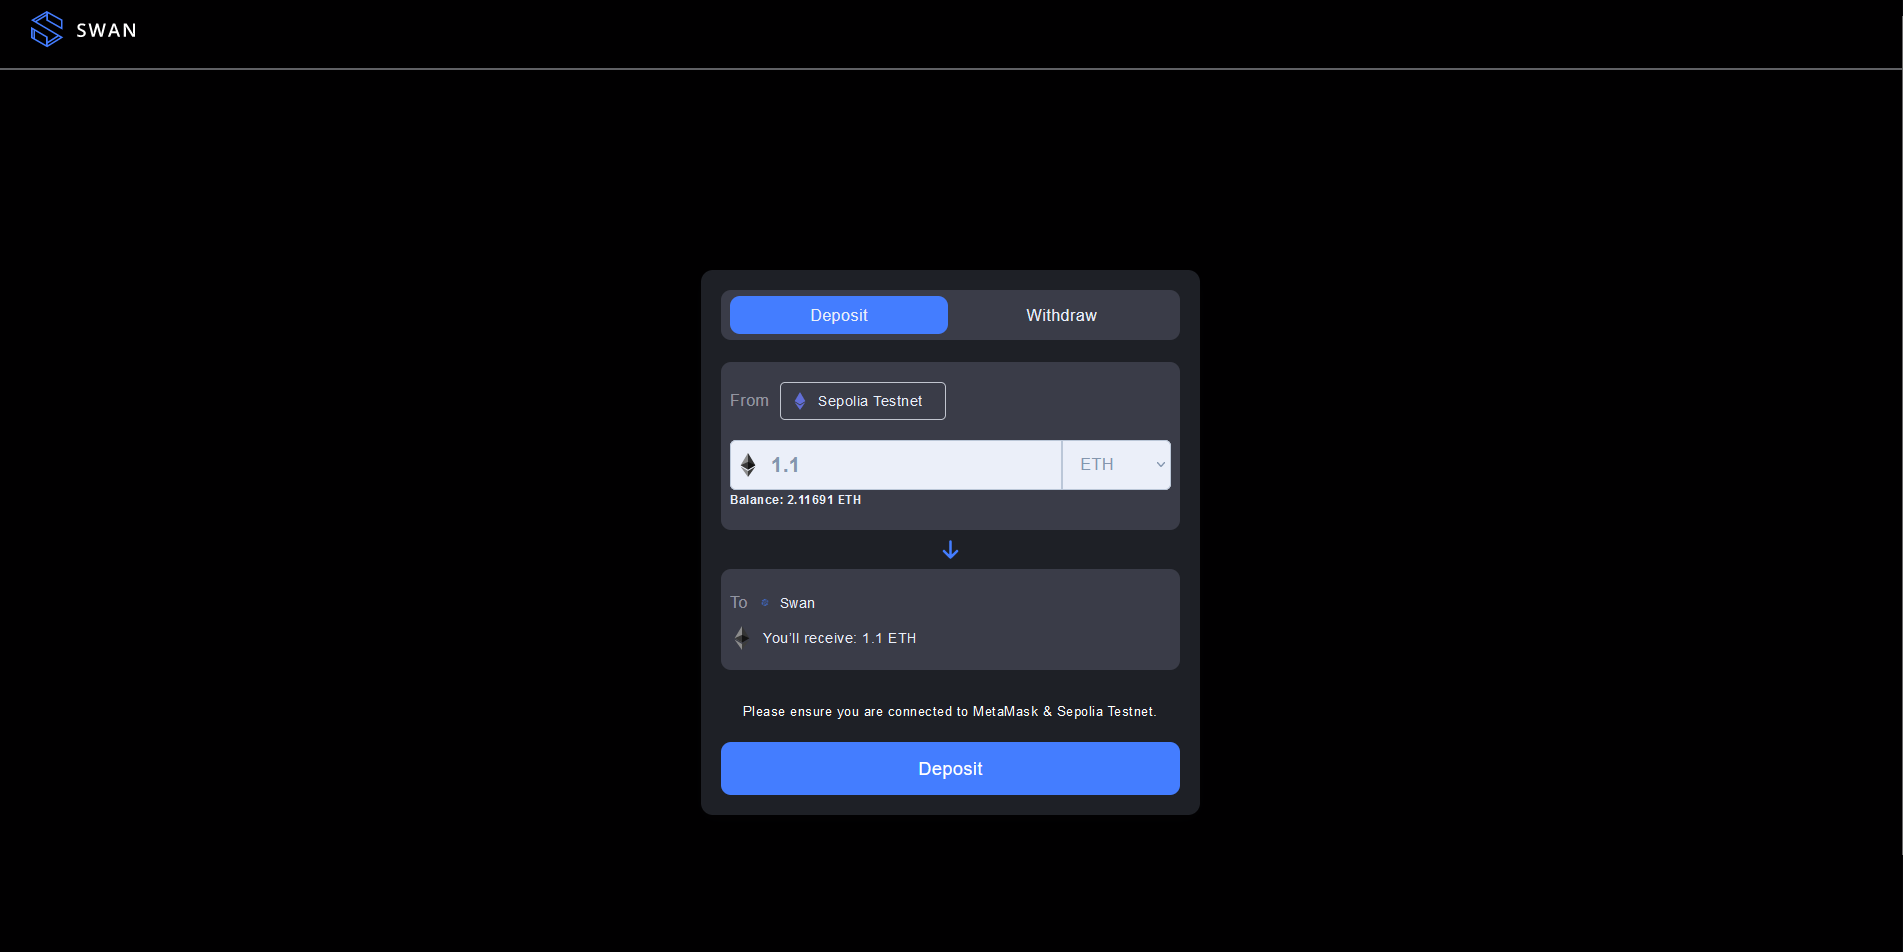
Now let's bridge some ETH from Sepolia to SwanChain.
To do this, head over to bridge.swanchain.io and connect your wallet.
Now input any amount of ETH and hit "Deposit".
We can also click the "Withdraw" tab to bridge ETH back to Sepolia from Swan Network.
If you can't add Swan Testnet to MetaMask, you will need to use a VPN and try again.
Step 4
Next, we're going to deploy a contract.
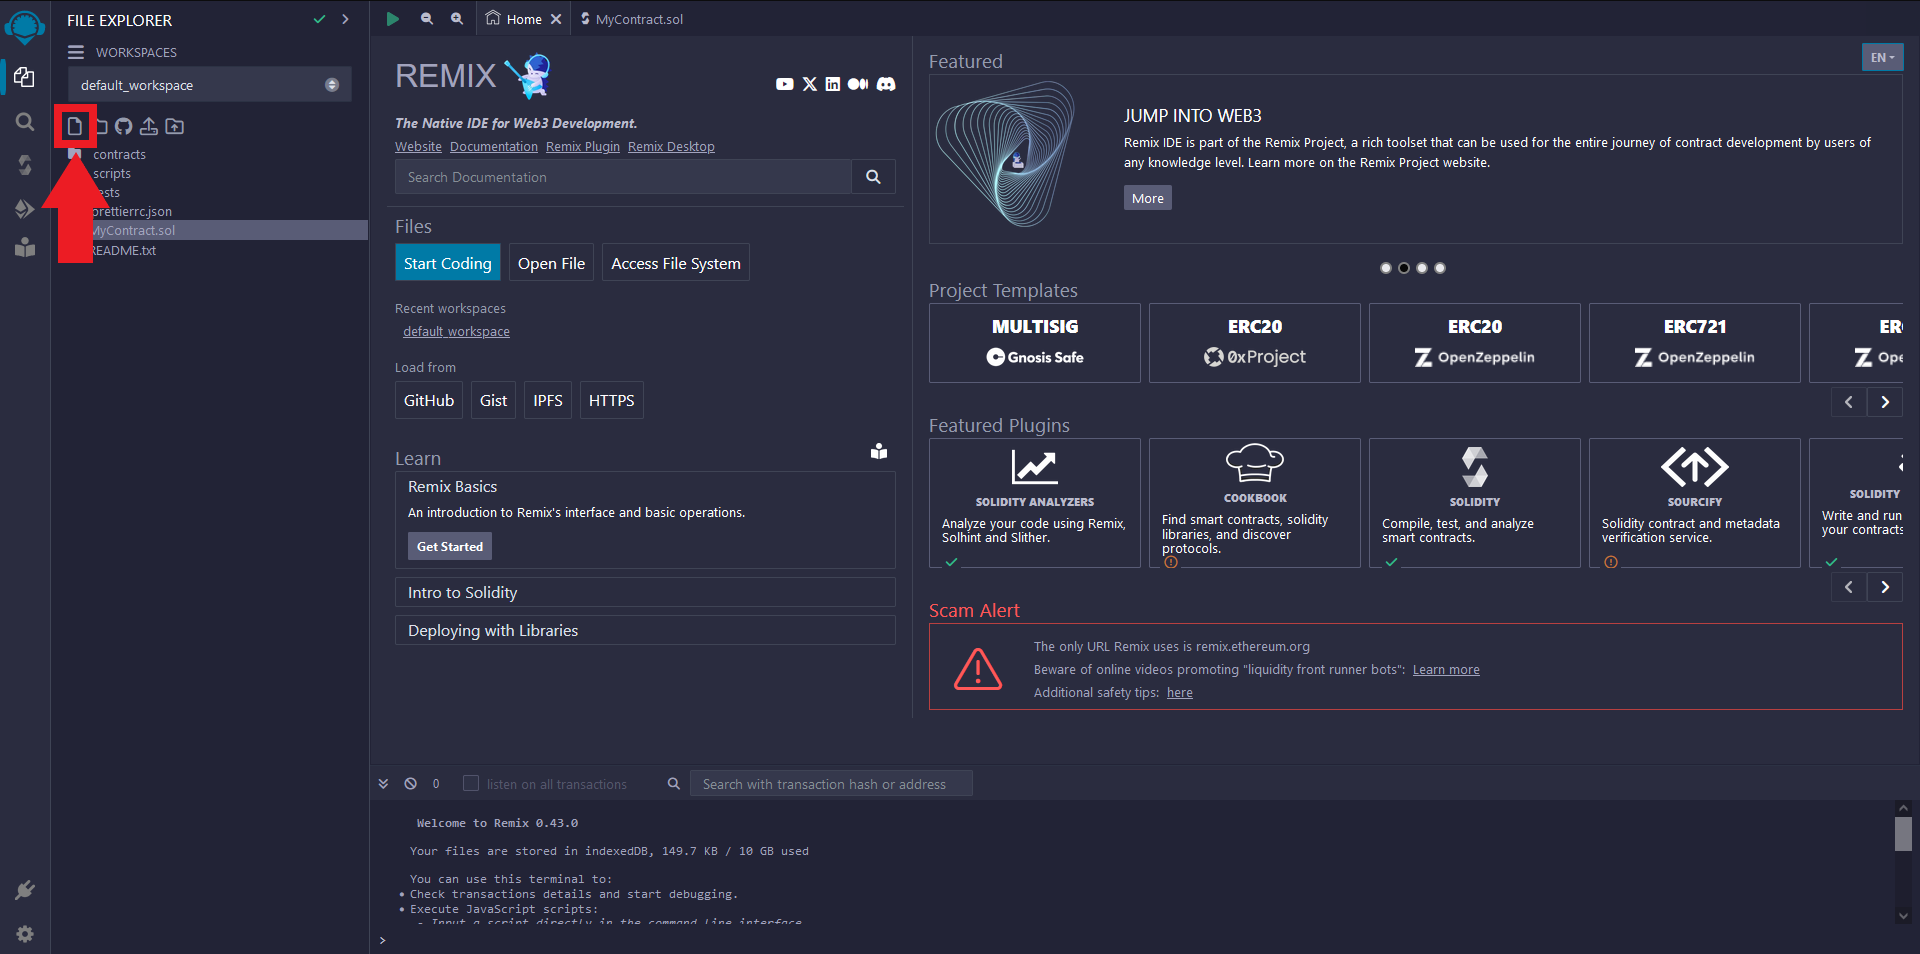
To do this, we'll need to use Remix
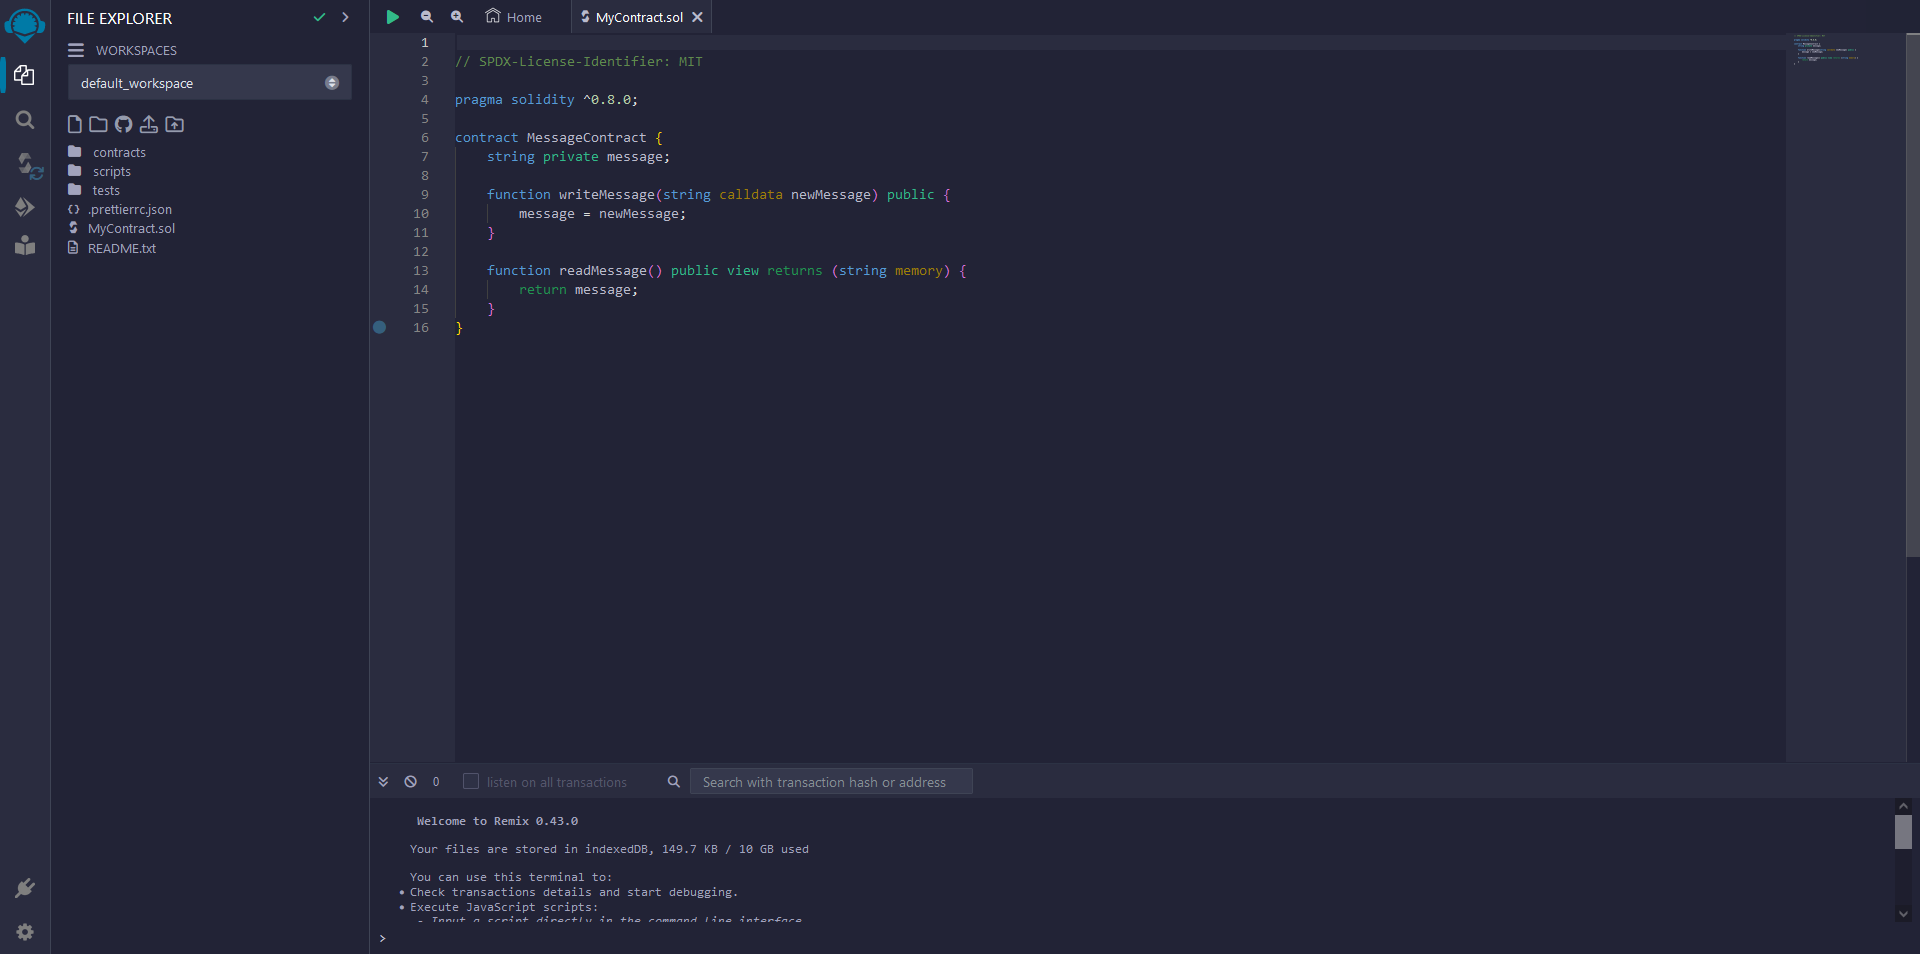
Once you've accessed the site, create a new file and name it anything you like, for example: "MyContract.sol" make sure to type the ".sol" file extension.
Now open the file and type (or copy & paste) the following code:
         // SPDX-License-Identifier: MIT
          pragma solidity ^0.8.0;
          contract MessageContract {
  string private message;
  function writeMessage(string calldata newMessage) public {
   message = newMessage;
  }
  function readMessage() public view returns (string memory) {
   return message;
  }
         }
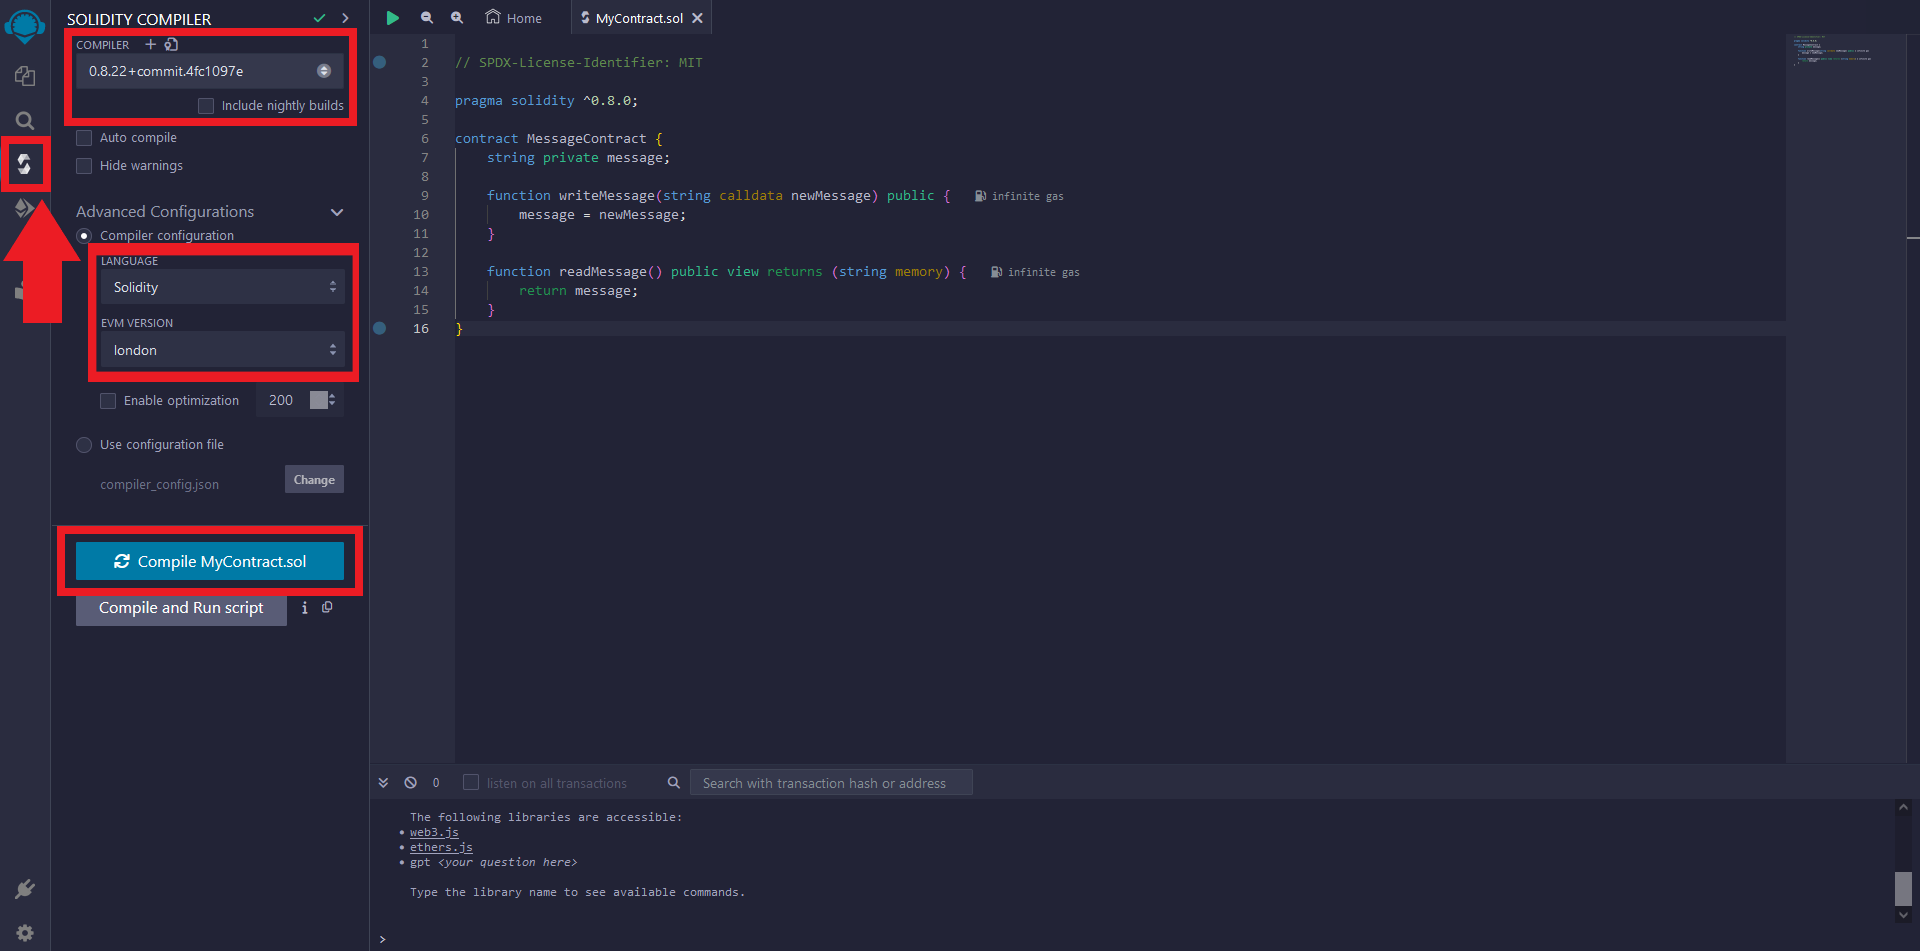
Now go to the third tab (Solidity Compiler) on the left-side navigation bar.
- Set the Compiler to: 0.8.22+commit.4fc1097e
- Select the "Advance Configurations" dropdown and set Language to "Solidity" & EVM Version as "London"
- Click the blue "Compile" button.
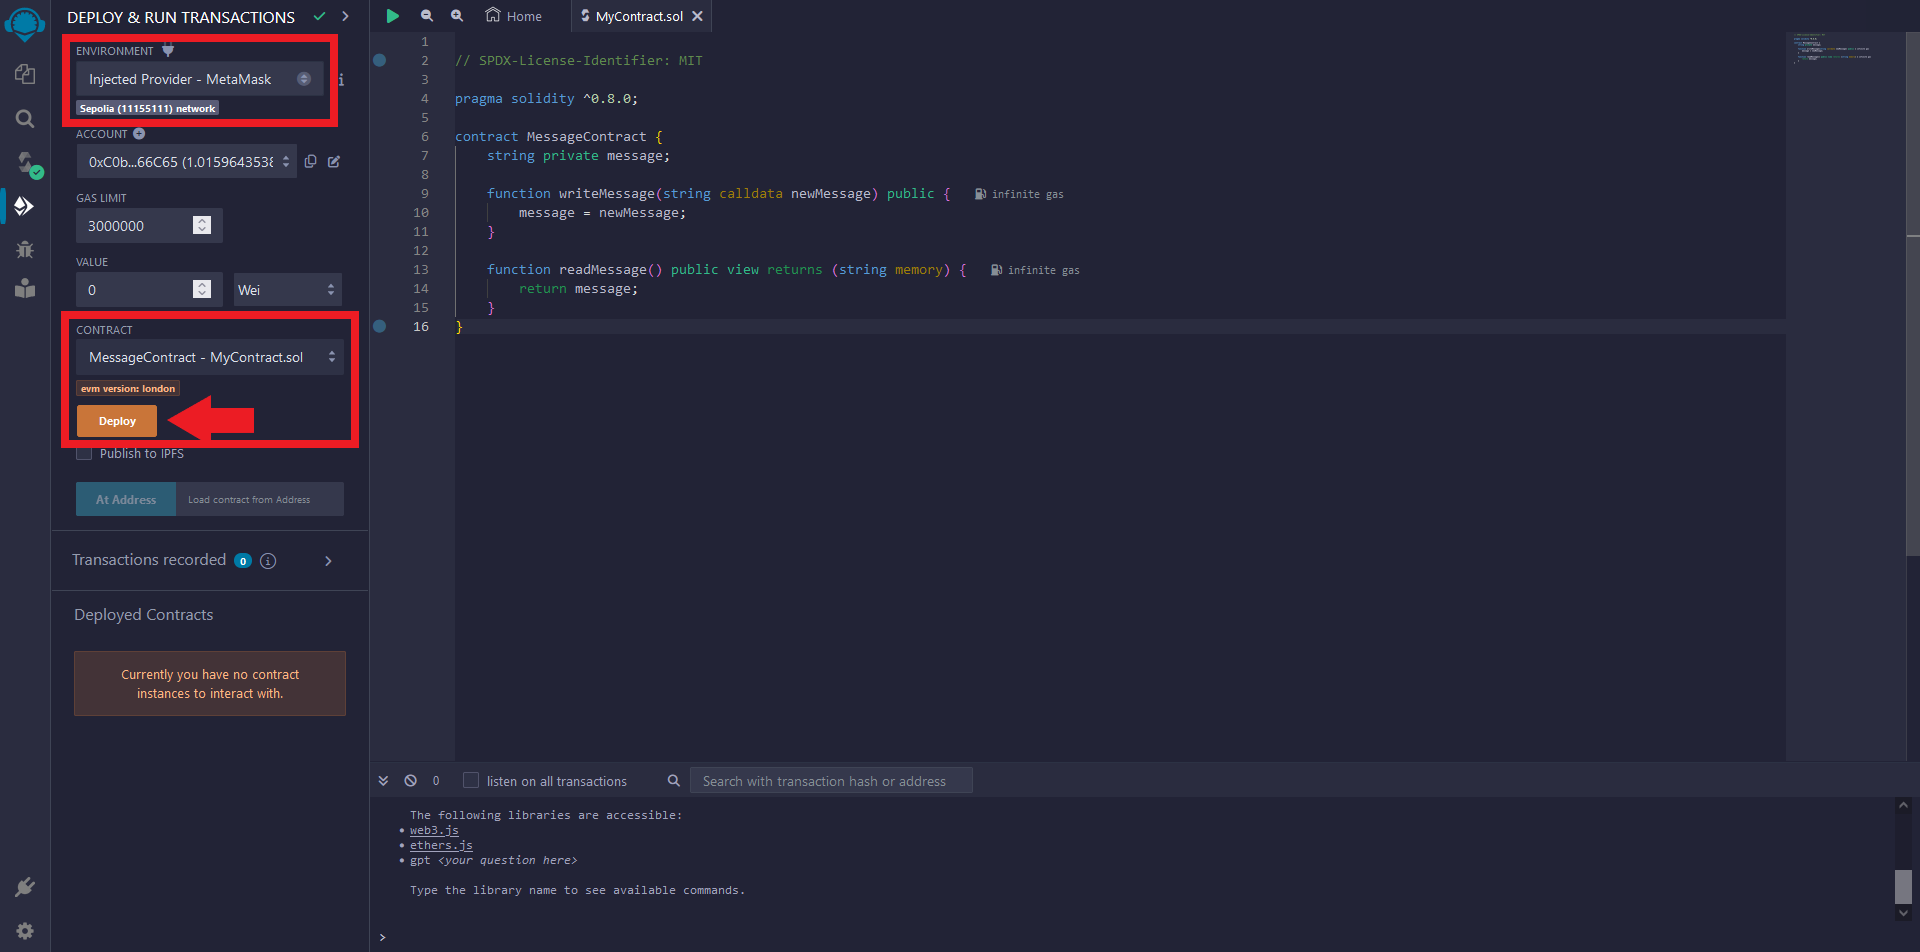
Now go to the fourth tab on the left-side navigation bar.
- Set the Environment as "Injected Provider - MetaMask" & connect your MetaMask wallet.
- Finally, hit the orange "Deploy" button.
Step 5
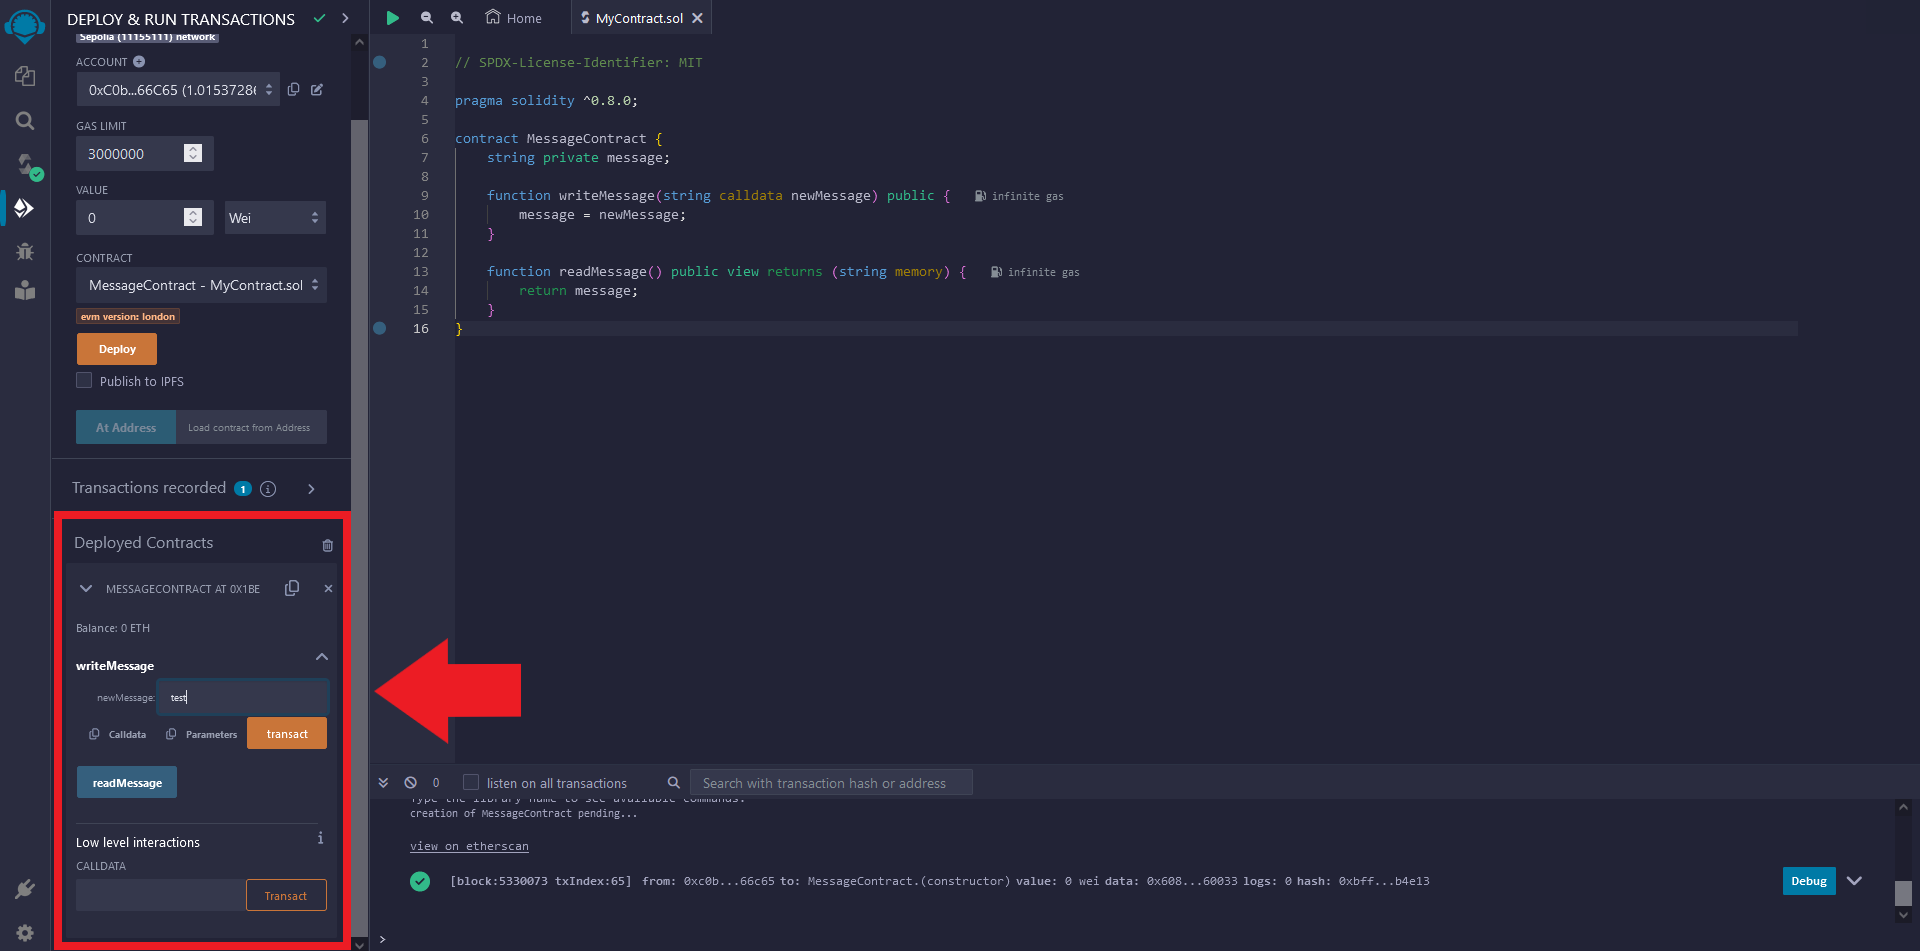
Now let's interact with the contract, press the "Deployed Contracts" dropdown, then the "writeMessage" dropdown and type a new test message.
Hit the orange "Transact" button and confirm transaction.
Now we can press the blue "readMessage" button.
Check the console for the output and you're done!
Step 6
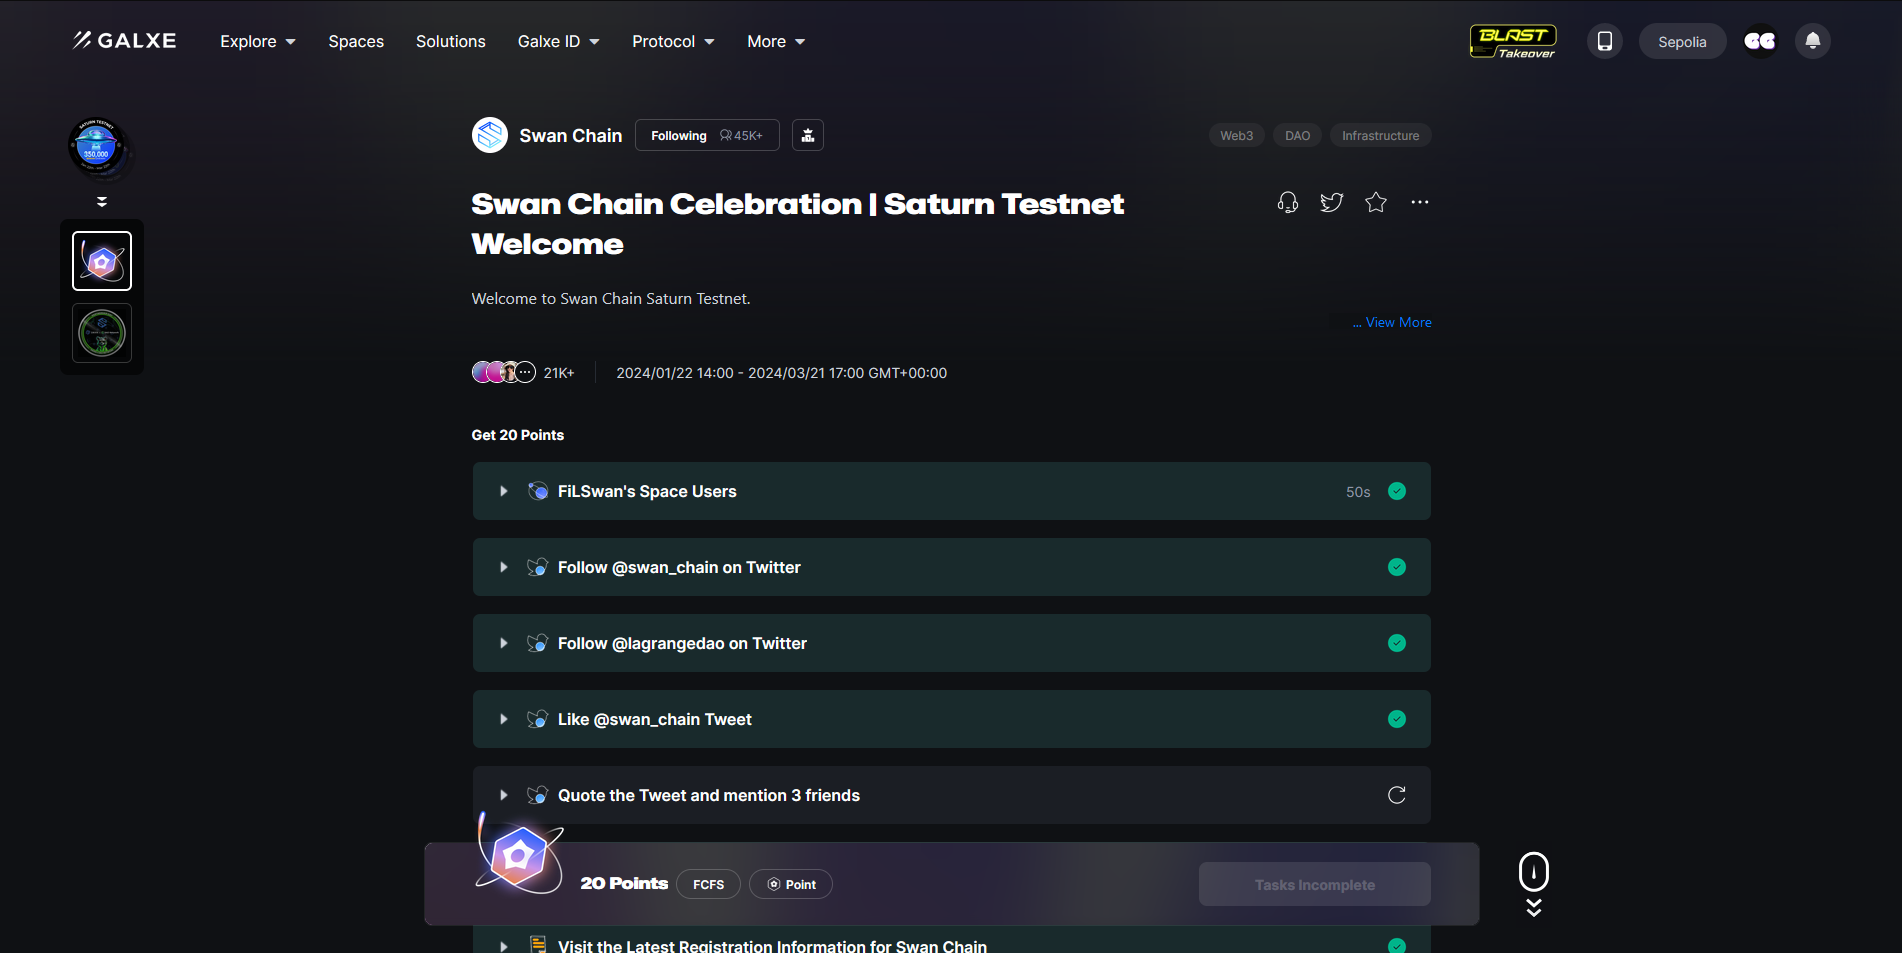
Finally, let's head over to the Swan Galxe Campaign & complete all the tasks for 20 points.
Now go to the second Galxe Campaign and complete the remaining tasks to earn two OATs (On-chain Achievement Tokens) and 70 extra points.
Outro
If you found this guide helpful and informative, consider sharing it on social media. You can also stay updated on the latest content and discussions by following us on X (formely Twitter): @BitBlogxyz
Disclaimer: This guide is provided strictly for educational purposes and should not be considered financial advice. The content is designed to offer insights into various web3 topics & projects.
We do not recommend putting real money into random projects without conducting plenty of your own research first. It is crucial to make informed decisions based on your own understanding and risk tolerance.