Introduction
In this guide, we'll dive into the Taiko Testnet, take a look at how to interact with it and potentially qualify for a future airdrop!
What is Taiko?
Taiko is a permissionless and fully open-source ZK-Rollup, serving as an Ethereum-equivalent solution. It consists of smart contracts deployed on the Ethereum blockchain, outlining the Taiko protocol, which functions as a scaling solution for Ethereum. The governance of Taiko is inherently embedded within the protocol contracts.
Step 1
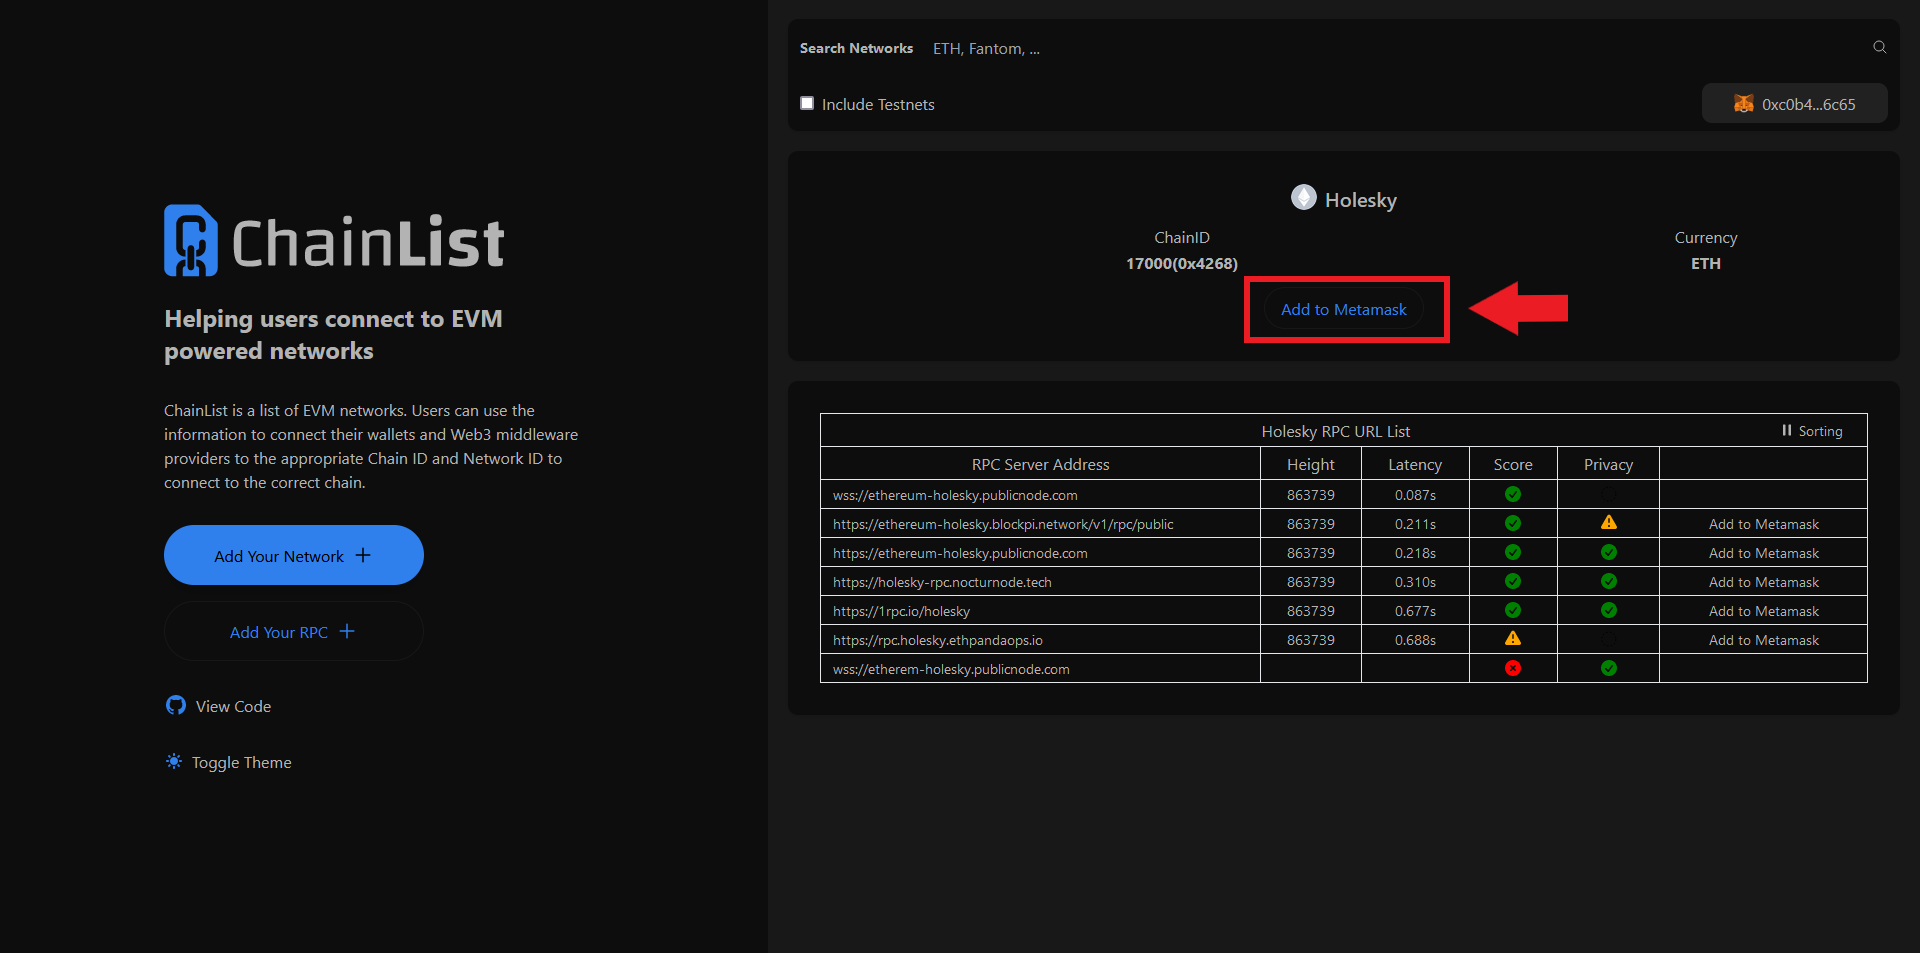
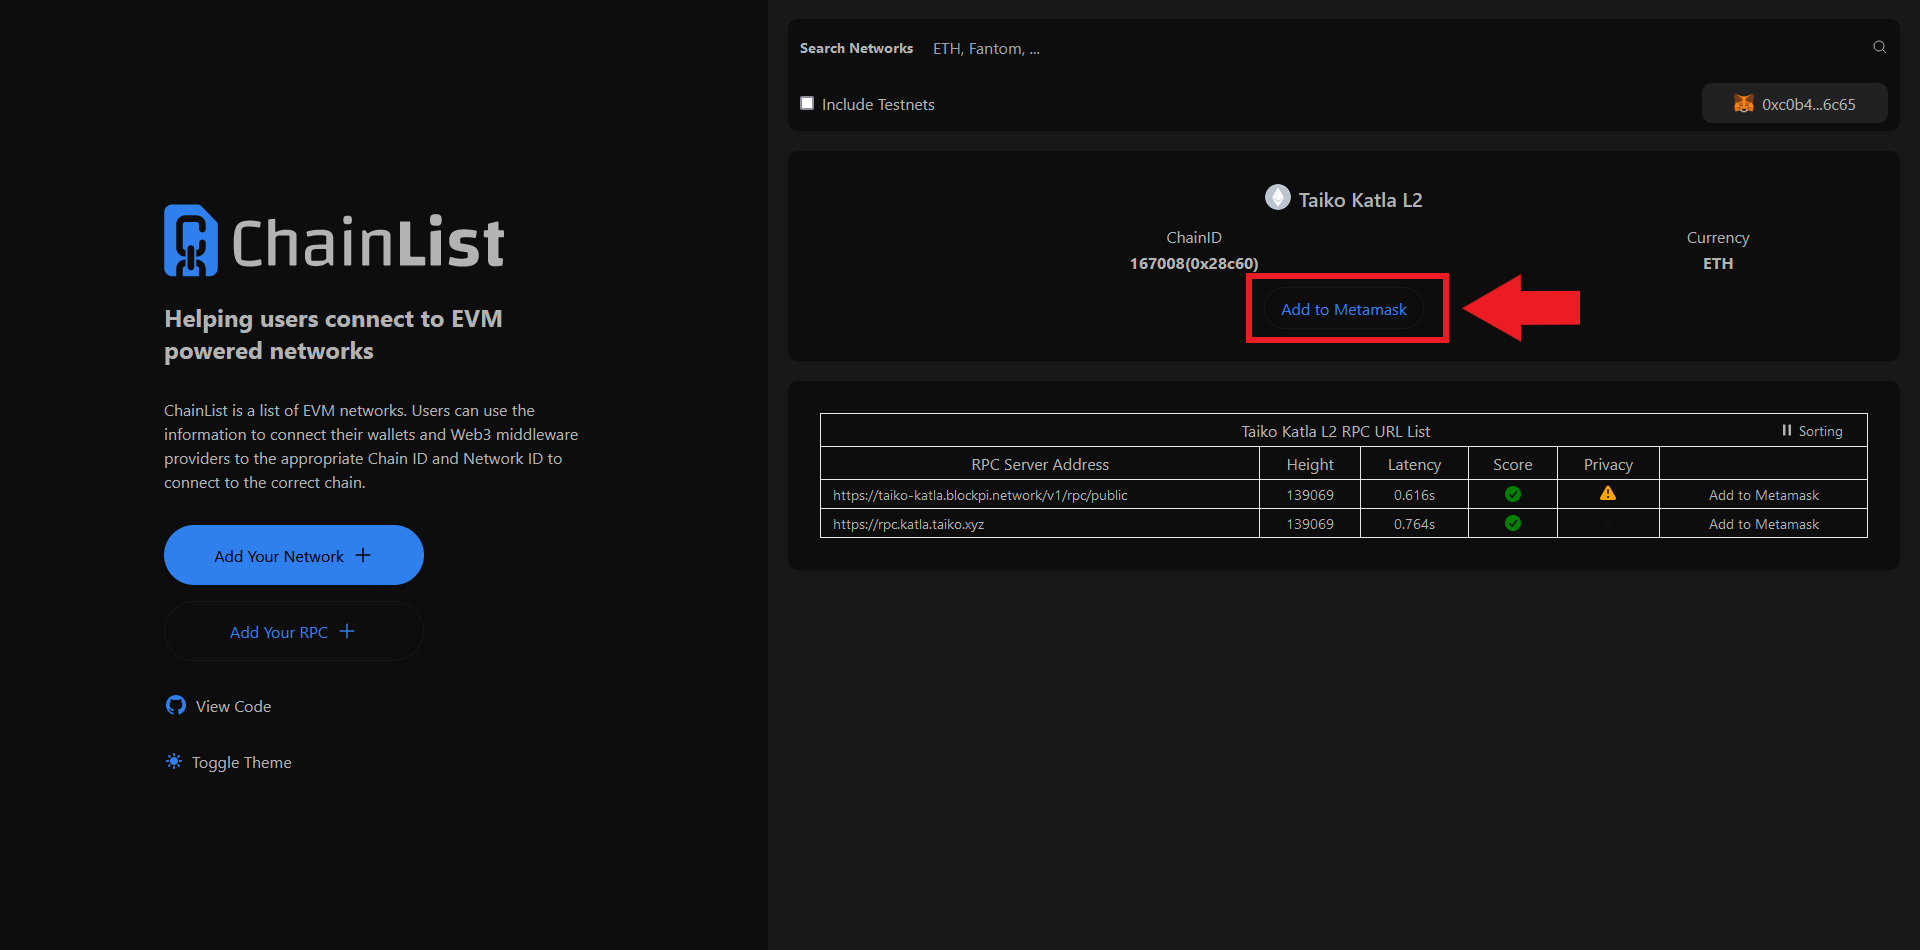
First, we need to add both Taiko Katla & Holesky Networks to our MetaMask wallet via Chainlist:
Step 2
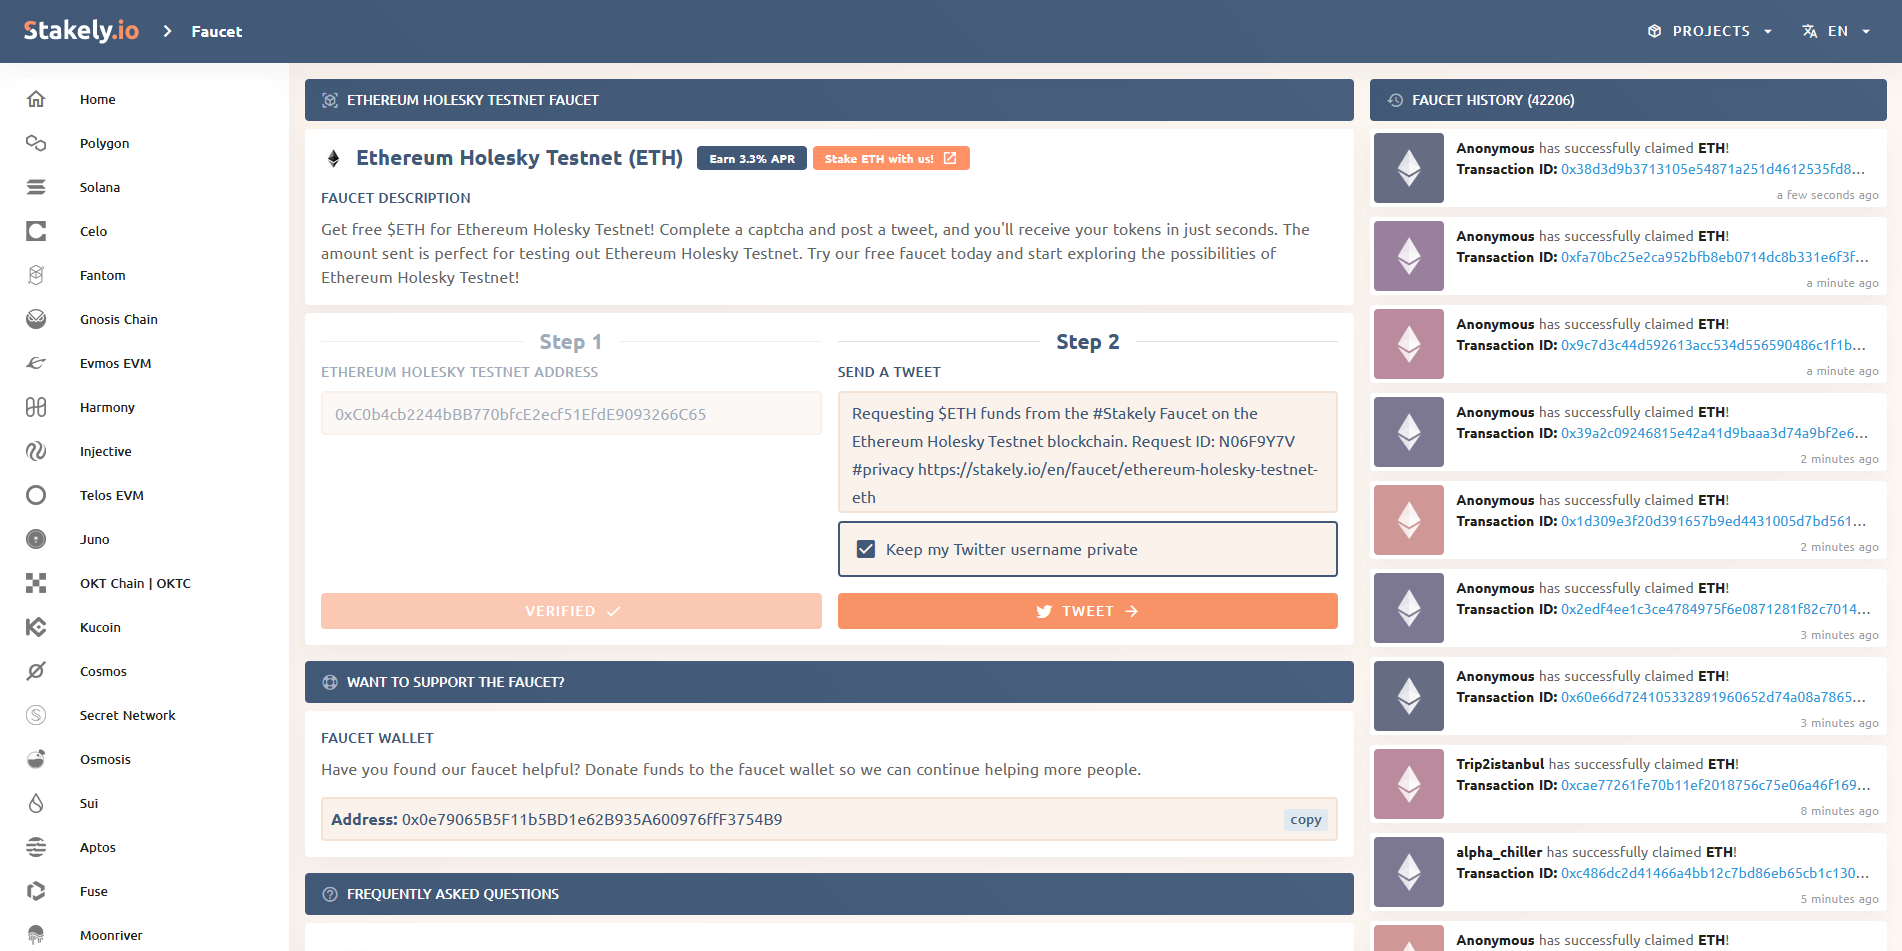
Next, we need to claim some test tokens.
To do this, go to stakely.io/en/faucet/ethereum-holesky-testnet-eth, insert your wallet and verify, then you need to post a tweet and verify the url of the tweet.
Once thats done you should receive some test tokens.
Step 3
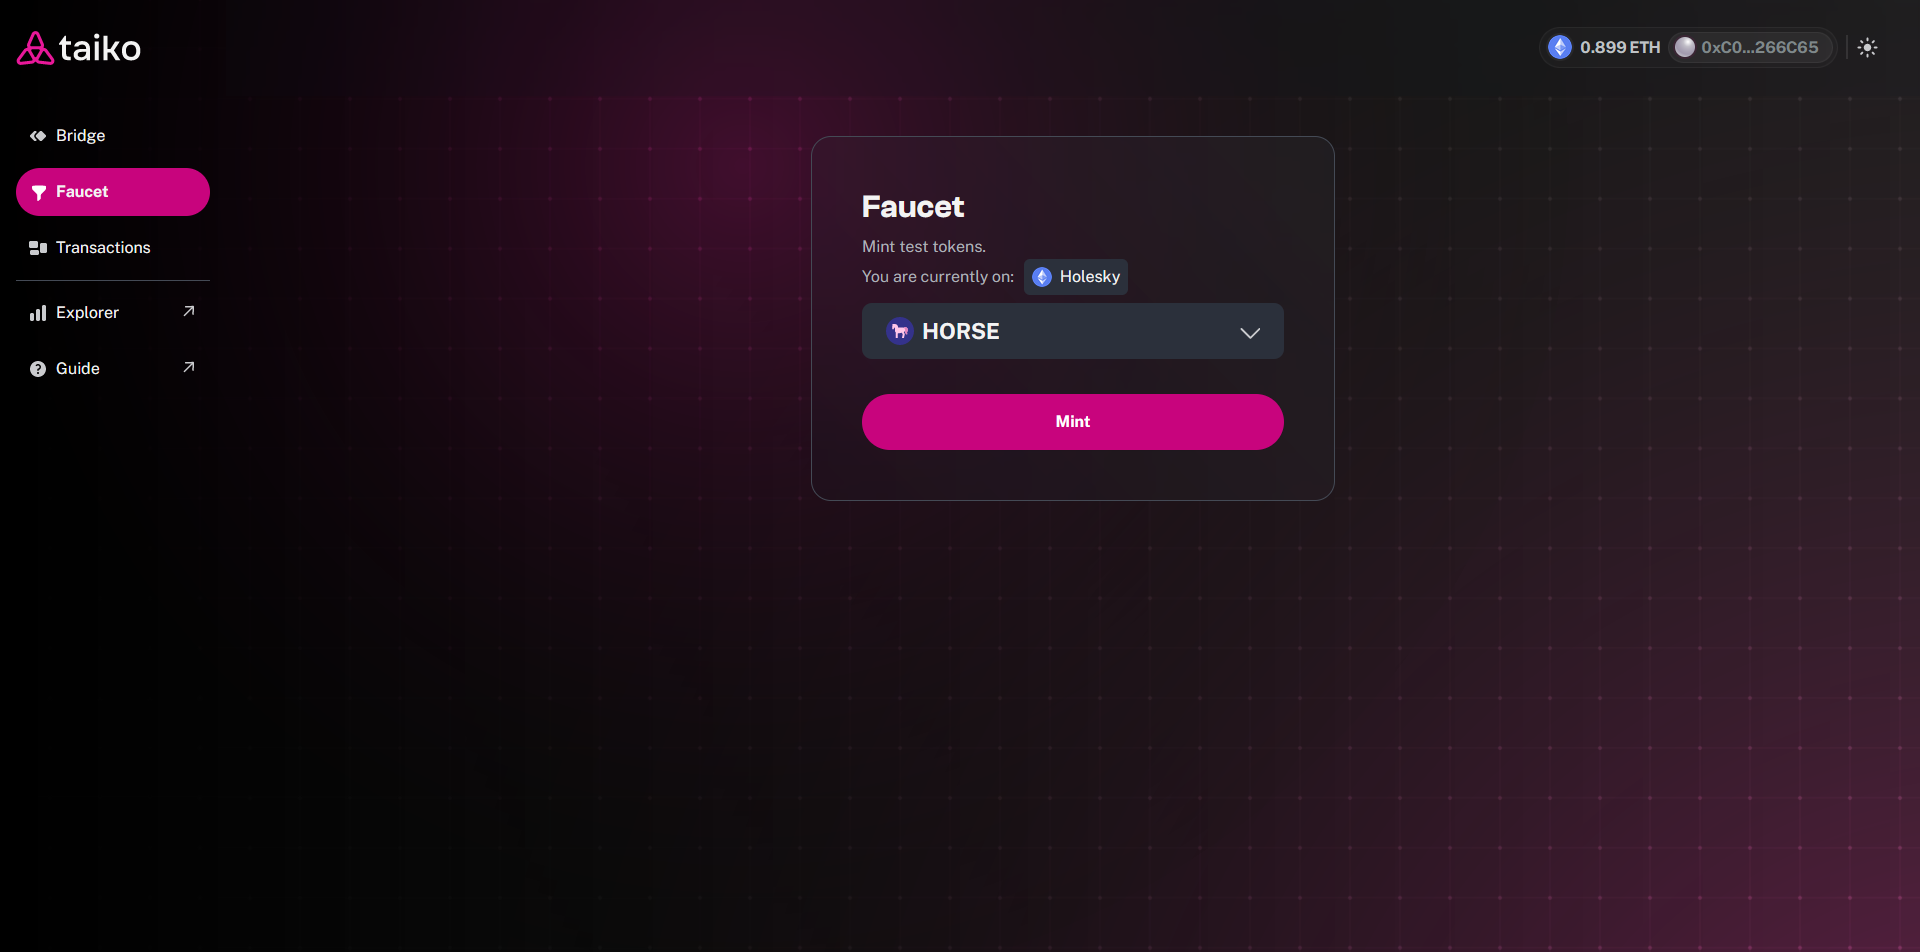
Now we also need to claim some HORSE tokens from: bridge.katla.taiko.xyz/faucet
Step 4
Next we're going to take a look at the Bridge.
Head over to bridge.katla.taiko.xyz and connect your wallet.
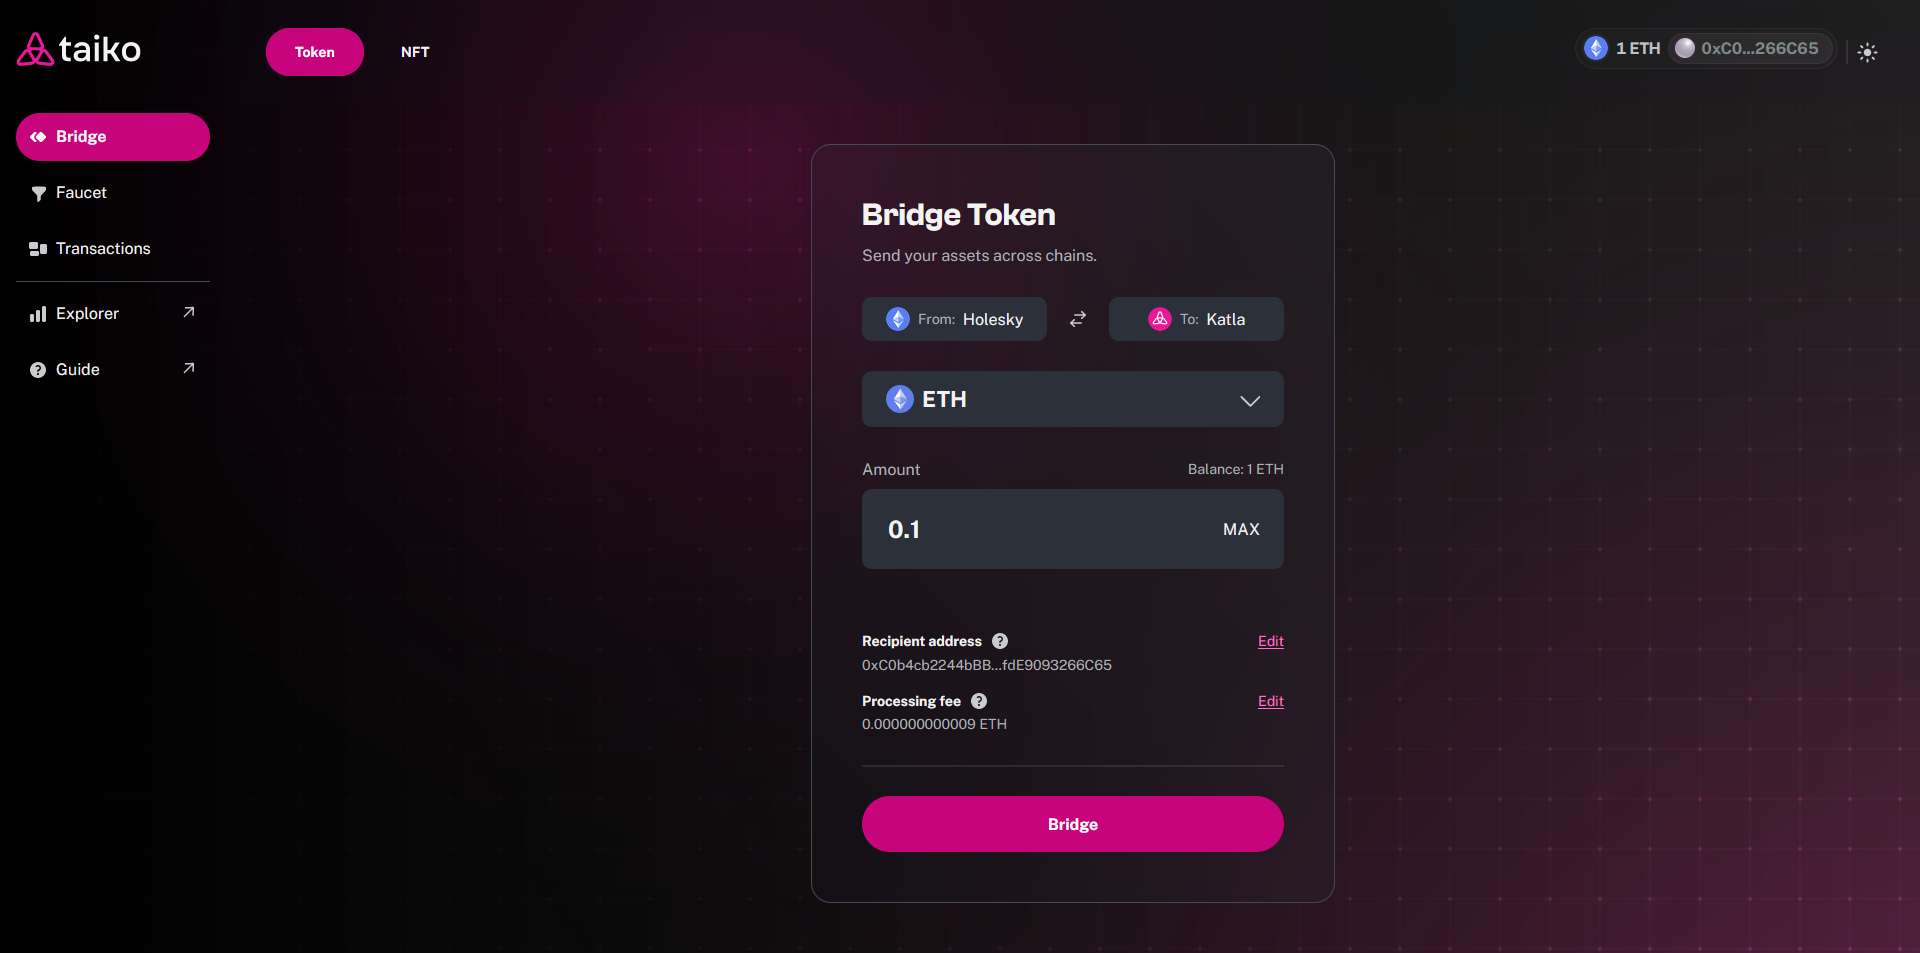
First, we'll bridge some ETH from Holesky to Katla.
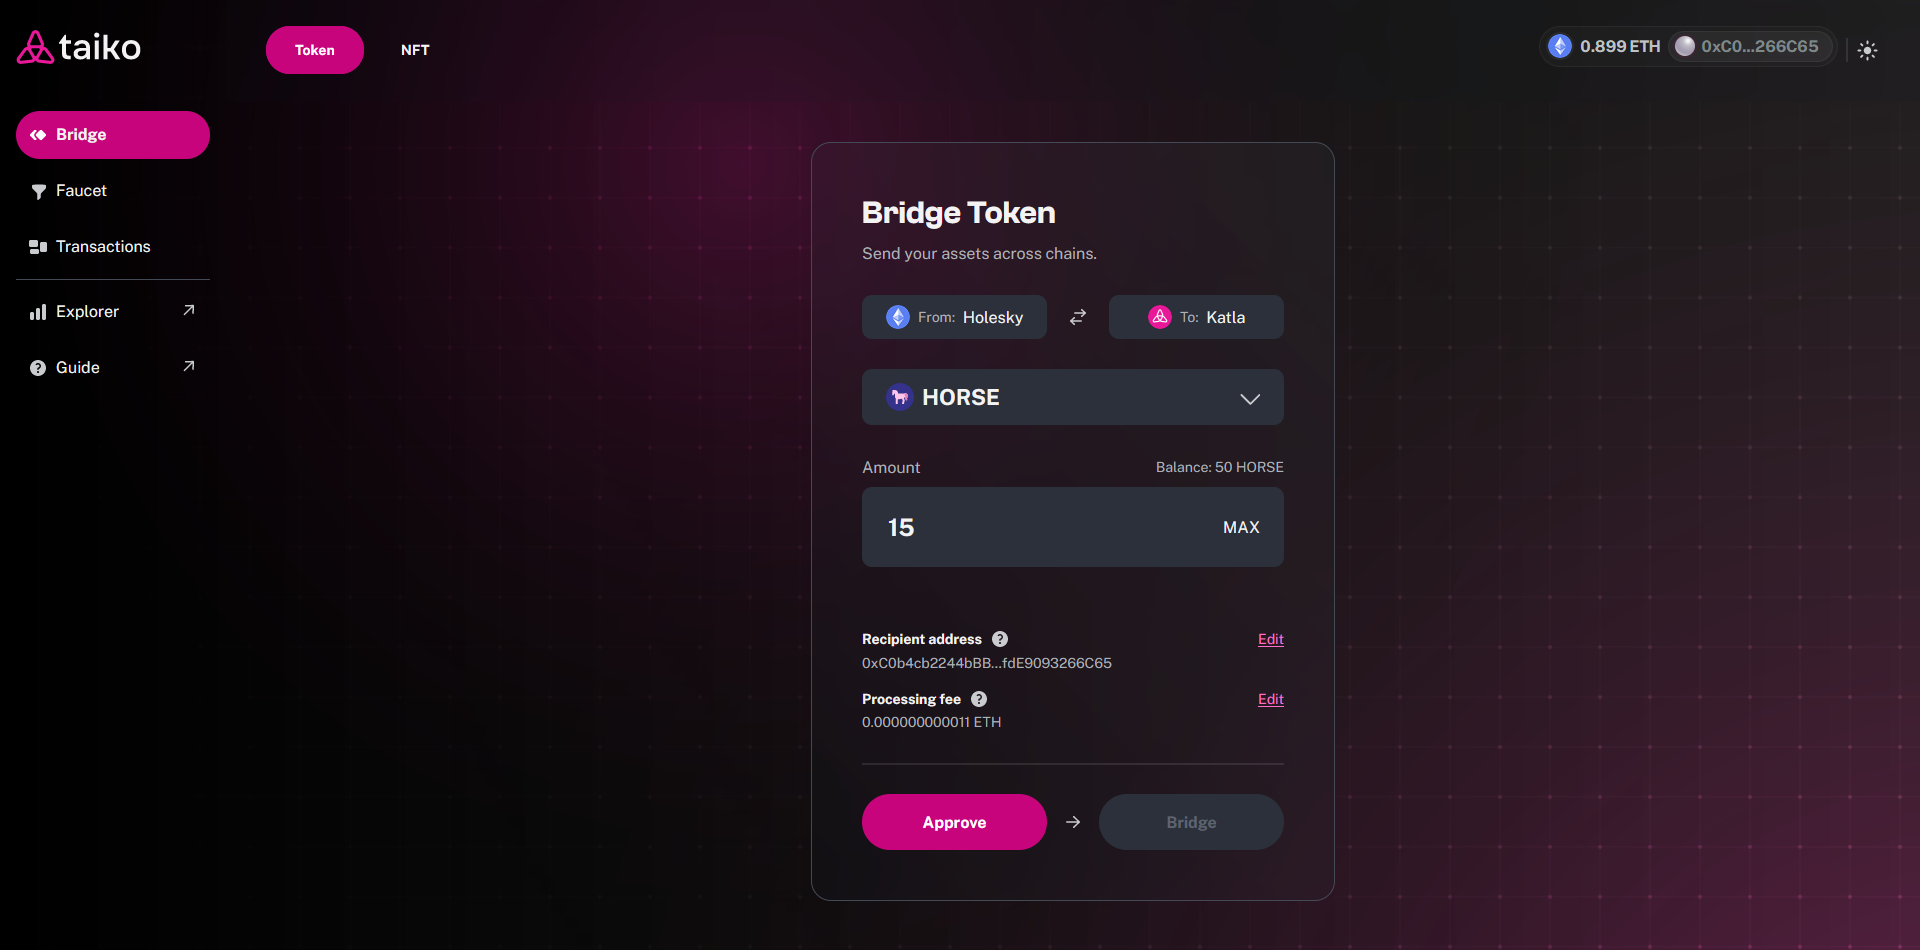
Insert a quantity, click the "Approve" button and wait for transaction to complete, then hit "Bridge".
Then we will do the same again, but this time we'll bridge some HORSE tokens instead.
Step 5
Now let's perform some Swaps!
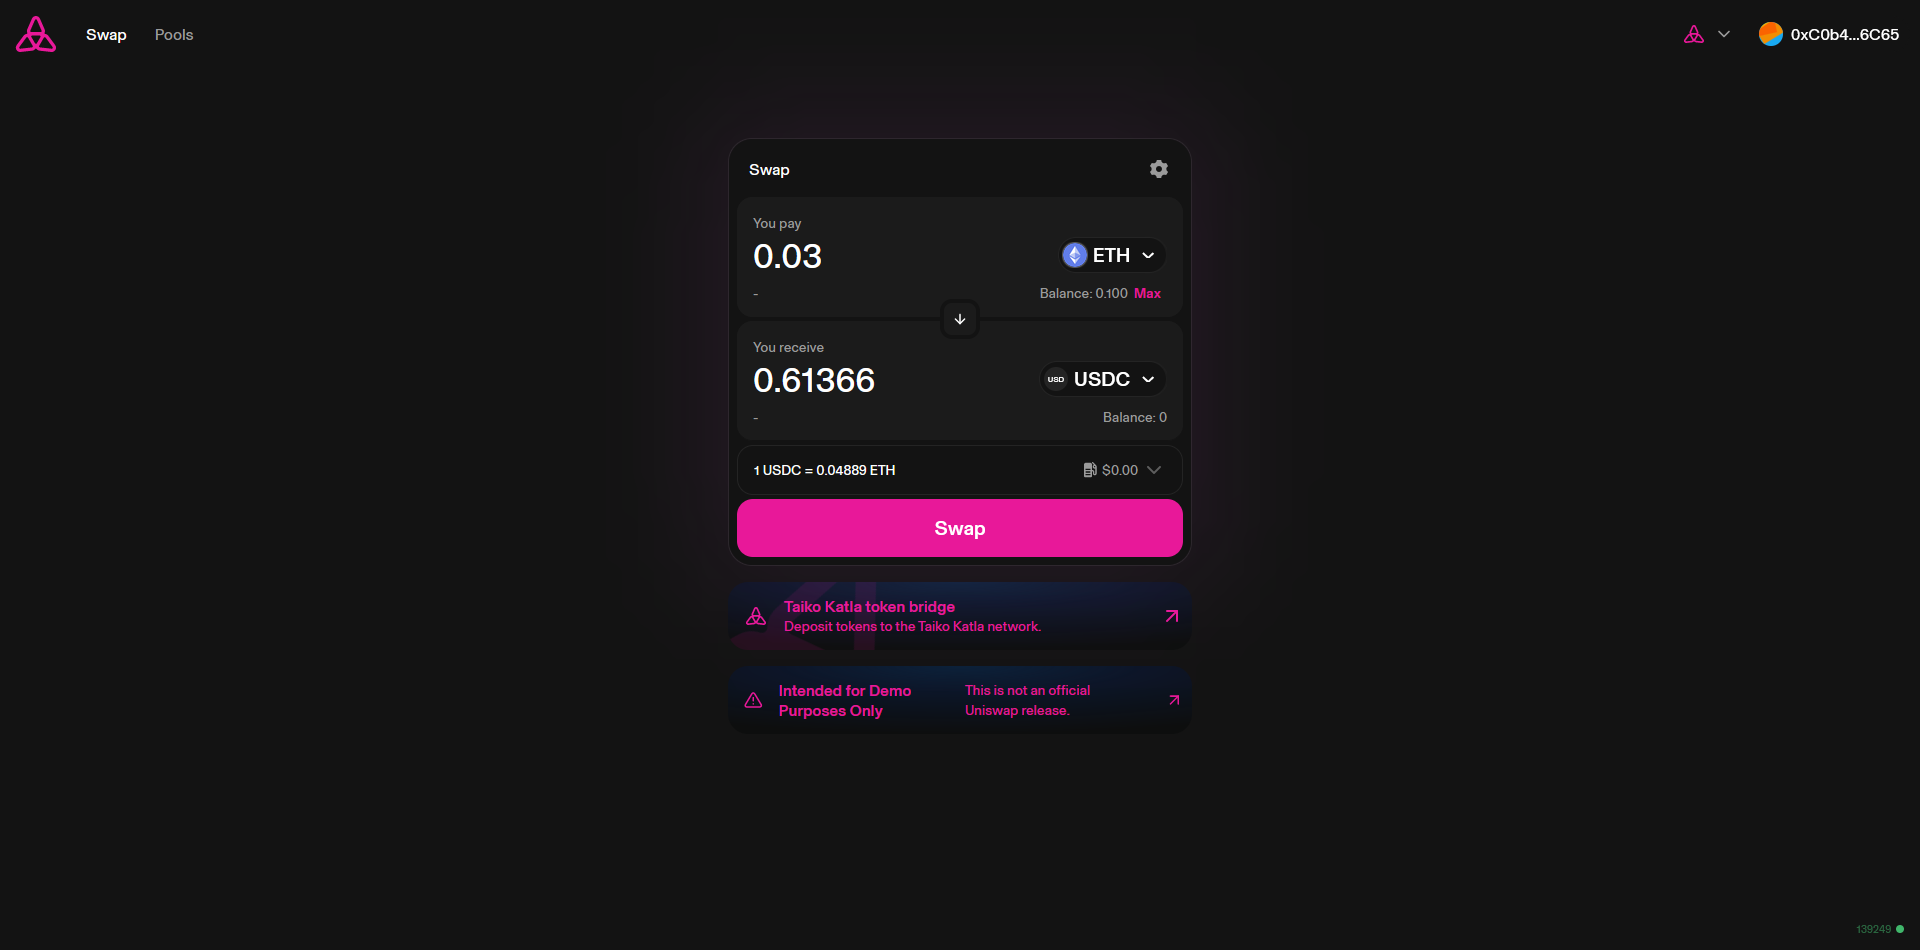
Head over to swap.katla.taiko.xyz & connect your wallet.
Select the first token as ETH and the second token as USDC, insert any amount and hit "Swap", then "Confirm Swap".
We can also swap ETH for HORSE to gain extra testnet activity.
Step 6
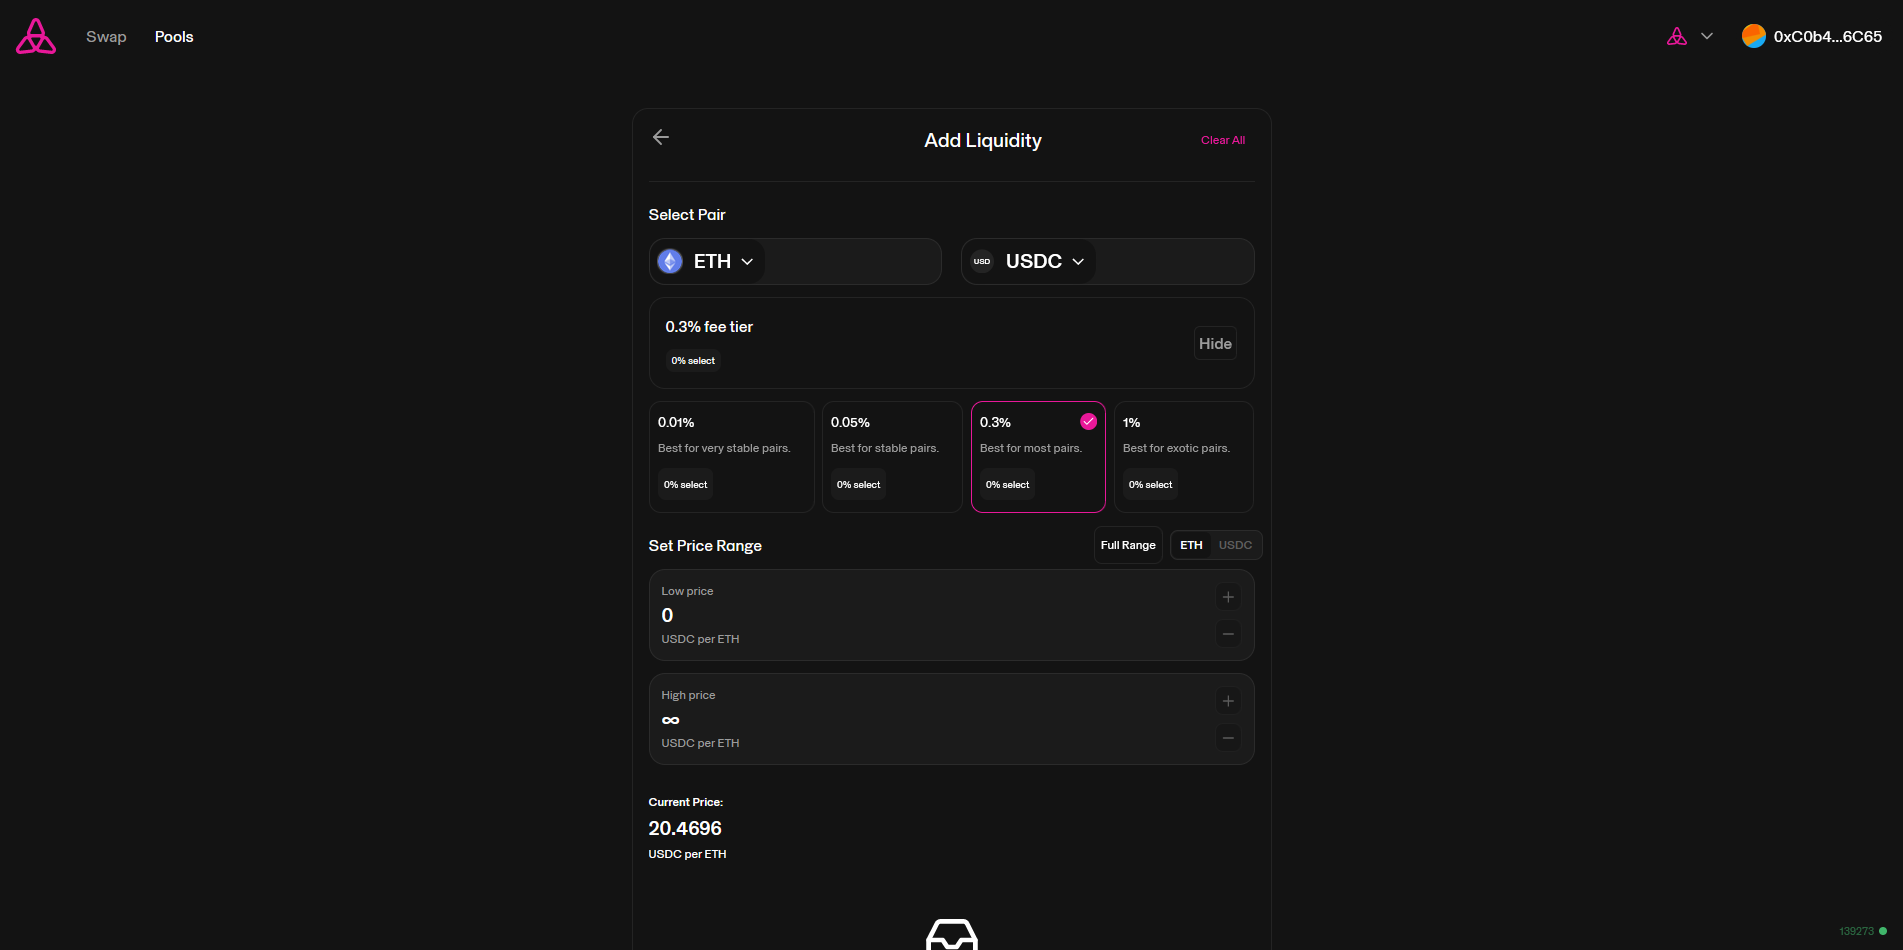
Next we're going to take a look at Pools and how to add liquidity!
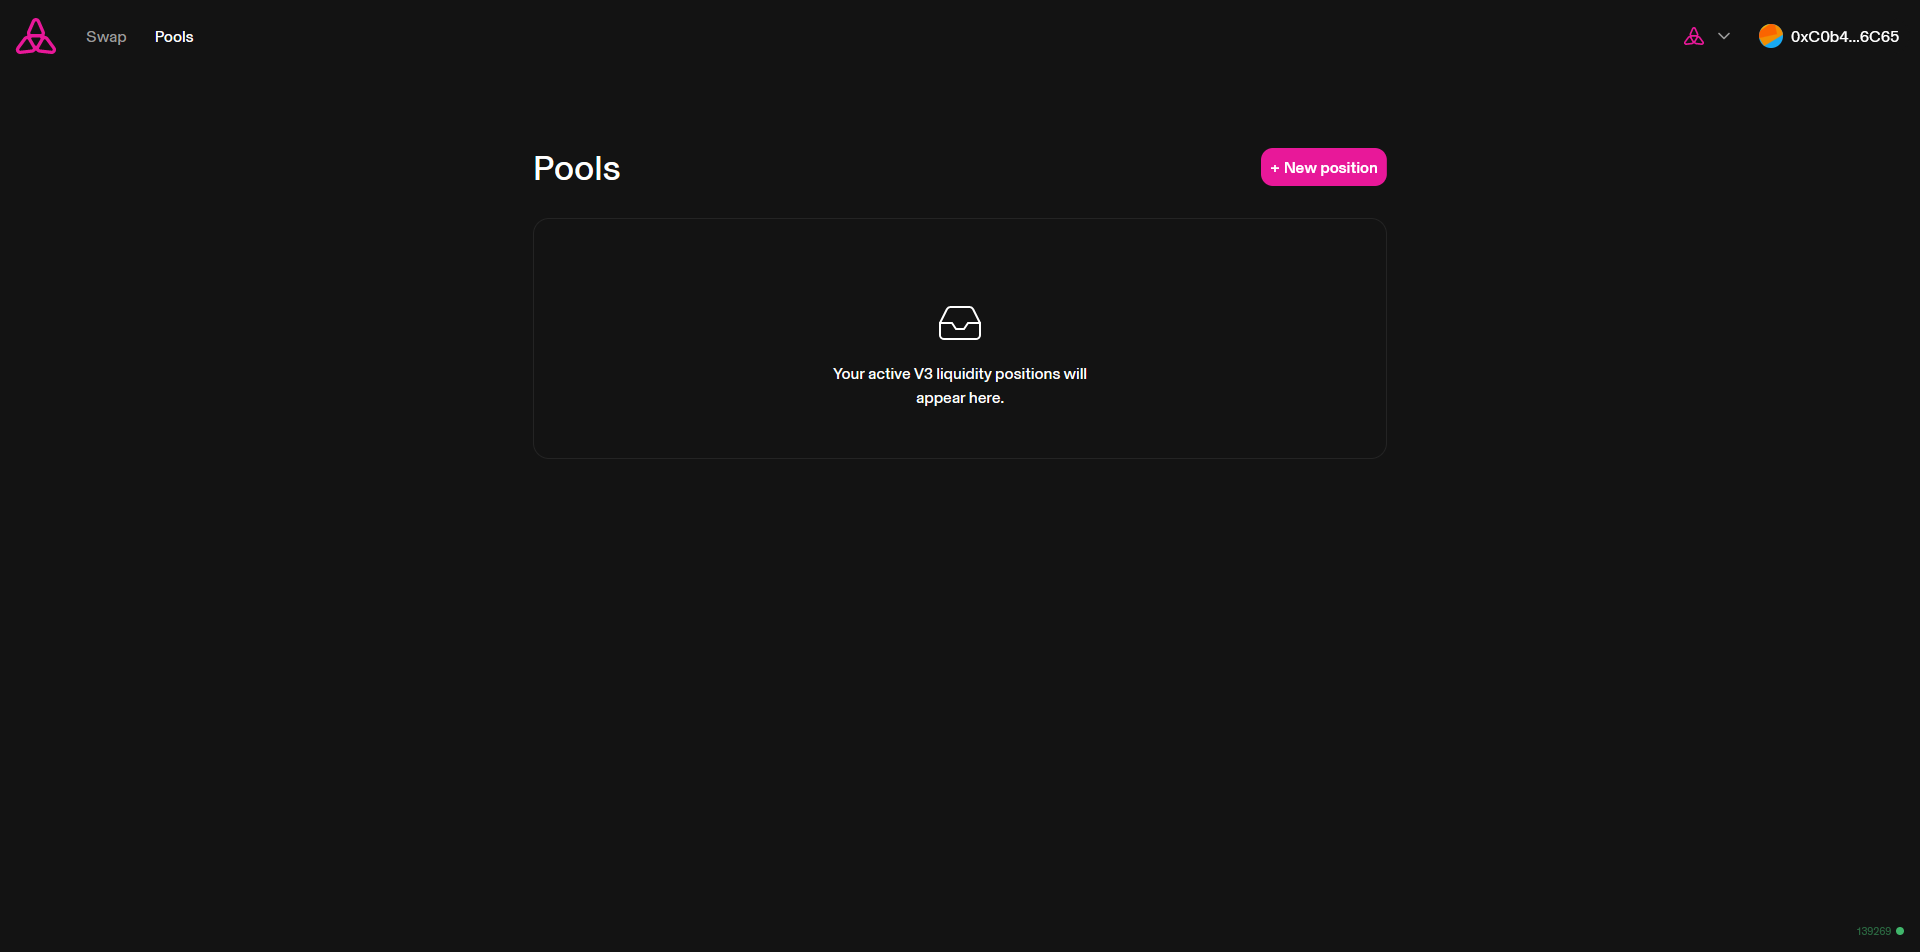
To do this, go to swap.katla.taiko.xyz/#/pools & connect your wallet.
Now just follow the steps:
- Select "New position"
- Select token pair (ETH & USDC)
- Click "Edit"
- Choose "0.3%" (best for most pairs)
- Select "Full Range"
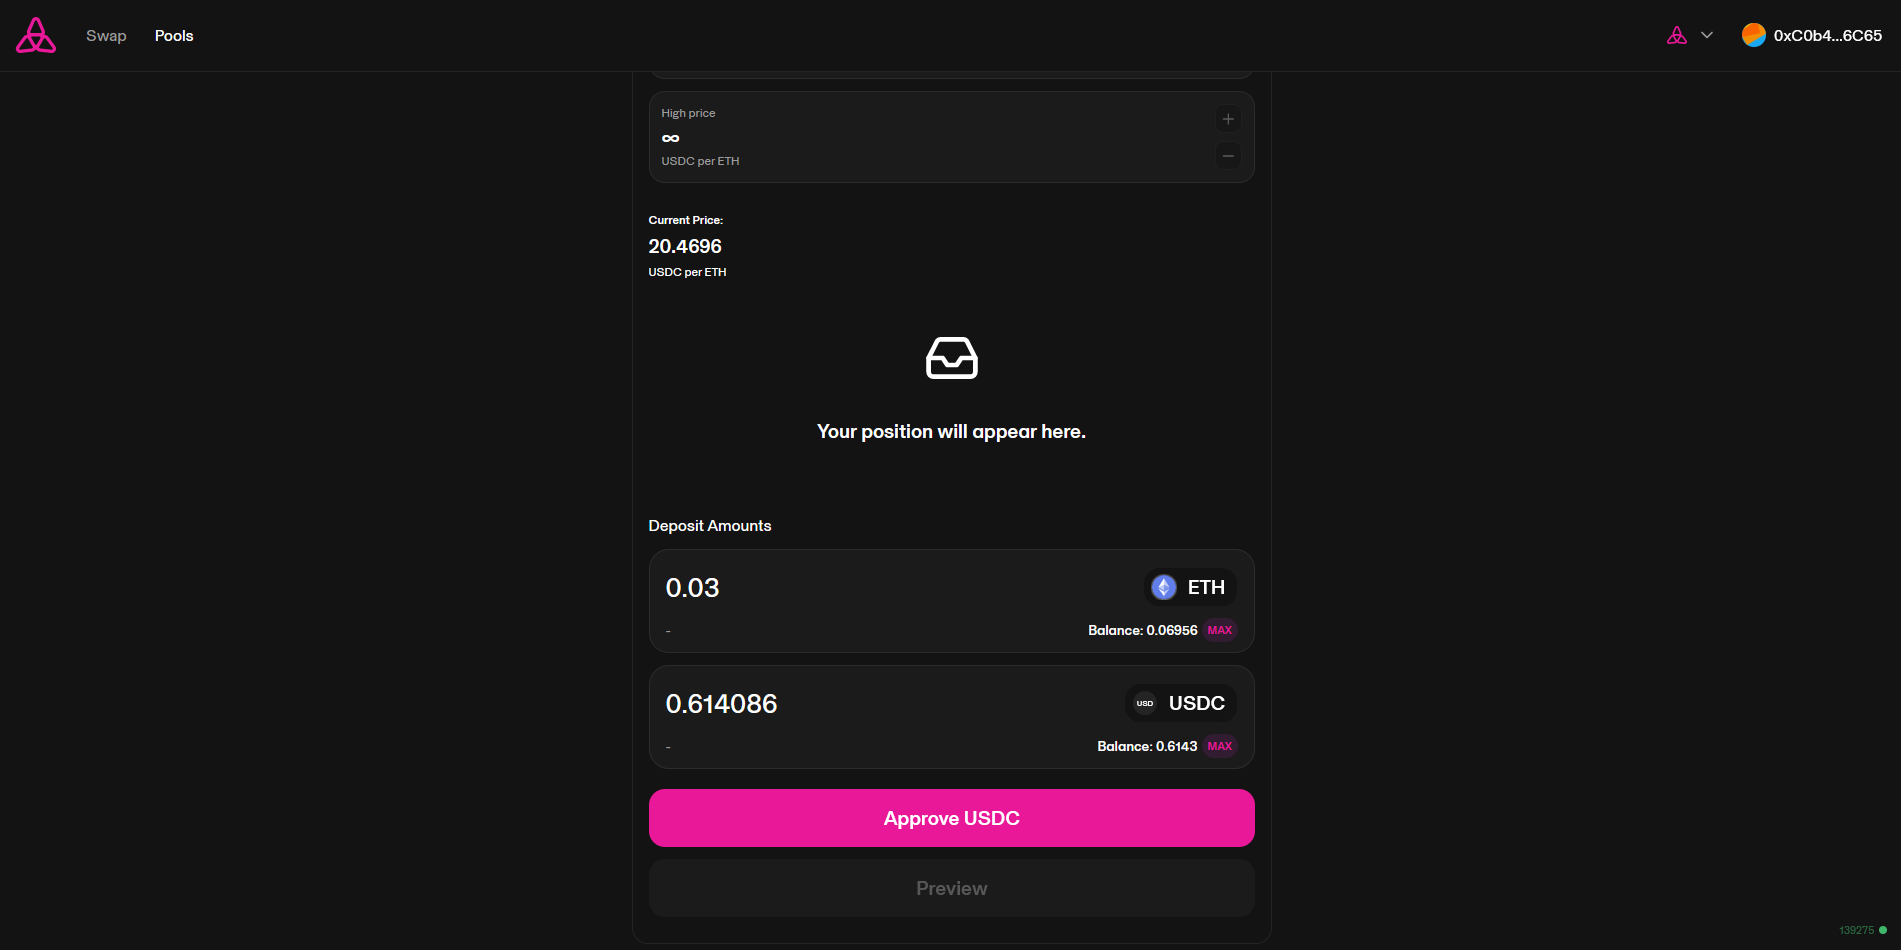
- Insert ETH quantity
- Click "Approve USDC", then "Preview" and finally, "Add" to finish adding liquidity.
After this, you can go back and view or manage your Pools.
We can also create Pools with other token pairs such as ETH/HORSE.
Step 7
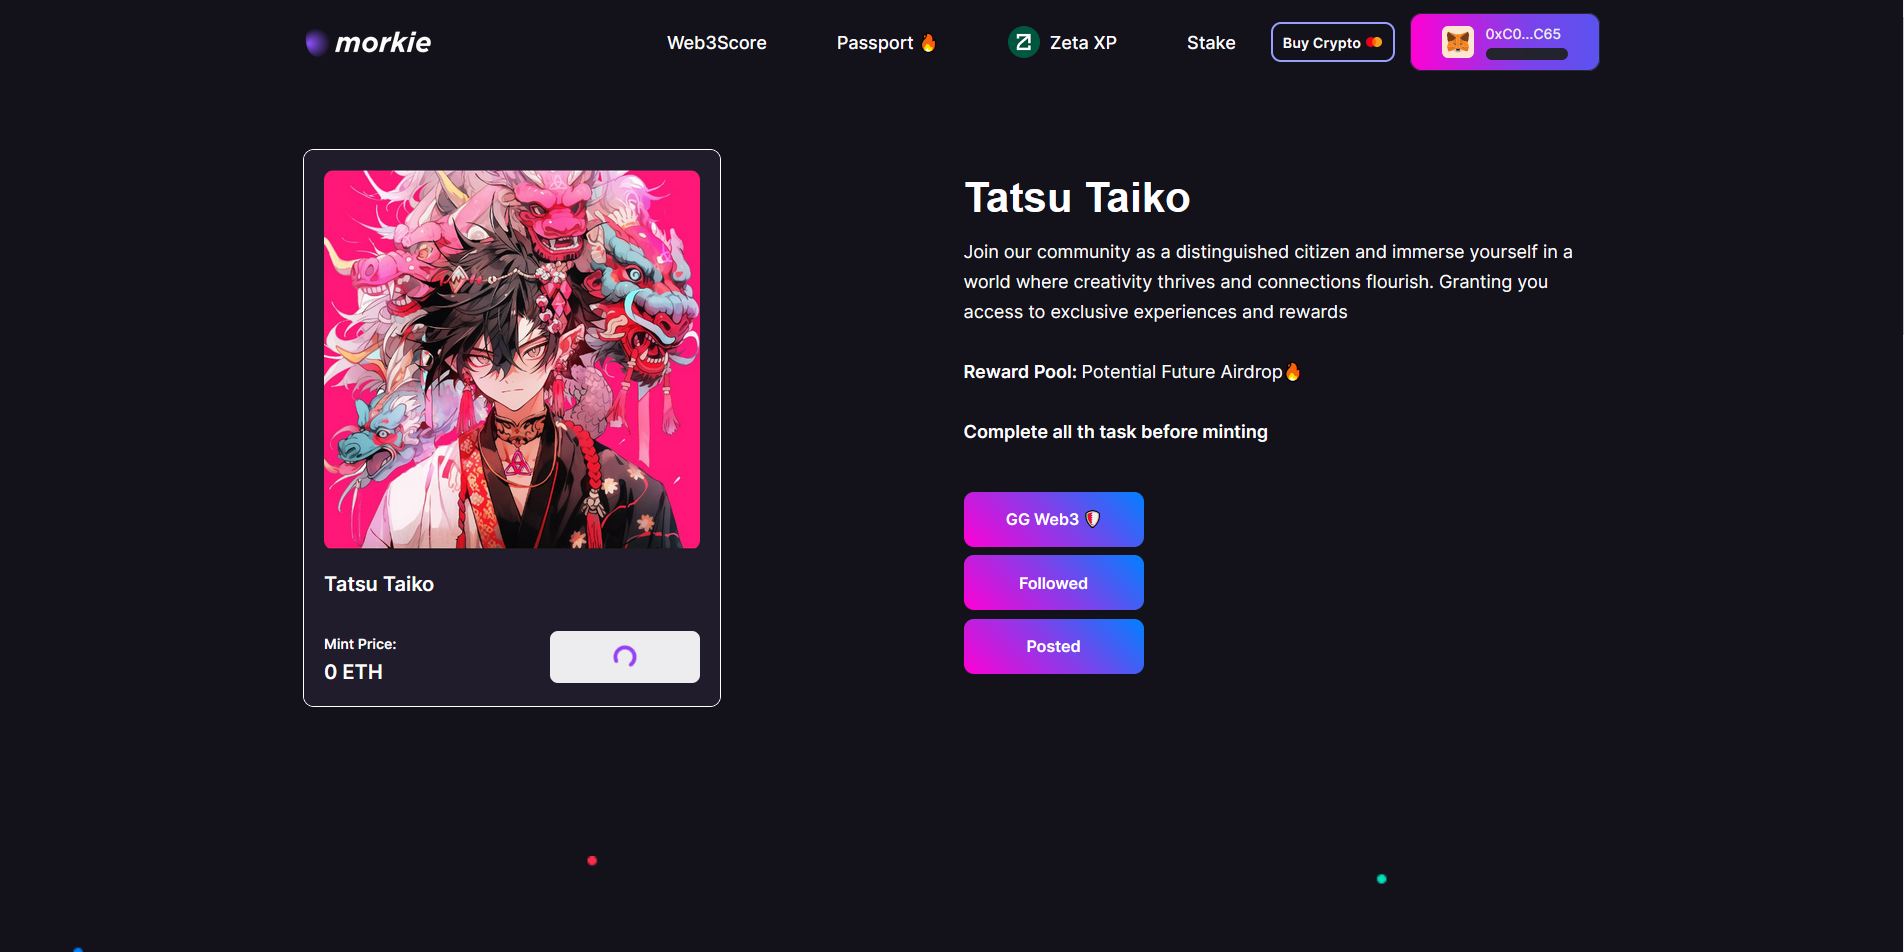
Next, we can try minting the Tatsu Taiko NFT: morkie.xyz/taiko
Step 8
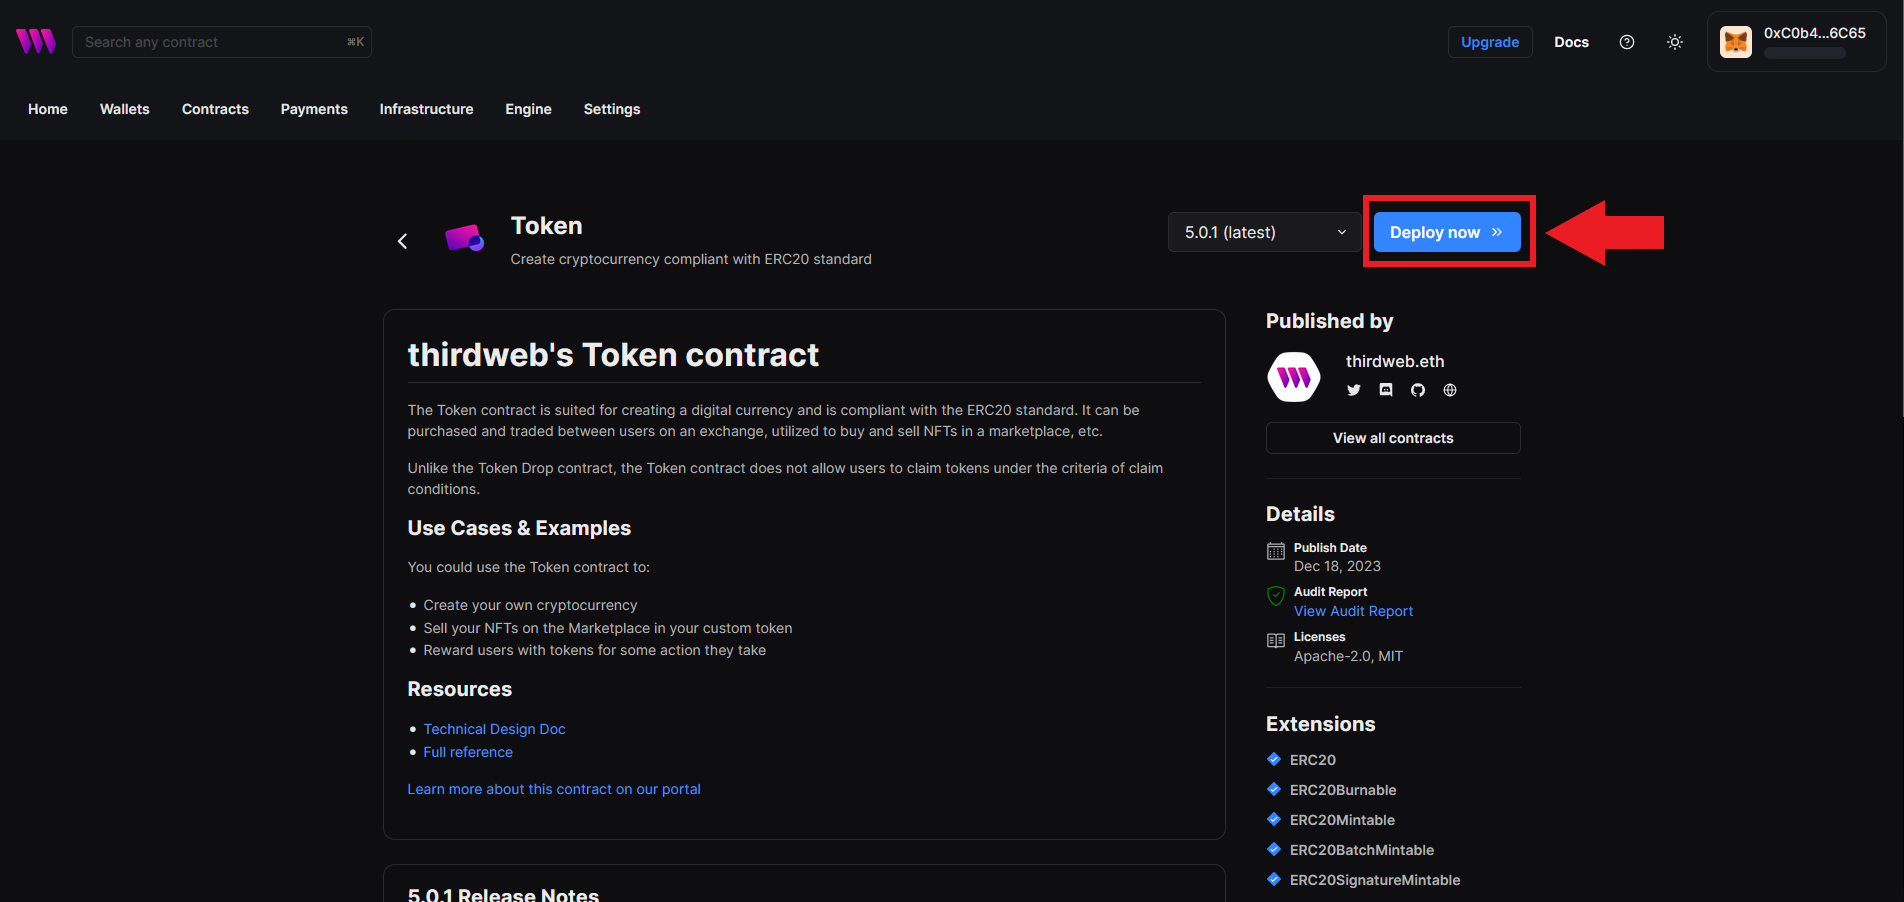
Next, let's deploy a contract!
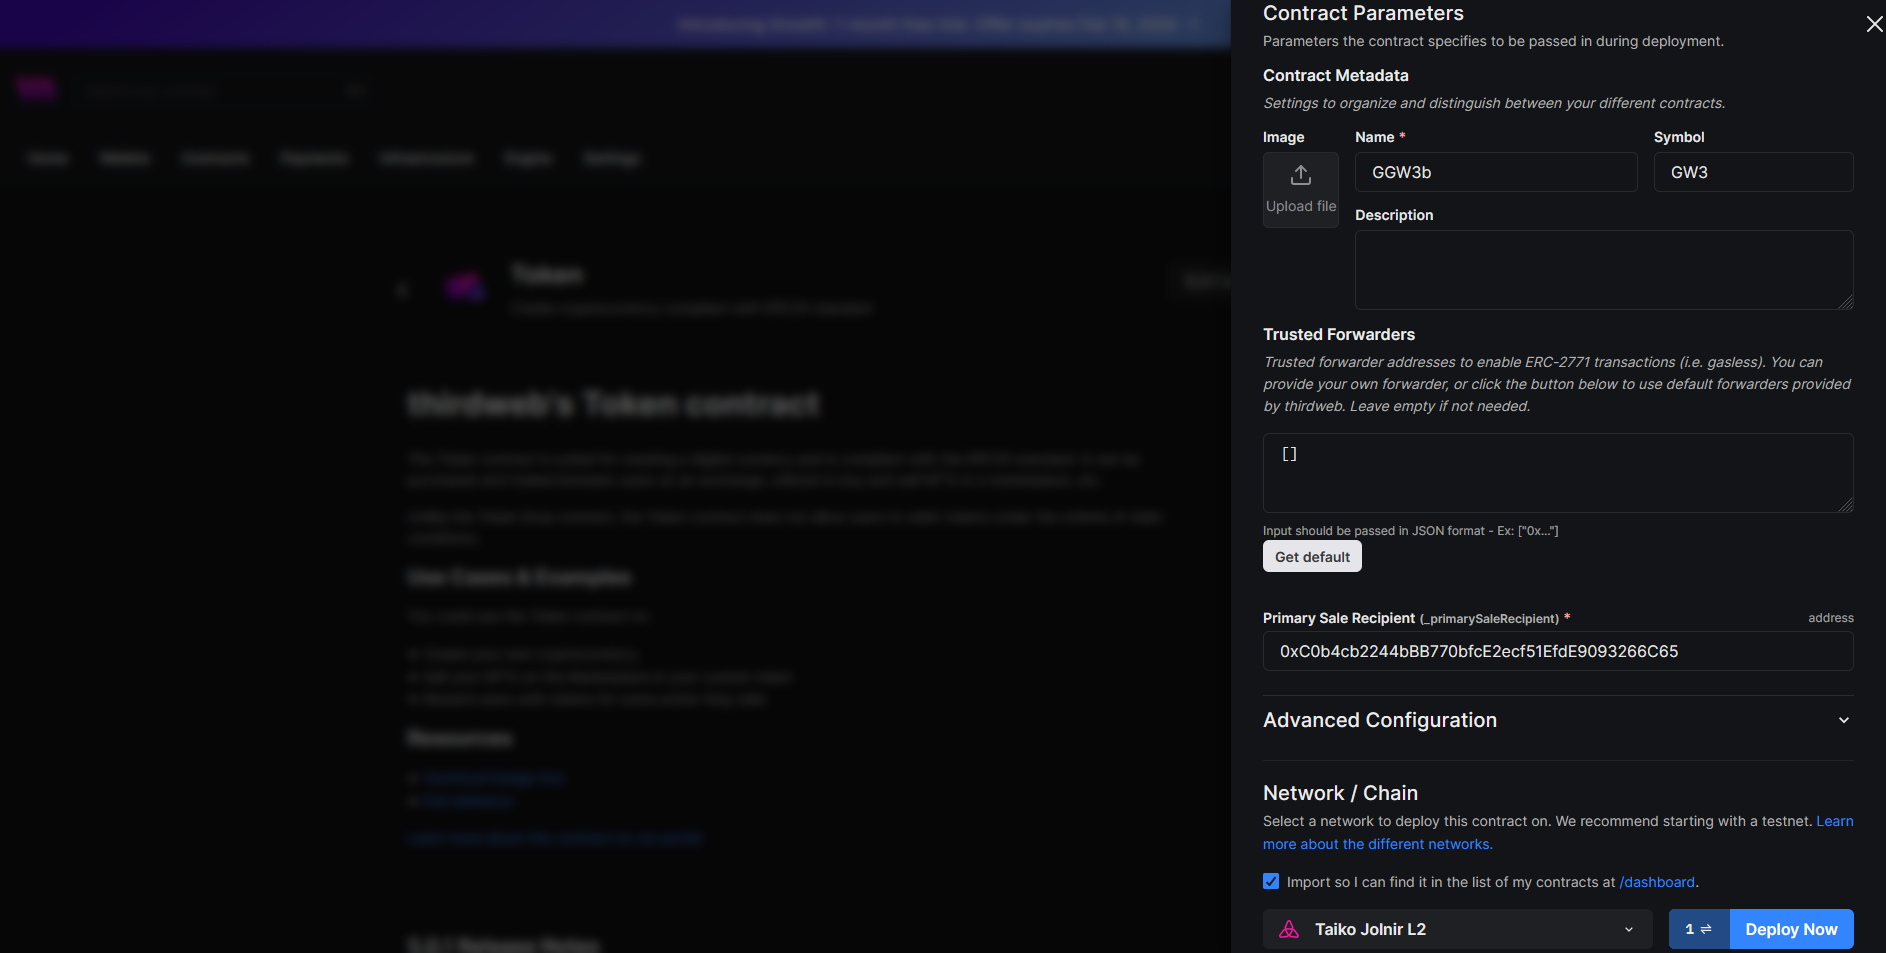
Head over to thirdweb.com/thirdweb.eth/TokenERC20 and click "Deploy Now".
Fill out the boxes and set the "Primary Sales Recipient" as your own address, then hit "Deploy Now".
Wait for approval and confirmation.
Step 9
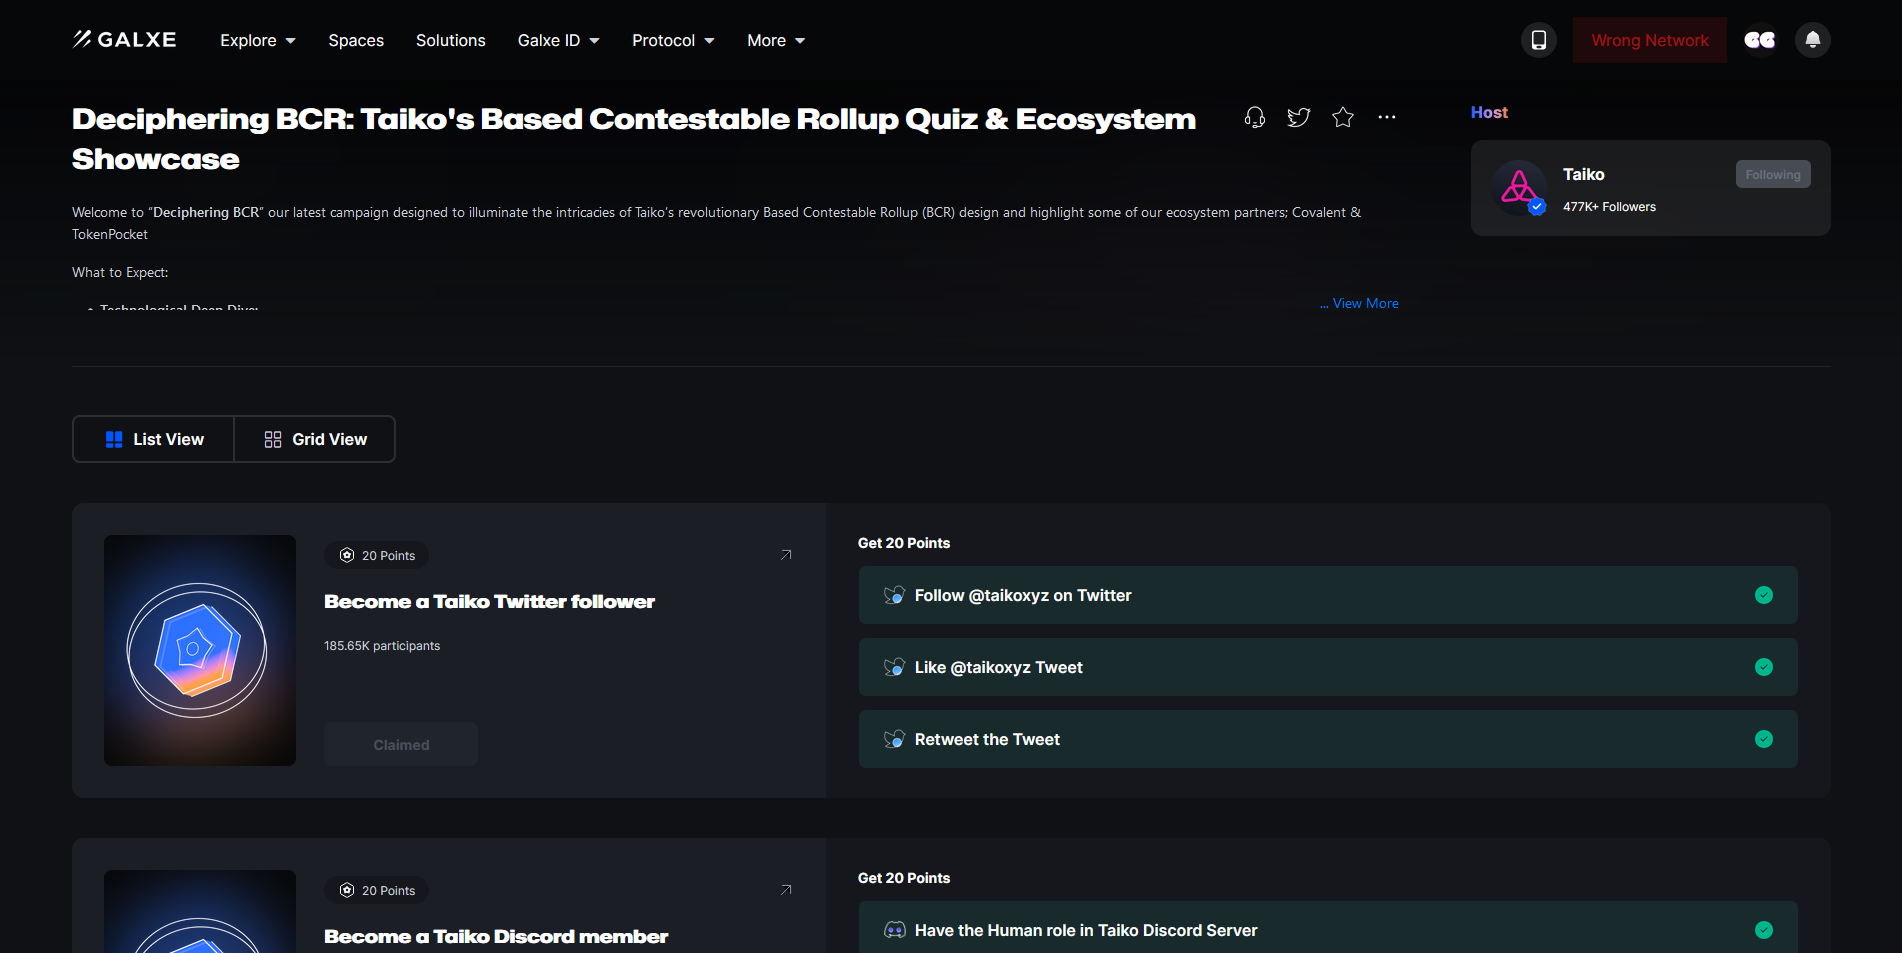
Finally, let's head over to the Galxe Campaign and complete some quick tasks.
Outro
If you found this guide helpful and informative, consider sharing it on social media. You can also stay updated on the latest content and discussions by following us on X (formely Twitter): @BitBlogxyz
Disclaimer: This guide is provided strictly for educational purposes and should not be considered financial advice. The content is designed to offer insights into various web3 topics & projects.
We do not recommend putting real money into random projects without conducting plenty of your own research first. It is crucial to make informed decisions based on your own understanding and risk tolerance.