

Introduction
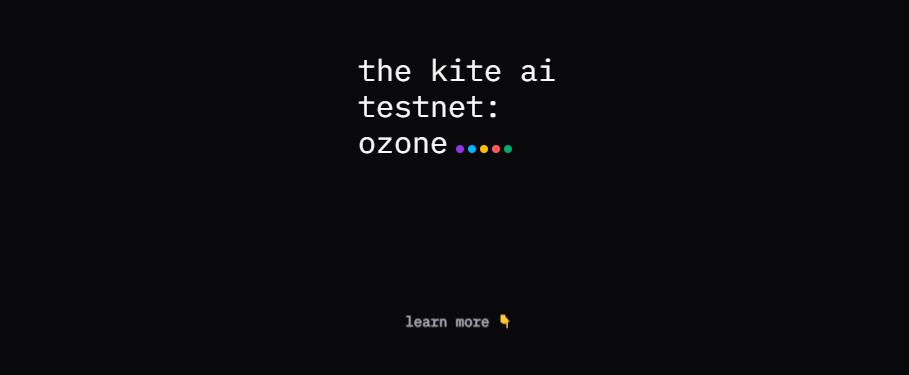
In this guide, we’ll take a closer look at Kite AI’s Ozone Testnet, the experimental environment where developers and innovators can explore and test AI-powered applications on Kite’s decentralized, AI-optimized blockchain.
What is Kite AI?
Kite AI is a purpose-built decentralized blockchain platform designed specifically for artificial intelligence, enabling fair and transparent collaboration across data, models, and agents. It introduces Proof of AI (PoAI) to ensure contributors receive fair rewards and clear attribution, while every interaction is tracked transparently. By eliminating centralized control, Kite empowers developers to own, monetize, and manage their AI assets, fostering an open, trustless marketplace optimized for the computational and storage demands of advanced AI models.
Step 1
First, head over to: testnet.gokite.ai/landing & login using your EVM wallet. For this guide, I will use MetaMask wallet.
If you participated in the first Kite AI testnet then you should already have a wallet with on-chain activity for Kite AI.
Step 2
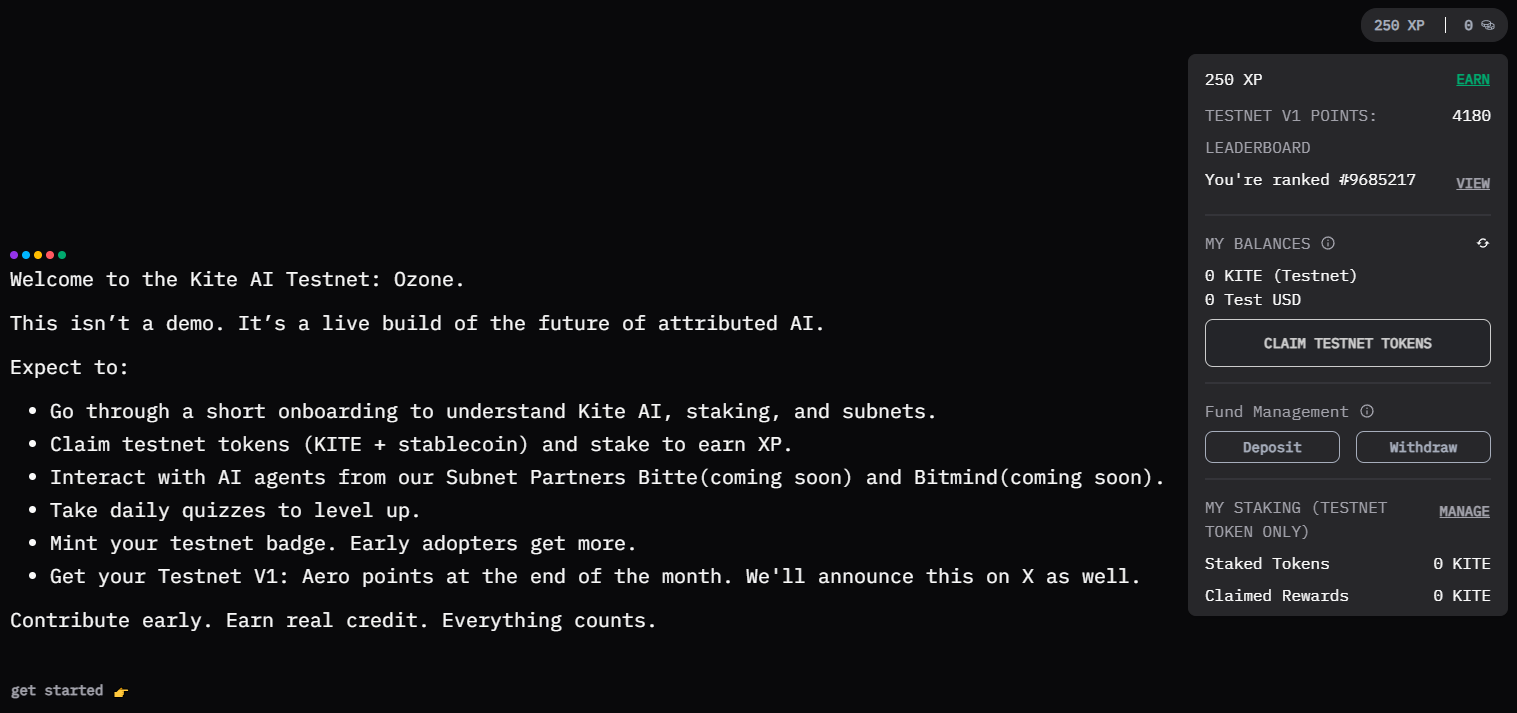
Now just scroll down and click the top-right XP button, and then press Claim Testnet Tokens button.
Then press "get started 👉" button.
Step 3
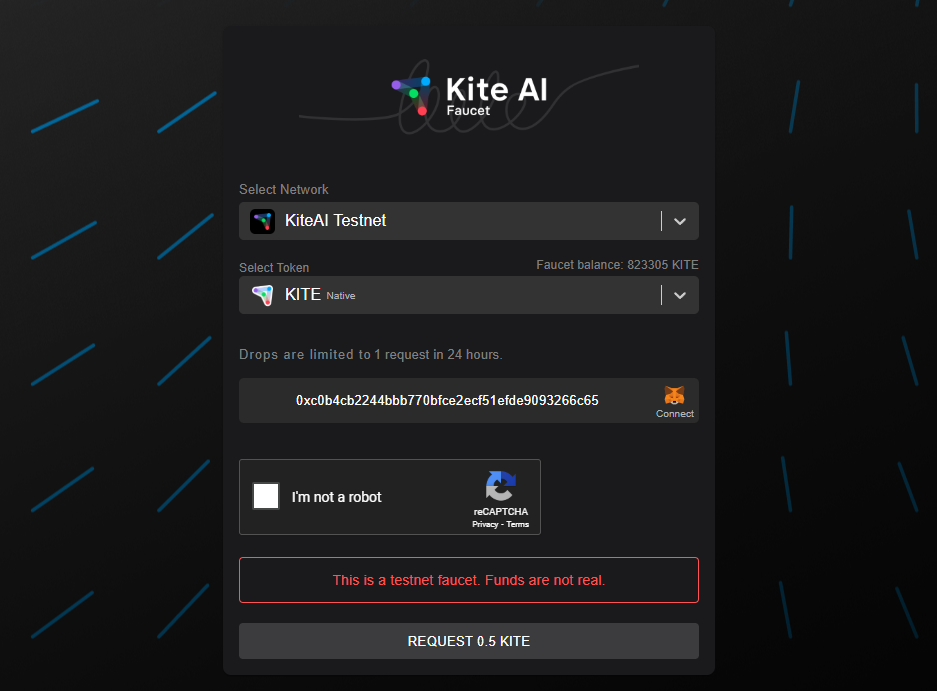
Now head over the Kite AI Faucet, here we can claim more test tokens (KITE & USDT), claim both available tokens.
Step 4
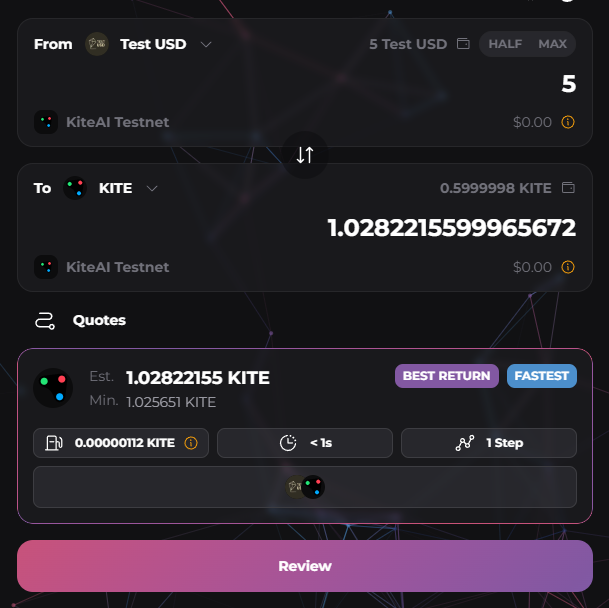
Now head to the Swap page & connect your wallet, here you can swap from Test USD to KITE or vice versa.
Step 5
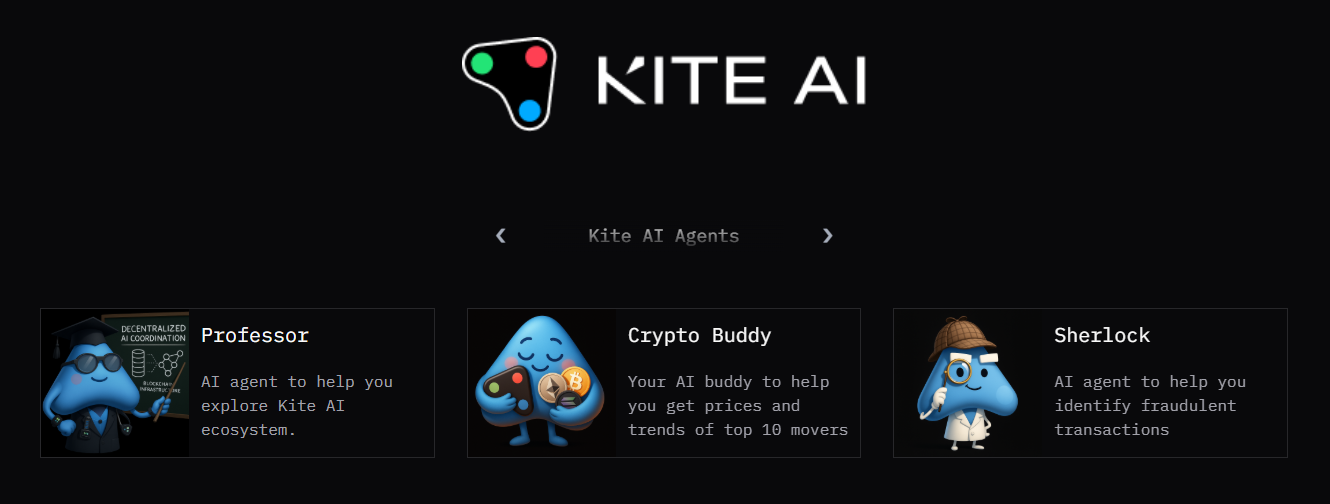
Now let's chat to the AI agents. These are limited per 24 hours, so make sure to use once per day for now.
Step 6
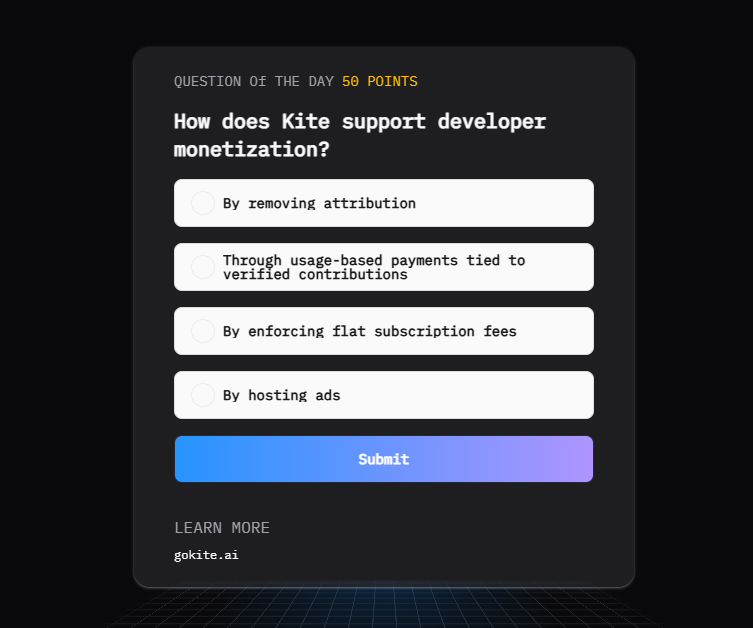
Now head to the Quiz page, here you can complete one quiz daily to earn XP.
Step 7
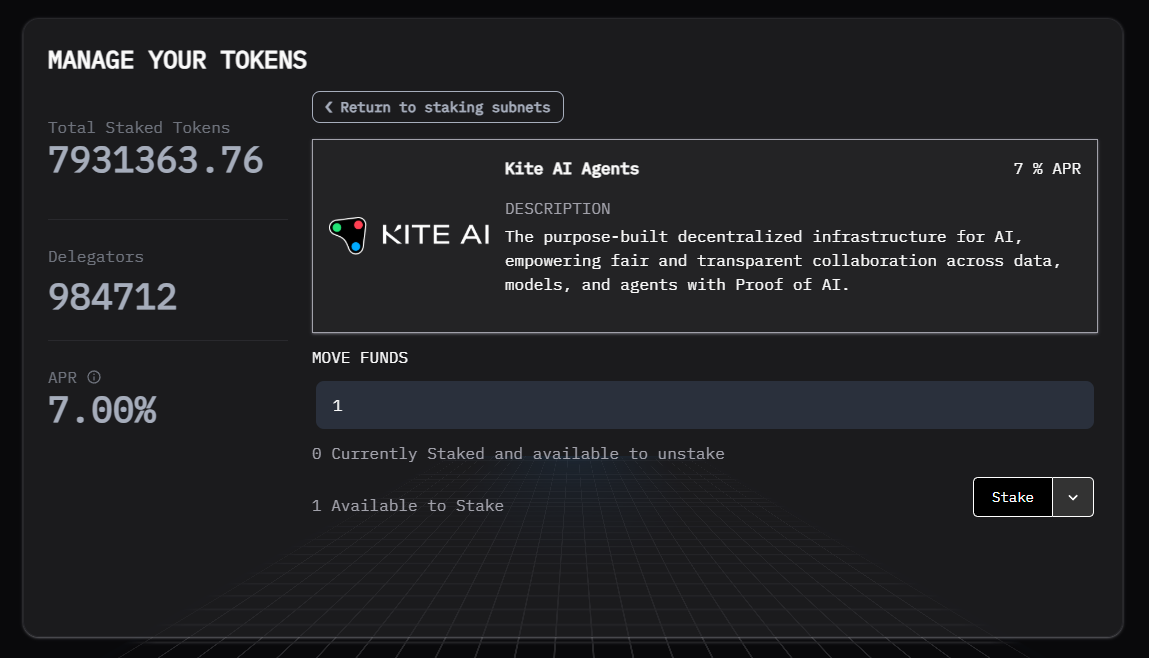
Now head to Stake page and select a subnet, here you can stake your KITE & USDT test tokens.
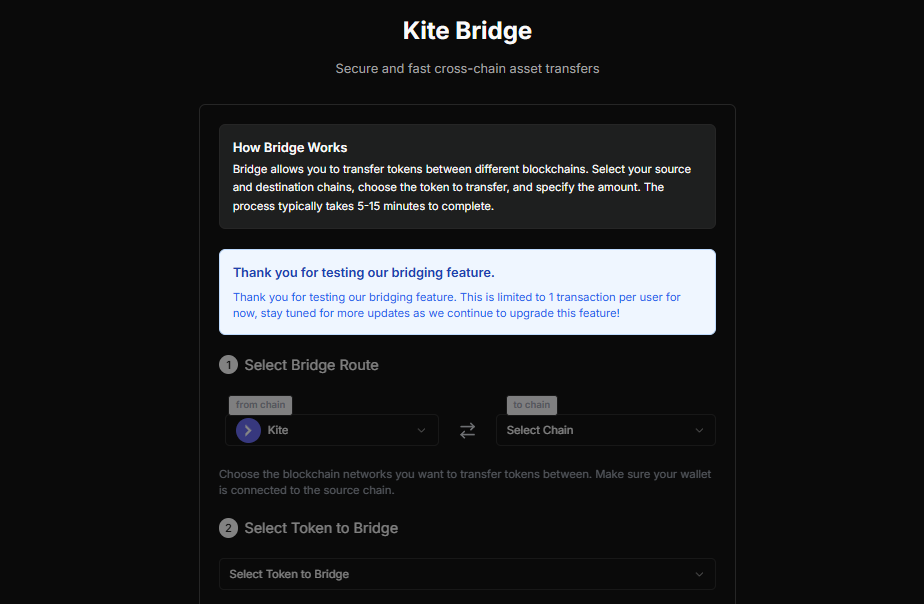
Step 8
You can also bridge KITE over at: bridge.prod.gokite.ai this action is limited to one use per user.
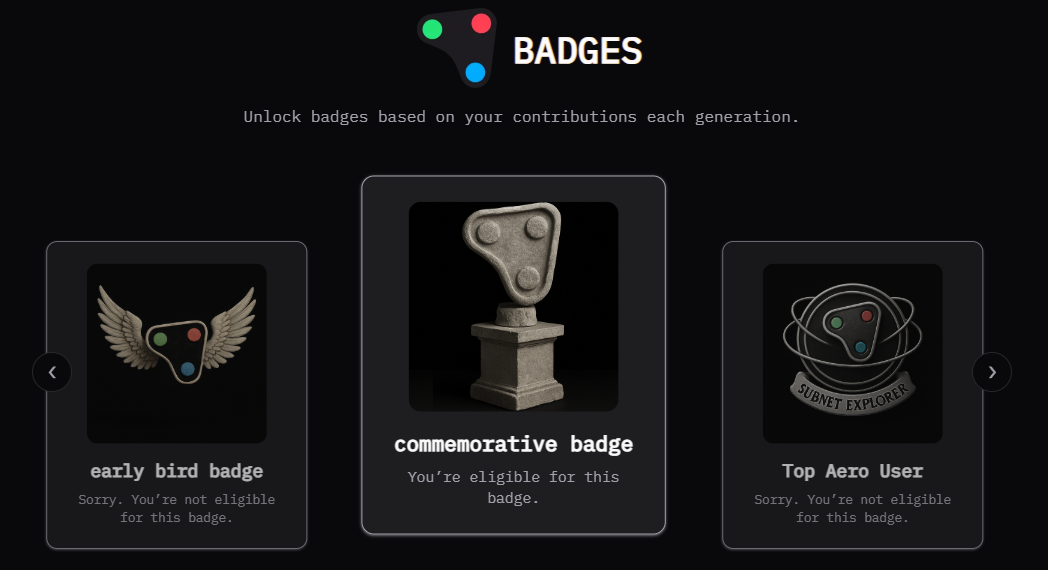
Step 9
Next, head to Badges. Here you can mint a badge if you're eligible for them. You may already be eligible for the Commemorative Badge if you participated in the previous Kite AI testnet.

Step 10
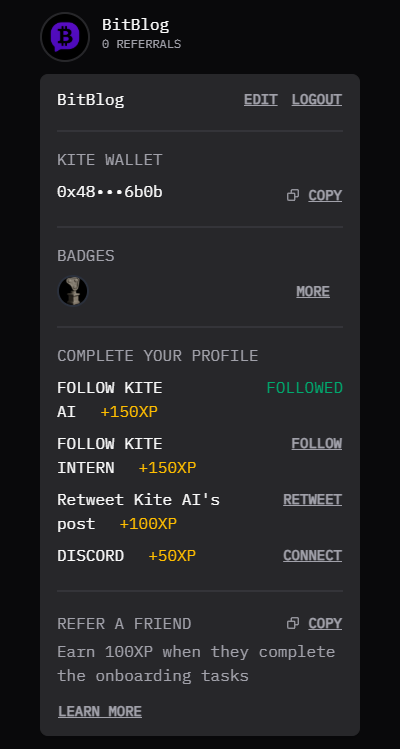
Lastly, press your avatar in the top right corner and here you can edit your profile, connect X & Discord accounts and complete social quests for more XP.
Outro
That's all for this guide!
If you found this tutorial helpful and informative, consider sharing it on social media. You can also stay updated on the latest content and discussions by following us on X (formely Twitter): @BitBlogxyz
Disclaimer: This guide is provided strictly for educational purposes and should not be considered financial advice. The content is designed to offer insights into various web3 topics & projects.
We do not recommend putting real money into random projects without conducting plenty of your own research first. It is crucial to make informed decisions based on your own understanding and risk tolerance.
Want to support the platform? 👉 Support Us